This lesson explains how to edit and view W9 Legal Tax Information for your Provider Firm. The W9 Legal Tax information must be complete before you can submit your first order for payment. Incomplete W9 Legal Tax information will not allow payment processing. The information contained in this tab must legally be maintained and accurate at all times. The business address registered in the W9 Legal Tax Information is the same address on the 1099 that will be mailed to you at end of year if you did work for any Sears Holdings Corporation (SHC) entity. The 1099 will say Sears Holdings, not ServiceLive. You will NOT be sent an SHC 1099 if collectively the work you completed for SHC is under $600. The individual Buyer has the responsibility to issue 1099s for the payments they made as ServiceLive simply provides a platform for Buyers and Providers to conduct business.
Note: Fields with * (red asterisk) must be completed.
- Important information regarding W9 Legal Tax Information:
- If the company name ever changes or is incorrectly typed, ServiceLive allows the Provider Admin to make a change to the company name in the W9 Legal Tax Information section within ServiceLive.
- History of W9 Legal Tax Information will be stored in ServiceLive for a period of 7 years.
- To locate W9 Legal Tax Information:
- Hover over
 tab.
tab. - Click on W9 Legal Tax Information link.
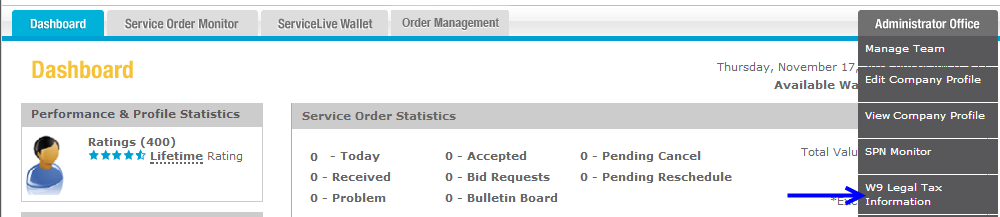
- Hover over
- To view helpful W9 Information:
- Click on
 link in top right hand corner to display your history of W9 Information.
 - Click on
 to display popup box with supplier requirements for specifying your business name and TIN.
Note: TIN is either your Social Security Number (SSN) or Employer Identification Number (EIN). - Click on
 link for more instructions.

- Click on
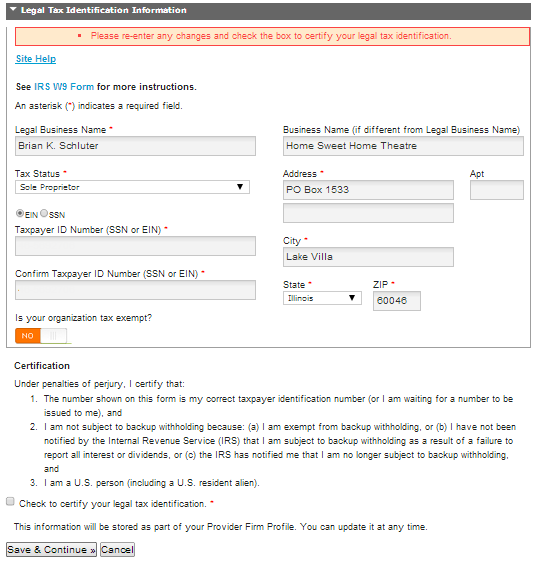
- You will need to complete Legal Tax Identification Information section.
Note: For your convenience, ServiceLive has pre-filled the form with information from your profile. Be sure to double check business information and select either EIN or SSN for Taxpayer ID Number.- Type required information in boxes.
- Click on drop down arrows to display and select choices.
- Select appropriate radio buttons.
- Click on link if you need to make changes to EIN or SSN information previously entered.
- If you select EIN radio button, below screen will display OR if you select SSN radio button, skip to step h in this lesson.
- Be sure to select No or Yes on Tax Exempt boxes.
Note: This defaults to No. - Click on the checkbox in front of “Certification of Legal Tax Identification” statement.
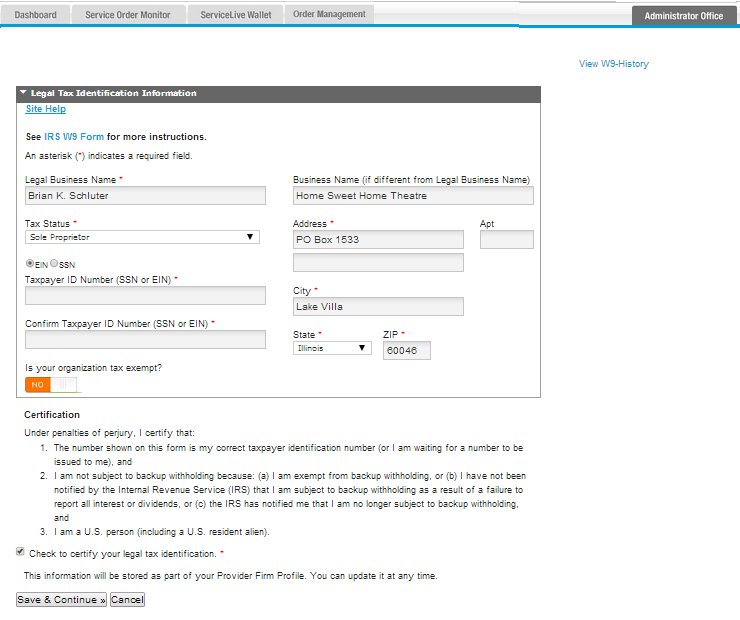
- If you select SSN radio button, below screen will display.
- Be sure to select No or Yes on Tax Exempt boxes.
- Click on the checkbox in front of “Certification of Legal Tax Identification”
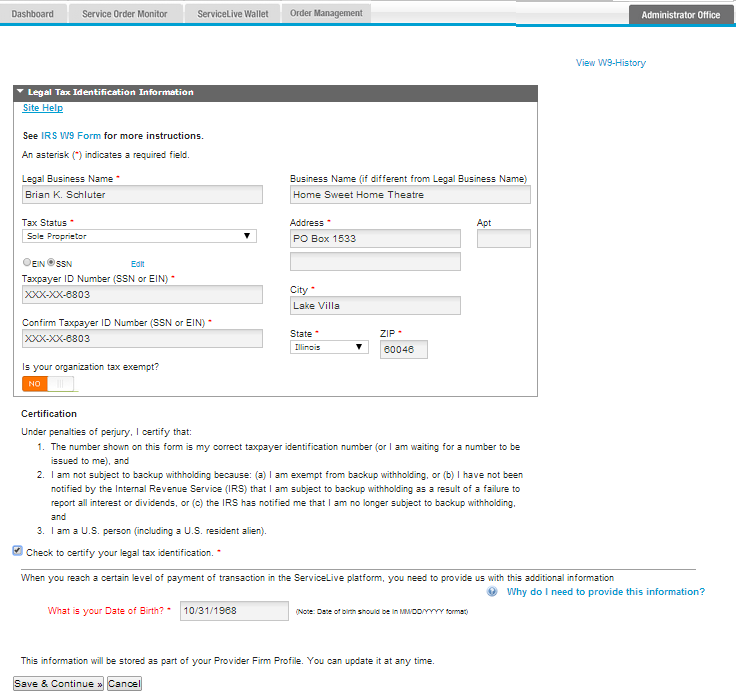
- Click on “Why do I need to provide this information” link if you have questions.
- Click in box after “What is your Date of Birth?” to display pop up calendar.
- Click on drop down arrow for year.
Note: This defaults to current year. - Scroll up and click on appropriate birth year.
- Click on drop down arrow for month.
- Scroll up and click on appropriate birth month.
- Click on specific birthday.
- Once you have entered all information, scroll down after Certification section.
- To save and continue, click on
 button.
 - OR to cancel and return later, click on
 button.
- To save and continue, click on
- If you completed all required fields, the Dashboard will display indicating successful W9 Legal Tax Information section completion.
- If you have one or multiple data errors, the errors will display in red. You will need to go back and make the necessary changes and click on button.
Note: For security reasons, the system will not allow you to save changes unless Certification section is also complete. Remember to click once all required data is input.