This lesson explains how you will upload Licenses or Certifications for each of your Service Pros. These credentials will allow your Service Pro to accept Service Orders on projects that require Licenses and Certifications. Once uploaded, your credentials are subject to verification by the ServiceLive team.
- Once you have successfully completed Skills & Services tab and you click on button, Licenses & Certifications tab will open. You can also click directly on the Licenses & Certifications tab.
- If you logout and login later, the Welcome screen will open, click on
 or
or  button.
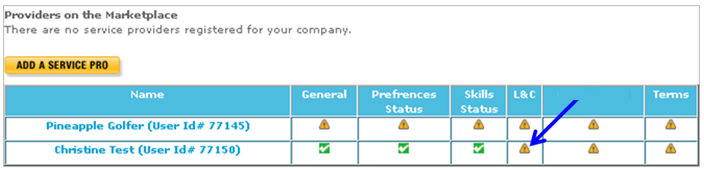
 - Click on Licenses & Certifications tab of Service Pro you want to continue to Build Profile.
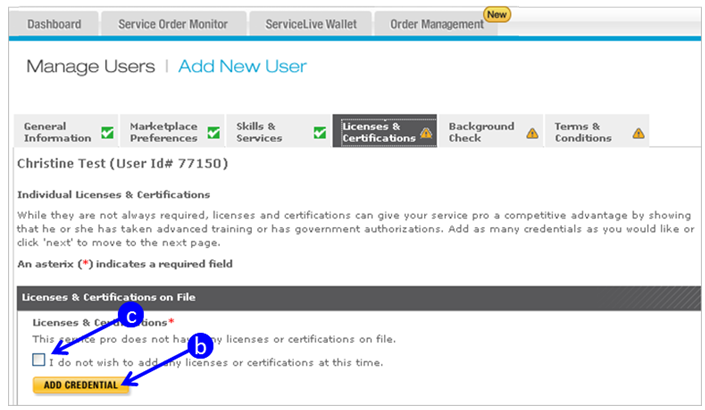
- Complete Licenses & Certifications on File section in this tab (Add Credential).
- IMPORTANT: To understand the ServiceLive Verification process, refer to Provider Firm Licenses & Certifications lesson in Provider Firm Profile course.
- To add Licenses or Certifications, click on
 button.
Note: You will need to follow the steps to complete the Licenses & Certifications Information and Attach Credential Document for every credential you want to add. You may come back and add documents/information after you have gathered your Licenses & Certifications. - To decline adding any Licenses or Certifications, select checkbox labeled “Decline to Add Licenses or Certifications Statement”. Unless you do not have any Licenses or Certifications, we do not recommend selecting this option as this is information that many Buyers require.
- You will need to complete all sections in this tab which include:
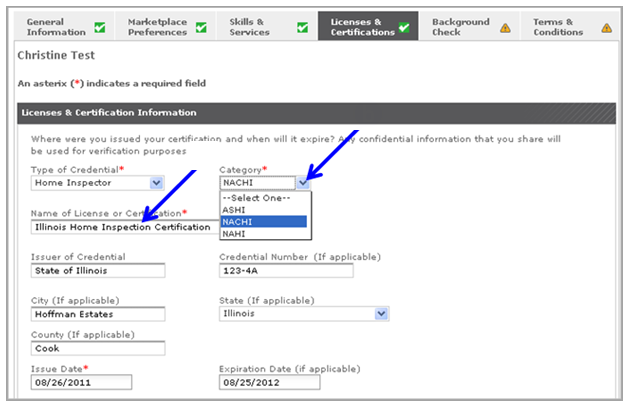
- Licenses & Certification Information
- Attach Credential Document
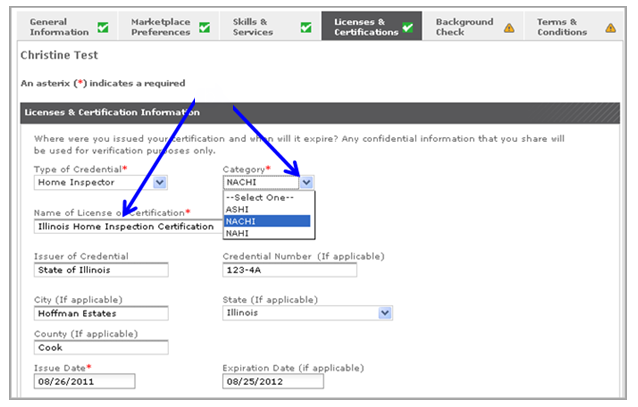
- Complete Licenses & Certifications Information section:
- Enter required information in boxes.
- Click on drop down arrows to display and select choices.
Note: Fields with * (red asterisk) must be completed.
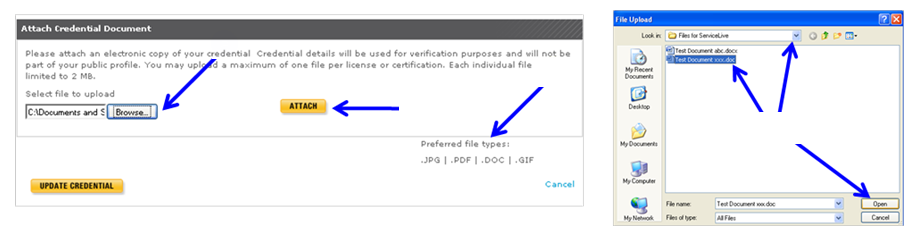
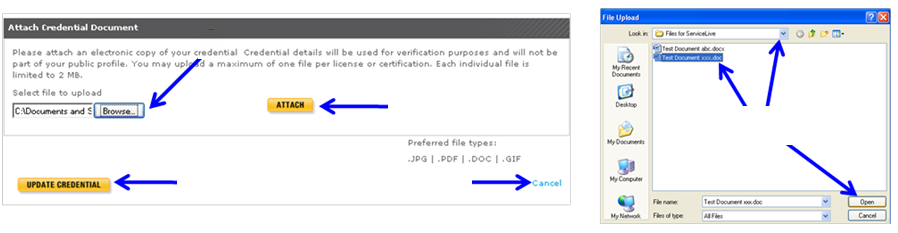
- Attach Credential Document section:
- Click on
 button.
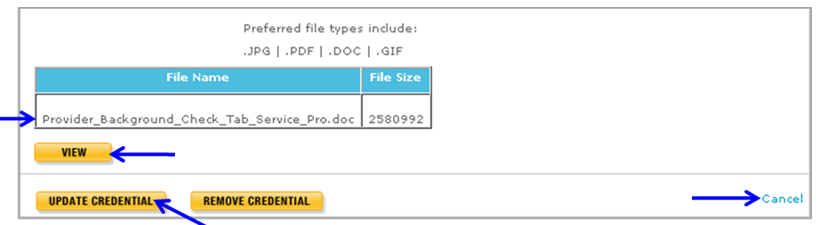
 - Acceptable file types to attach will display on the screen.
Note: The system does not allow attaching multiple documents with the same file name. - Locate document on your computer, click to select, and click open to attach the appropriate document.
Note: Steps to scan and save documents on your computer to be able to attach documents are available in Scan & Save Documents lesson in Registration course. - Click on
 button.
- Attached document displays.
- Click on
 button to view and validate that attached document is correct.
 - To cancel and not save information, click on
 link.
link. - IMPORTANT: To complete Add Credential and Attach Credential Document, click on
 button.
- You will be back on Licenses & Certifications on File screen and can click on button to go to Background Check tab or follow other actions explained in this lesson.
- Click on
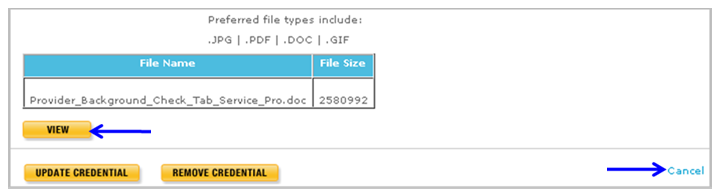
- To View (validate you attached the correct document):
- Click on
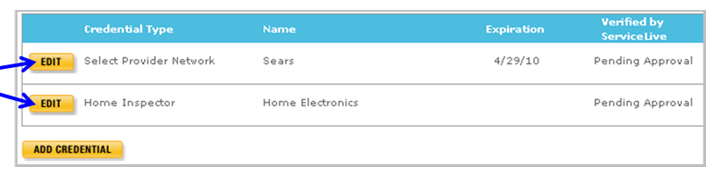
 button for appropriate Licenses & Certifications Information you want to view.
- Click on button.
- Your document will open so you can validate you attached correctly.
- Close the document and click on link in right corner if the document is correct. If not follow instructions in this lesson to Edit (Replace) Credential Document.
- You will be back on Licenses & Certifications on File screen and can click on button to go to Background Check tab or follow other actions explained in this lesson.
- Click on
- To Edit Licenses & Certifications Information:
- Click on button for appropriate Licenses & Certifications Information you want to edit.
- Enter changed information in boxes or use drop down arrows to change selections.
- Scroll down and click on link on lower right side to cancel and not save information.
- OR scroll down and click on button at bottom of screen.

- You will be back on Licenses & Certifications on File screen and can click on button to go to Background Check tab or follow other actions explained in this lesson.
- Click on
- To Edit (Replace) Credential Document:
- Click on button for appropriate Licenses & Certifications Information you want to replace.
- Scroll down to Attach Credential Document section, click on button.
- Locate document on your computer, click to select, and click to open the appropriate document to attach.
- Click on button.
- Click on link on right side to cancel and not save information.
- Click on button.
- This will replace previous attached document.
- You will be back on Licenses & Certifications on File screen and can click on button to go to Background Check tab or follow other actions explained in this lesson.
- Click on
- To Remove Credential:
- Click on button for appropriate Credential you want to remove.
- Scroll down to Attach Credential Document section.
- Click on link on right side to cancel and not save information.
- Click on
 button.
Note: This will remove Licenses & Certifications Information and Credential Document.
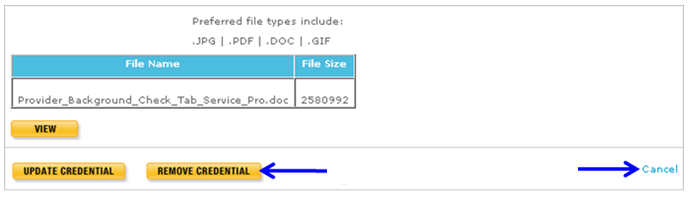
- Click
 button to confirm removing credential.

- You will be back on Licenses & Certifications on File screen and can click on button to go to Background Check tab or follow other actions explained in this lesson.
- Click on
- Keep in mind that you will get the
 icon once you complete one Licenses & Certifications, but remember to follow process to for every Licenses & Certifications you have. These credentials will allow you to accept orders on projects that require Licenses and Certifications.