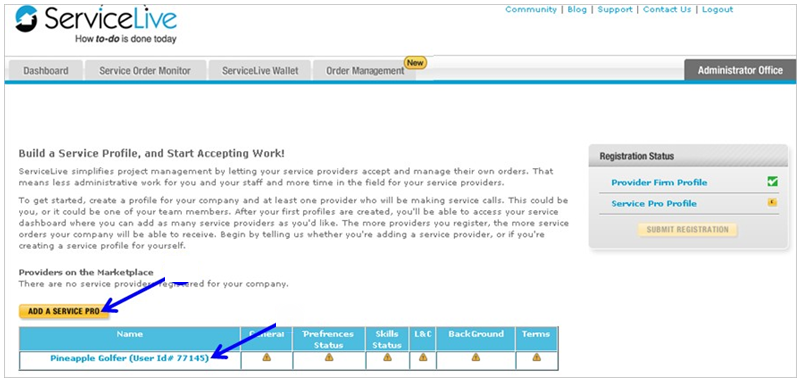
This lesson explains how ServiceLive simplifies project management by giving you the option to have your Service Pros accept and manage their own orders. This will require less administrative work for you, your staff, and more time in the field for your Service Pro.
- When you login to ServiceLive, the Welcome screen with
 buttons will open until you have completed your Provider Firm Profile and Service Pro Profile. Once you click on button:
- Click on Service Pro Name.
- OR click on
 button and General Information tab will open.
- You will need to complete all sections in this tab which include:
Note: Fields with * (red asterisk) must be completed.- Profile Photo – Will not display until you complete this tab (see instructions at end of this lesson).
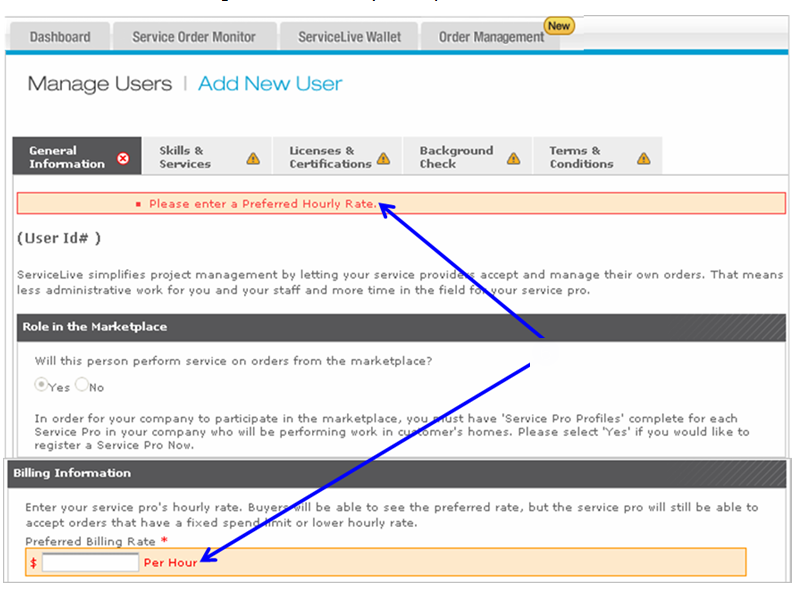
- Role in Marketplace
- Personal Information
- Job Title & Role
- Dispatch Address & Coverage Area
- Billing Information
- Work Schedule – Defaults to available 24 hrs/day and 7 days a week, so make sure to specify Service Pro hours.
- User Rights
- Select appropriate radio buttons.
- Enter required information in boxes.
- Click on appropriate checkboxes to select choice.
- Click on drop down arrows to display and select choice.
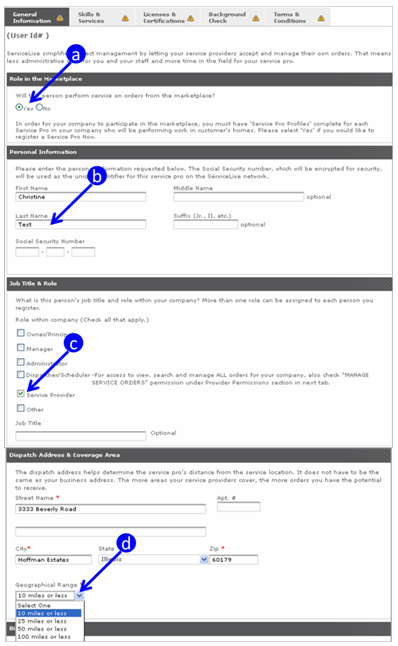
- Use scroll down on right side of browser window to display additional sections, complete, and save all information on this tab.
- User Rights section:
- If you select radio button labeled “Yes” in User Rights section, different Provider Permissions will be available in the Marketplace Preferences tab.
Note: Refer to Marketplace Preferences lesson in Service Pro Profile course for details.
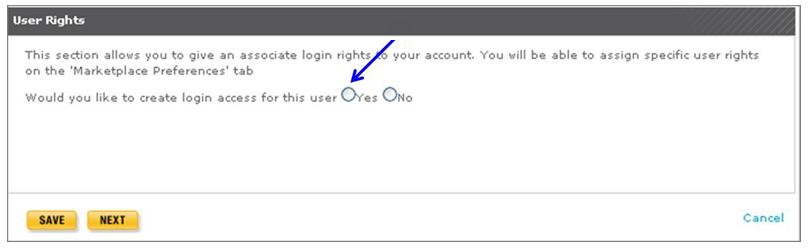
- If you select radio button labeled “Yes” in User Rights section, different Provider Permissions will be available in the Marketplace Preferences tab.
- Once you have entered all information, scroll down after the User Rights section.
- To save and return later, click on
 button.
 - OR click on
 button to save and go to next tab to continue to build Service Pro Profile.
 - OR click on
 link on right side to cancel and not save information.
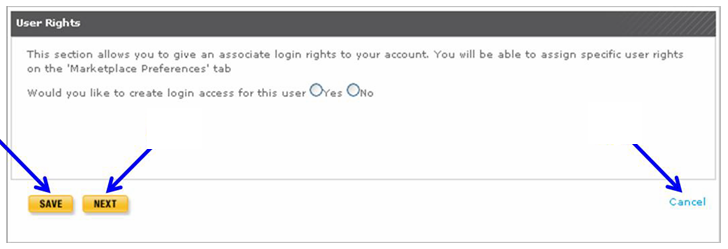
- To save and return later, click on
- If you completed all required fields, a
 icon will display on General Information tab indicating successful tab completion.
 - If you have one or multiple data errors, a
 icon will display on General Information tab and errors display in red. You will need to go back and make necessary changes. Then click on button to receive icon indicating successful entry of required information.
- Remember Profile Photo section will not display until you complete the General Information tab.
- Click on button.
- OR successfully complete tab, click on button, and navigate back to General Information tab.
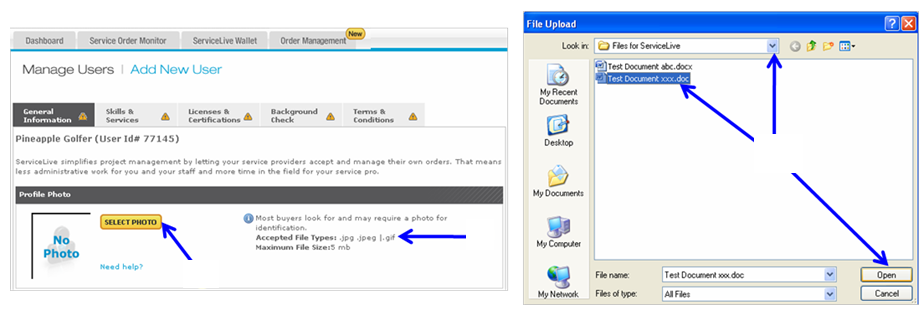
- Click on
- Once Profile Photo section displays:
- You will have an opportunity to download a professional photo of Service Pro.
- ServiceLive audits all photos. Photos including company logos, signs, contact information or other promotional materials with a business name in the foreground or background are not permissible.
- Photos of Service Pros display on the Provider Profile page, and may be included on printed materials for Buyer identification process.
- Click on
 button.
 - Acceptable file types for photos display in the Profile Photo section.
- Locate document, click to select, and click open to attach the appropriate document.
Note: Steps to scan and save documents on your computer to be able to attach documents are available in Scanning & Saving Documents lesson in Registration course.
- You are now done with General Information tab, click on or button.