This lesson will show you how to order major appliance parts from Sears thru the ServiceLive mobile app while technicians are on-site. This function only works while the mobile device is “online” and connected to a Wi-Fi or cellular network. Parts cannot be ordered while operating in “offline” mode. Once Sears part orders are received, the order cannot be canceled.
After checking into the Service Order, tap the Completion icon.

The Service Completion screen will display – tap the References icon to verify the model information, and then tap the < back icon to return to the Service Completion screen. If the information is incorrect – call your CSM.
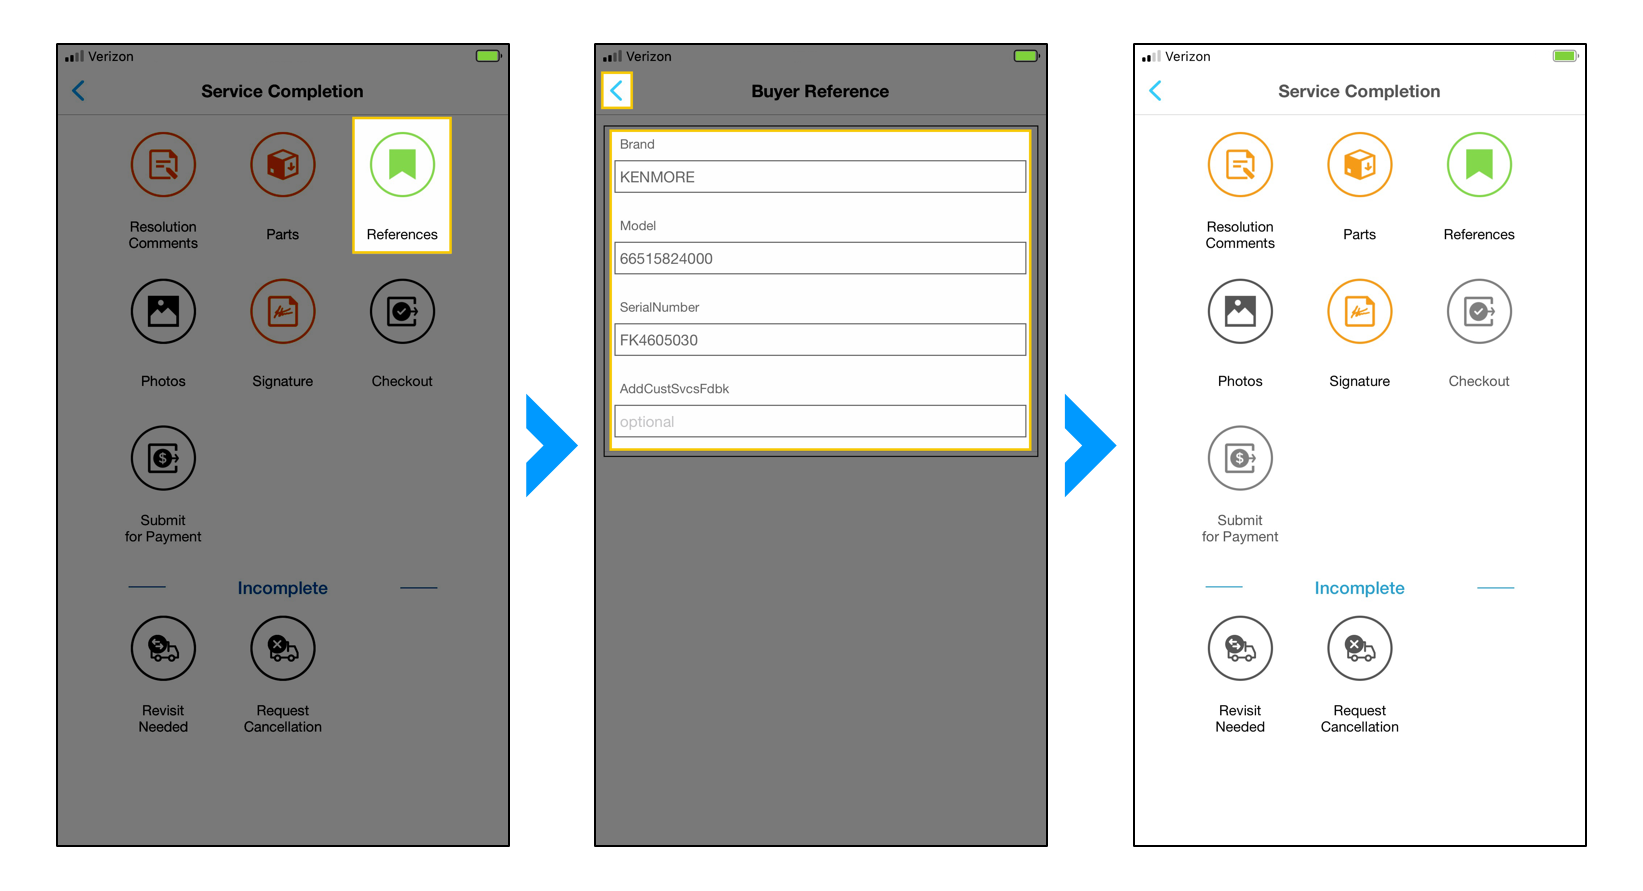
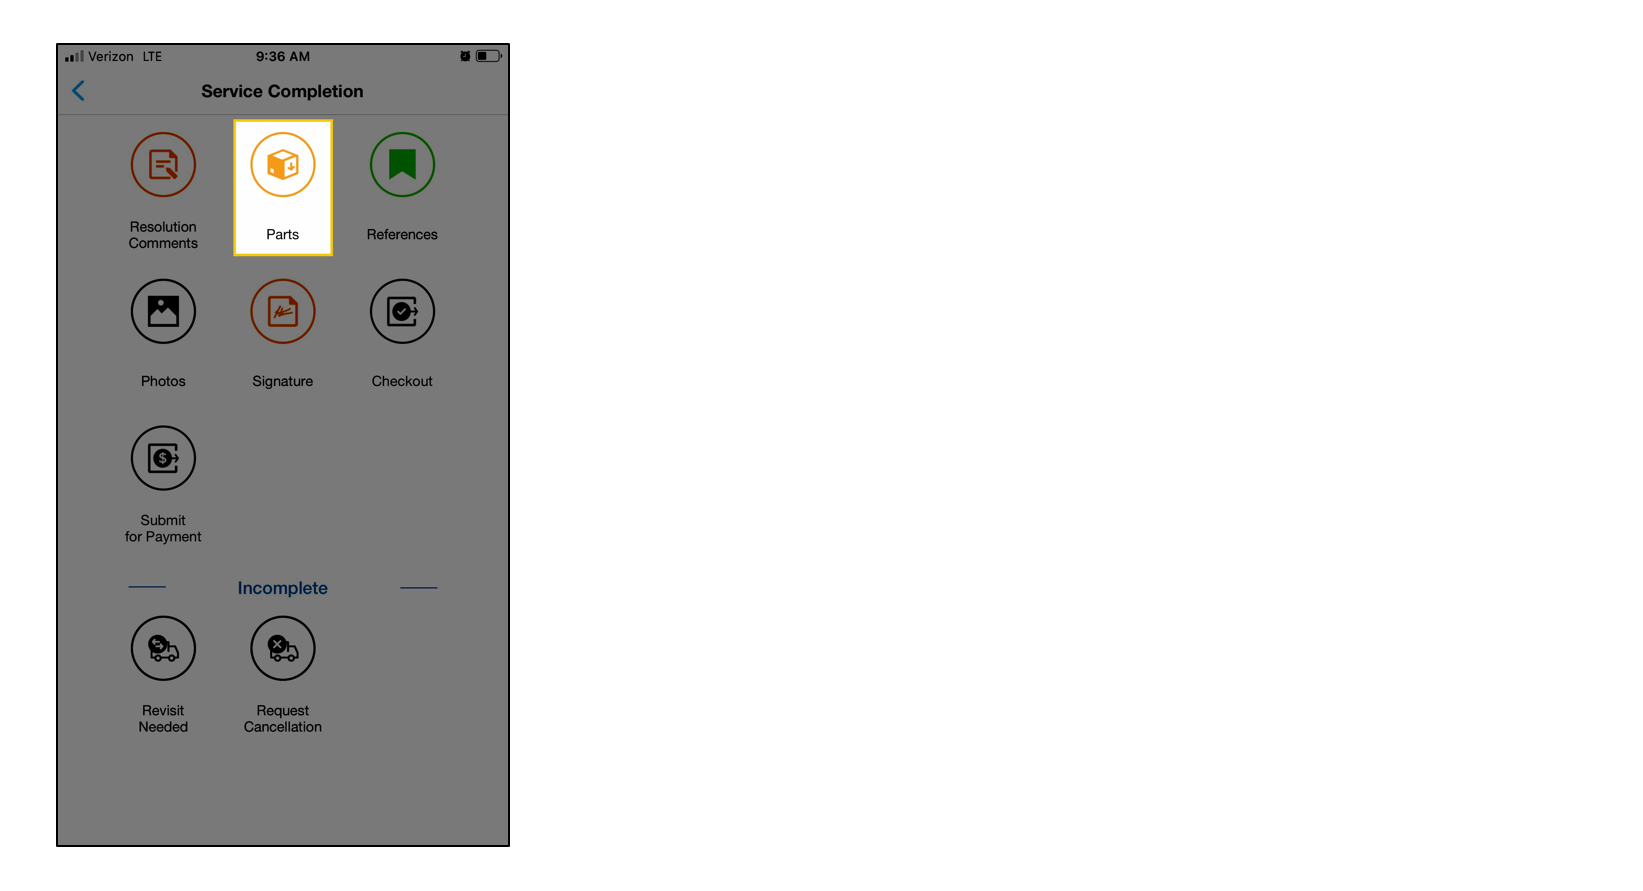
On the Service Completion screen – tap the Parts icon.
The Part Summary screen will display – tap Add Parts.

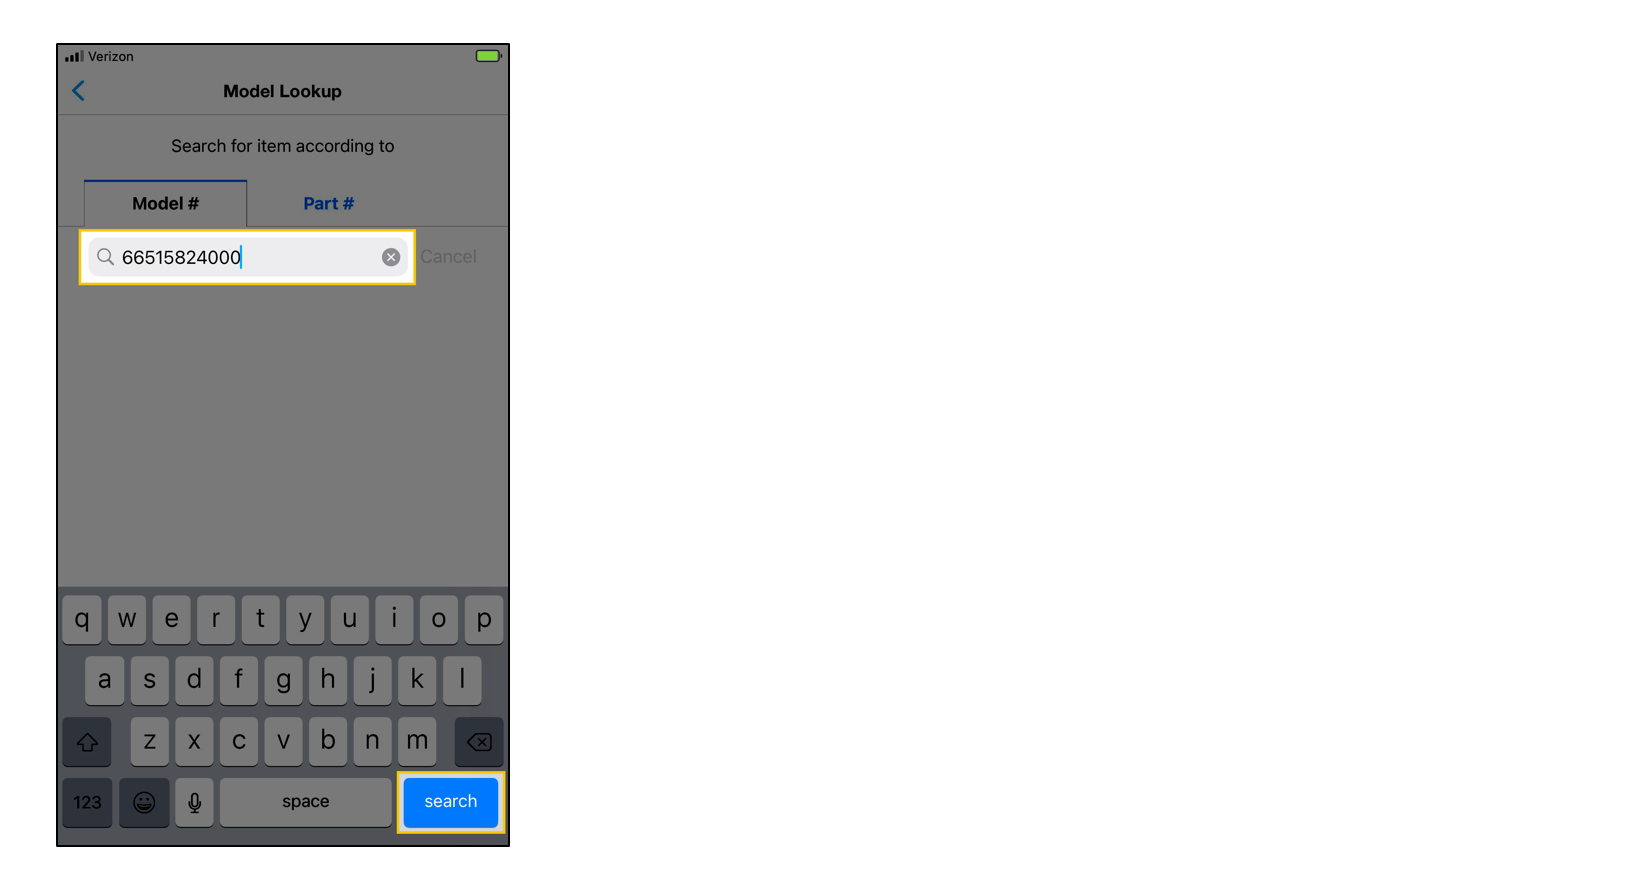
The Model Lookup screen will display – the Model # tab will automatically display the unit’s information tied to the Service Order, and the Part # will allow you to enter (and search for) a specific part number if you already know it.
• On the Model # tab, your device’s keyboard will automatically display – tap search.
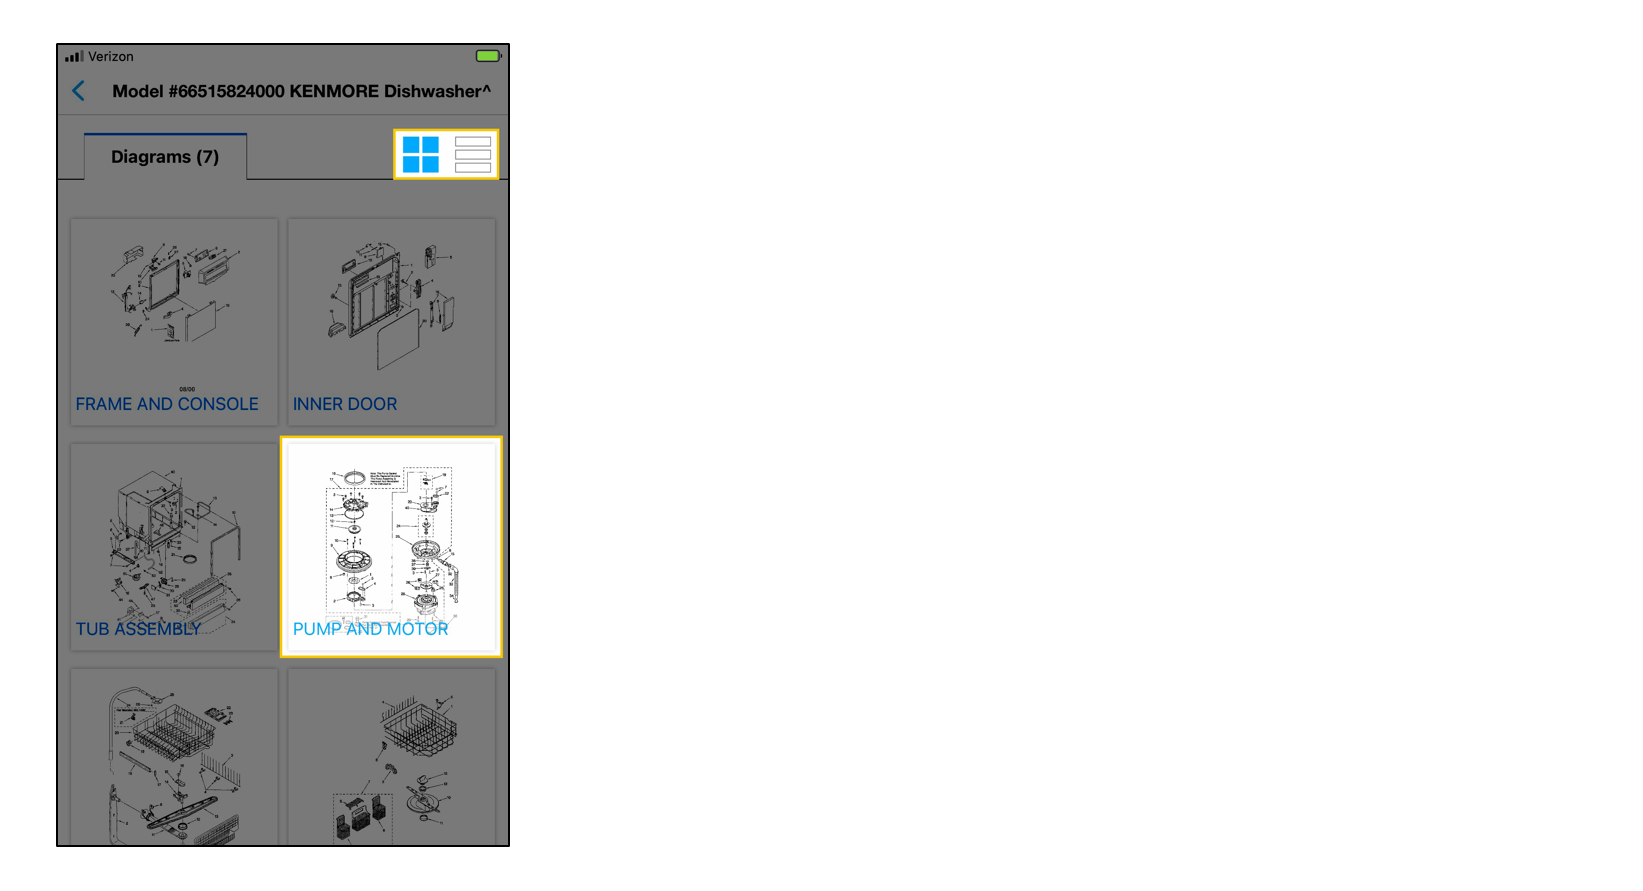
• The next screen will display all available schematics, thanks to SearsPartsDirect.com – tap a schematic.

• The next screen will display all available part diagrams – tap a diagram to display a detailed view of the parts.
Note: The tile view will display automatically (highlighted in blue at the top right-hand corner), but you can also tap the line view next to the tile icon to see the schematic(s) in a list format.
There are two ways to select parts
• Use the part diagram that displays to identify the appropriate part – enter the item number into the reference field, and then tap Show.

• You can also tap Show all parts to display a list of all parts within the diagram for more detailed information (like name and part #), and then tap Add.
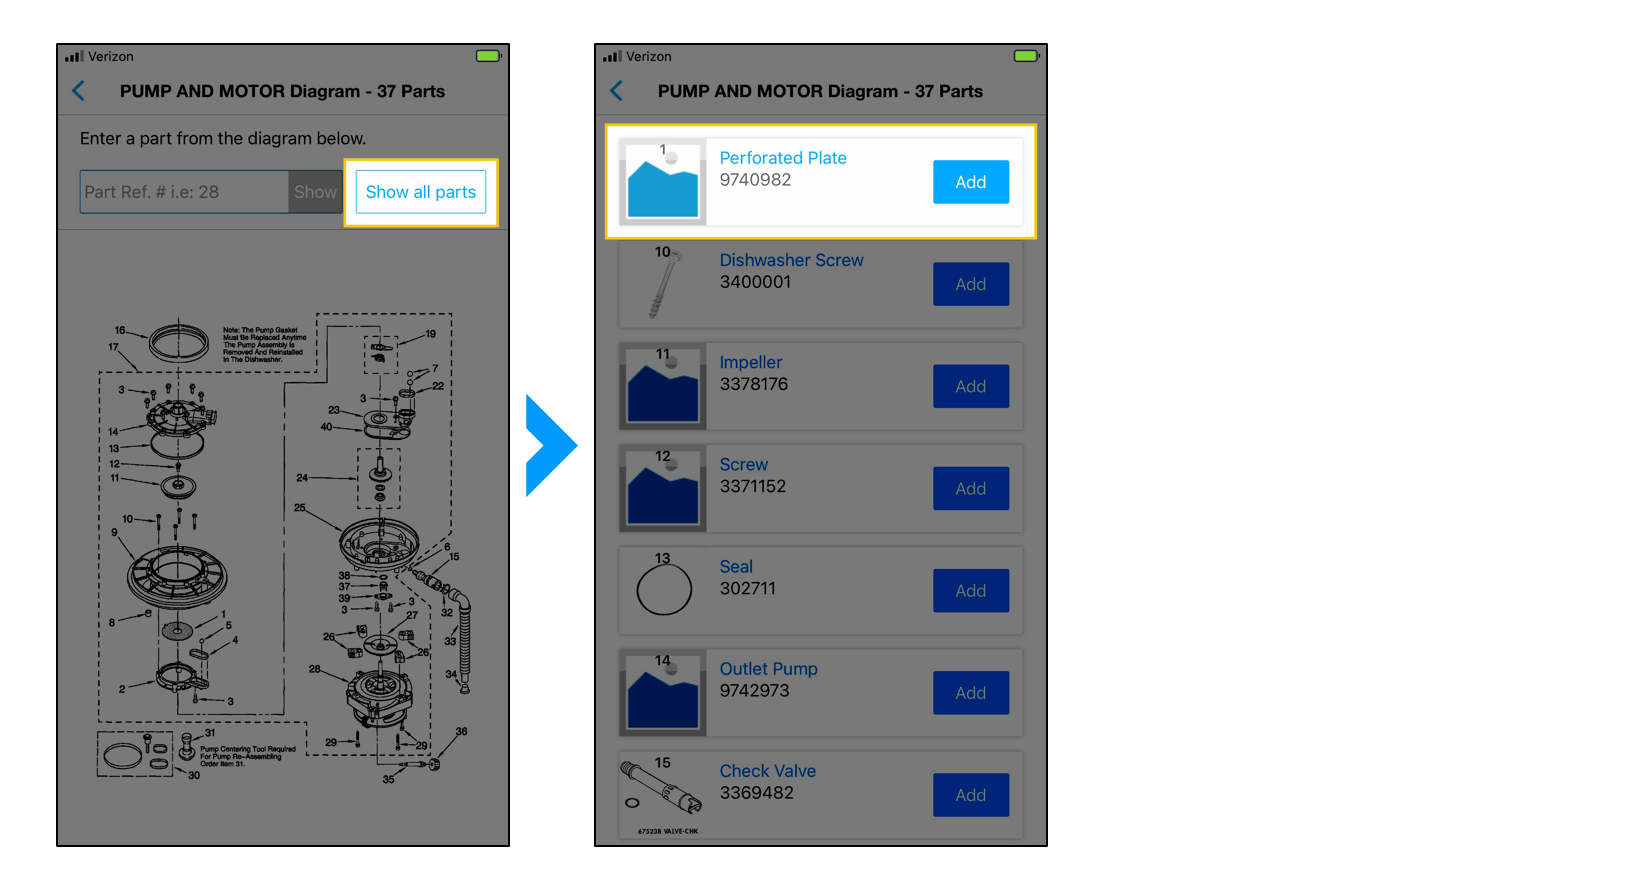
Confirm the selection
Select the quantity and then tap Add.
• Most units only require (1) of each specific part – if you select more than (1), you may receive a prompt letting you know this will be tracked due to audit purposes.
• Be sure to pay attention to parts that may come with more than a (1) in the package. For example, when ordering a “tension rod” – you would only order a quantity of (1), but the package actually comes with (4).
• Verify if the part comes with more than (1) so you don’t order more than what is needed.

After confirming the part, you can select the Part Source and move on towards check-out, or you can add more parts before moving to the next screen. When you are done adding parts – tap Select Part Source.

Part Sourcing
On the Part Source screen – tap the appropriate option next to each part you’ve added. A blue bar will display underneath each sourced option. When all parts have been sourced, tap Confirm. If you need to remove a part from this list – tap the trashcan icon before tapping Confirm.
Note: Cellular signal in the area may cause a delay.
• Tap Truck Stock ONLY if you are able to supply the part thru your inventory and install same day or next business day. Truck stock should not be used if the part needs to be installed along with an ordered part.
• Tap Local Pickup ONLY if you would like to pick-up the part from a local store (available store locations within 20-miles of the customer’s location will display) and install same day or next business day – tap the store you’d like to pick-up the part from, or tap Other Location if you prefer to source the part thru a store you work with. Local pickup should not be used if the part needs to be installed along with an ordered part.
• Tap Order to have the part shipped to the customer’s home from Sears. If the Order button is grayed out – the part is not available for order.

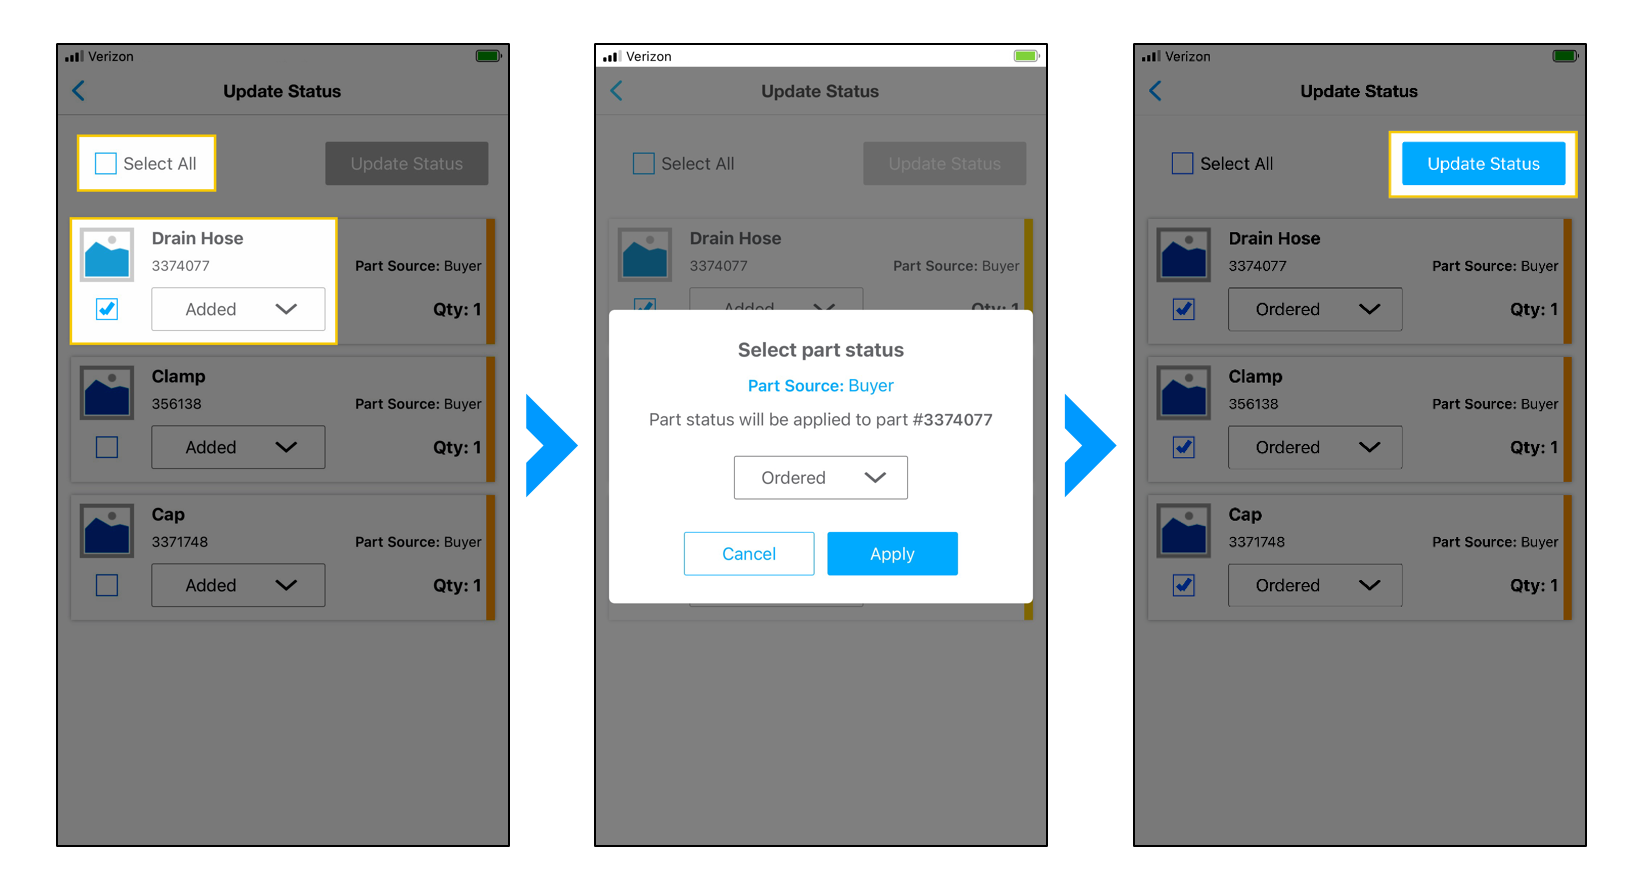
The Part Summary page will display. A yellow bar will display next to each part as a call to action letting you know the part’s status needs to be updated – tap Update Status at the bottom of the screen. If you do not tap Update Status before rescheduling the visit – the part will not be ordered.

• You can use the Select All checkbox to update the status of all parts in the list together, or you can tap the checkbox next to each individual part.
• After tapping a checkbox, you’ll be prompted to select the part status – choose an option from the source dropdown menu, and then tap Apply.
• After all part statuses have been applied – tap Update Status.
– Ordered – the part will be ordered from Sears and shipped to the customer.
– Installed – the part was available from your inventory (truck stock) and installed during this visit.
– Not installed – the part was available from your inventory (truck stock) or through local pick-up, and will be installed on the next visit.
– Hold – not needed at this time.
After updating the status – the call to action bar(s) will change, depending on the status.
– Blue – the part was ordered through Sears.
– Orange – the part was not installed during this visit (like truck stock or local pick-up and you will be returning within 24-hrs to install).
– Green – the part was installed during the visit (like truck stock).
– Gray – the part is on hold. This is not needed at this time.
Remember – a part order thru Sears must go through the Revisit Scheduled flow outlined in the next steps for the part to actually be ordered, and only use truck stock or local pick-up parts if you are able to install them same-day, or return next business-day to install.
When you’re ready – tap the < back icon twice to return to the Service Completion screen.
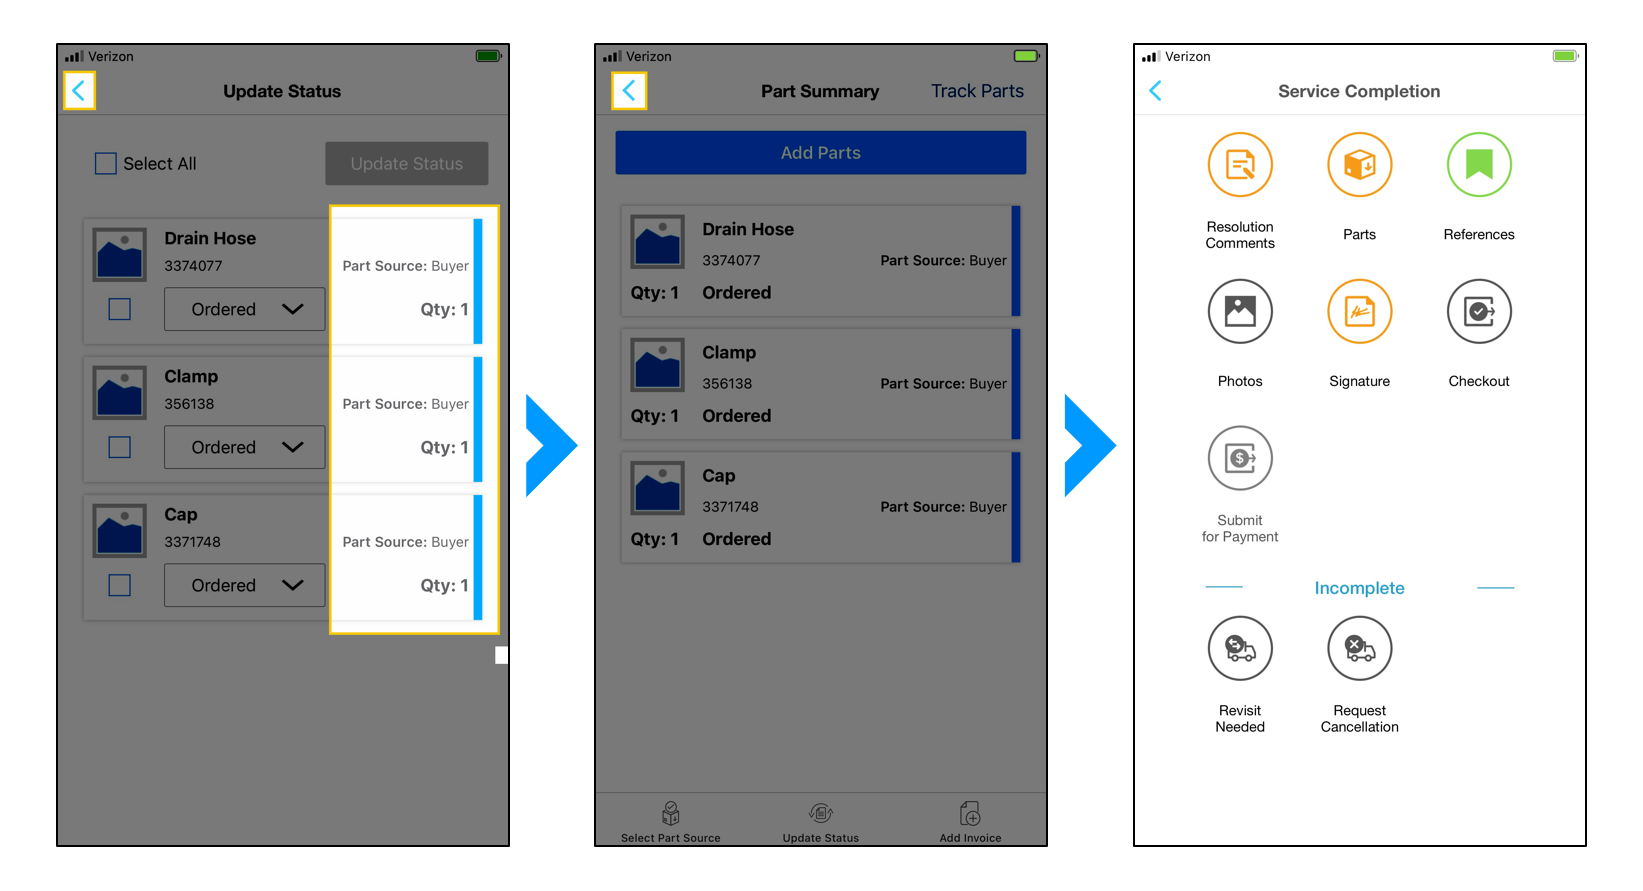
On the Service Completion screen – tap Revisit Needed in the bottom left-hand corner.
Important – this step is required before checkout, in order for the part to ship from Sears! If the revisit is not scheduled, the customer will not receive the part. If you attempt to reschedule the visit without updating the part(s) status – you will receive an error message and will need to return to the Parts screen.
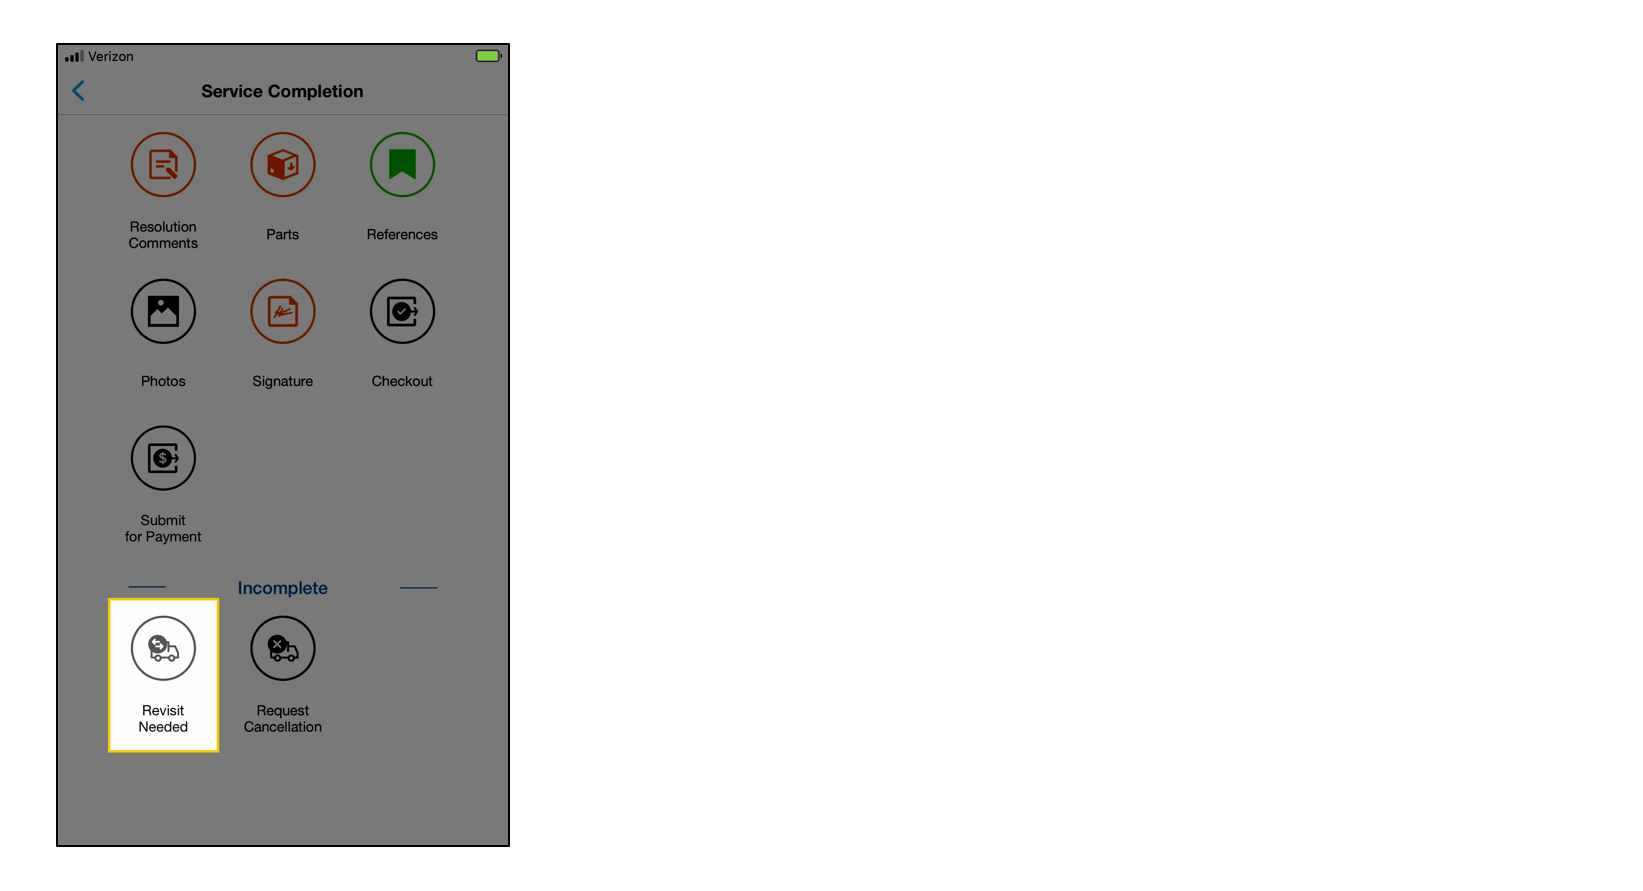
• Tap the Reason for Revisit dropdown menu, and select Parts Required.
• Tap the Appointment dropdown menu and select the appropriate date – the calendar at the bottom of the screen will display the next available date (based on the shipped part’s arrival date). For example, the part will arrive in 7-days, so the next available date will be the next day for “next day service”. You can also choose a later date based on your schedule.
• Tap the Service Window dropdown menu(s) to select the appropriate time(s).
• Enter your detailed diagnosis and resolution comments, and then tap CHECKOUT.

You’ll receive a checkout confirmation and an option to return to the Order List for your next available Service Order.

ServiceLive desktop version – what to know
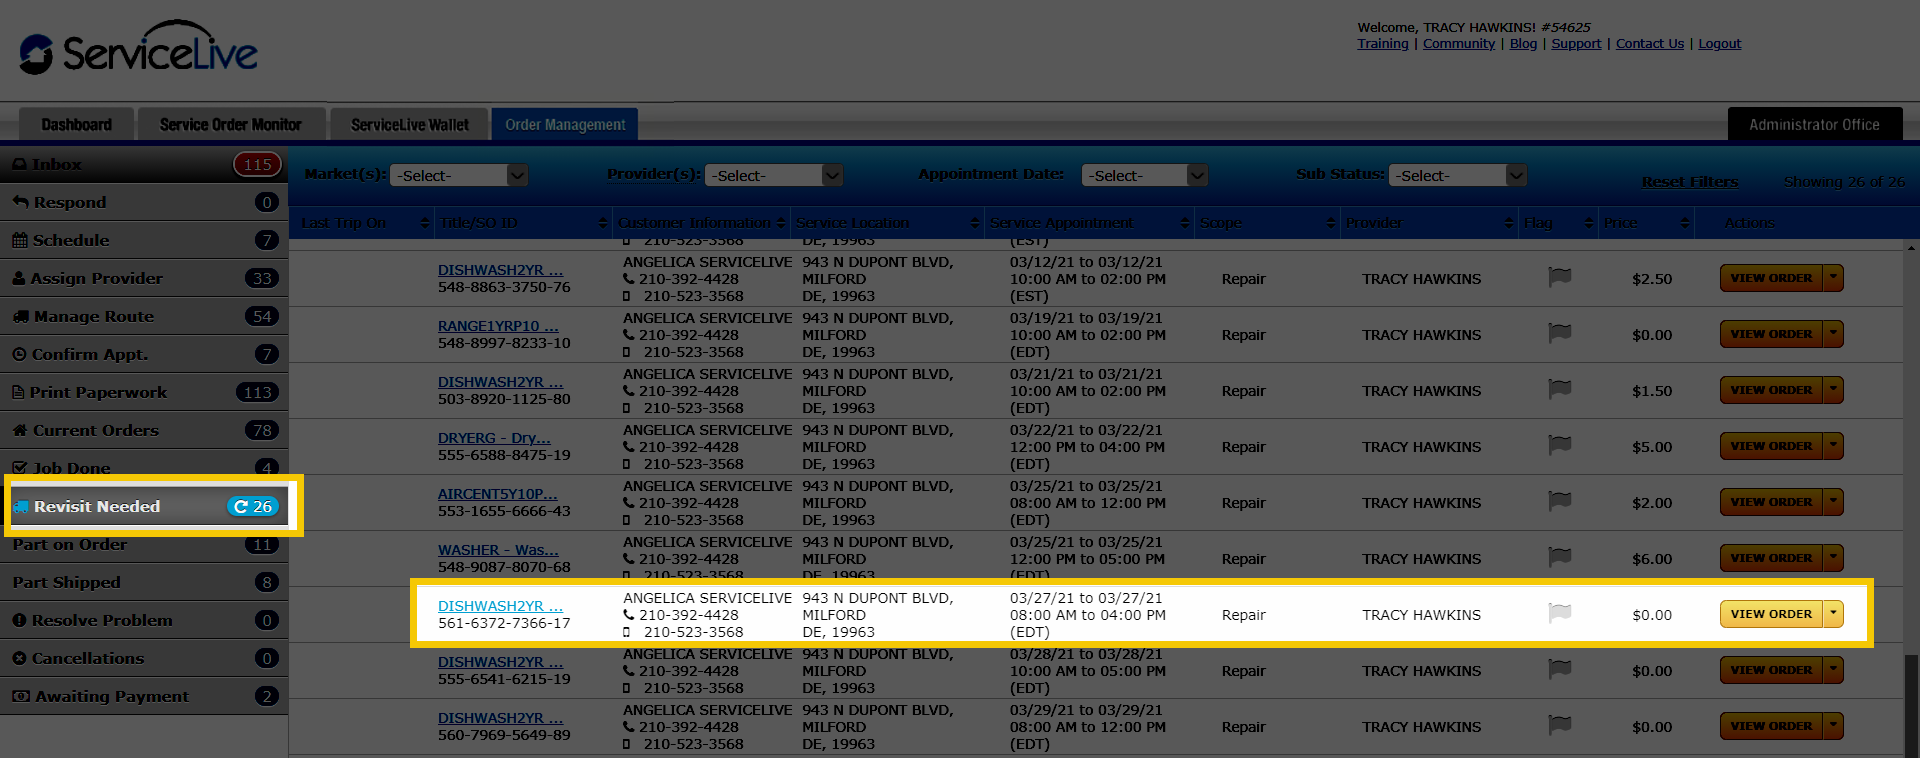
Order Management Queues
When the part(s) order has been fulfilled, the Substatus will change to Part on Order, and then the order will move into the new Part on Order queue under the Order Management tab. The order will not be able to be rescheduled at that time.

When the part(s) have shipped, the order Substatus will change to Part Shipped, and then the order will move into the new Part Shipped queue under the Order Management tab. You will be able to track the part(s) and also reschedule the new appointment window once you confirm the part(s) have arrived.

If there is a problem with part fulfilment – the Service Order will stay in the new Revisit Needed queue under the Order Management tab.
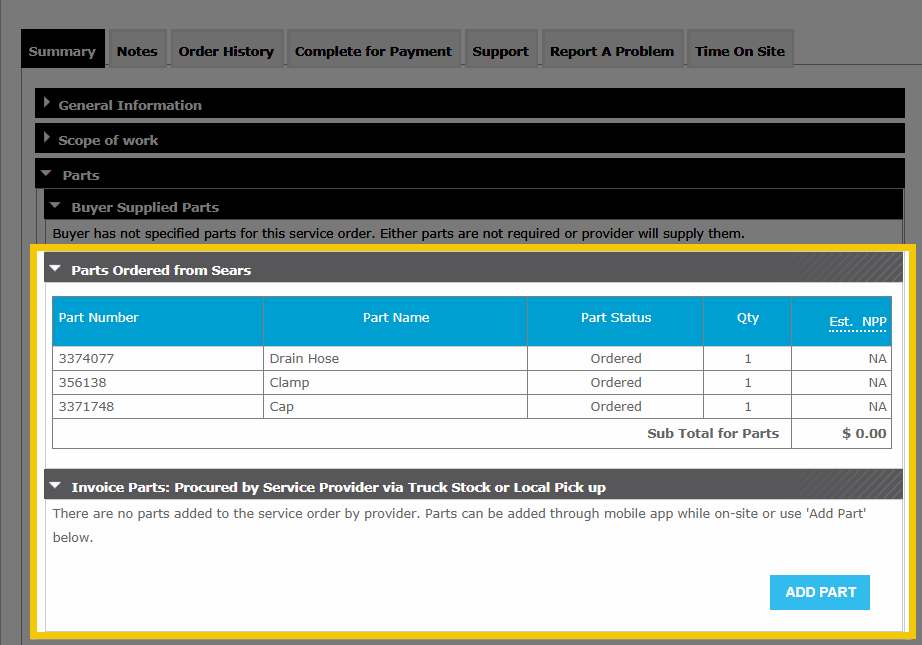
Inside the Service Order
When you view the Service Order – the Status will still display Active, and the Substatus will display Revisit needed.

The Parts section will display all parts that were ordered from Sears (through the app), and you will be able to add invoiced parts from truck-stock or local pick-up by clicking ADD PART.