This lesson explains steps to Complete Service Order for Payment. The Service Orders you need to complete will be located in Job done link on Order Management tab and will be in Active status. Once Provider completes work and changes Service Order status to Complete, Buyer will review required documents, confirm pricing, Close and Pay, and Rate Provider.
Note: Fields with * (red asterisk) must be completed.
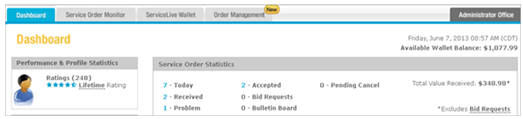
- When you login to ServiceLive, the Dashboard tab will open.
- Navigate to
 link.
link.
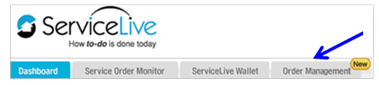
- Click on
 tab.
tab.
- Click on link from left navigation panel.
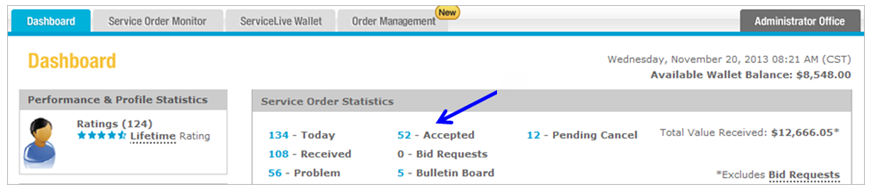
- Indicates the number of open Service Orders for your Provider Firm on link.
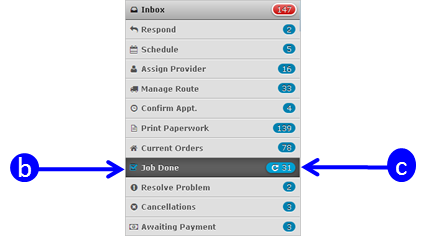
- Click on
- Complete an Order – Service was Completed:
- Click on
 button on right side of screen.

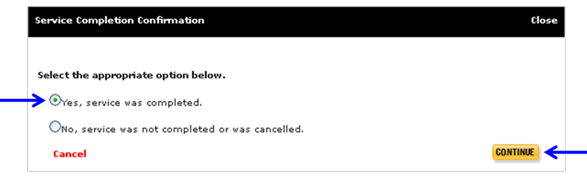
- Select radio button labeled “Yes, service was completed”.
- Click on
 button.
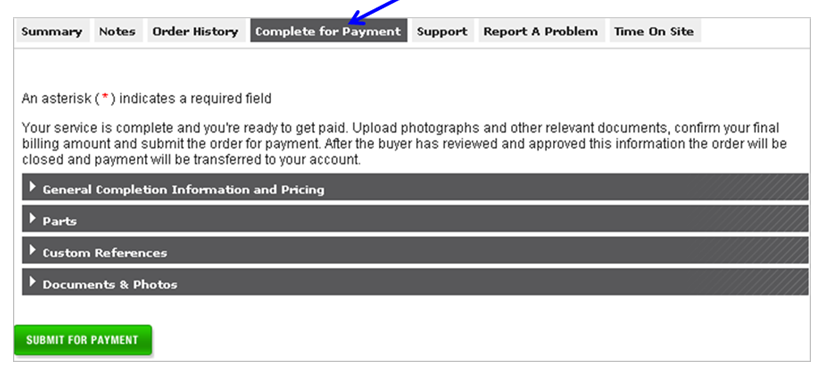
- This will take you to the Complete for Payment tab where you will need to complete all sections on this tab including upload all Provider documents that are required.
IMPORTANT: Make sure you complete all information accurately and thoroughly or could result in delay of Payment.- General Completion Information and Pricing
- Parts
- Custom References
- Documents & Photos
- Click on
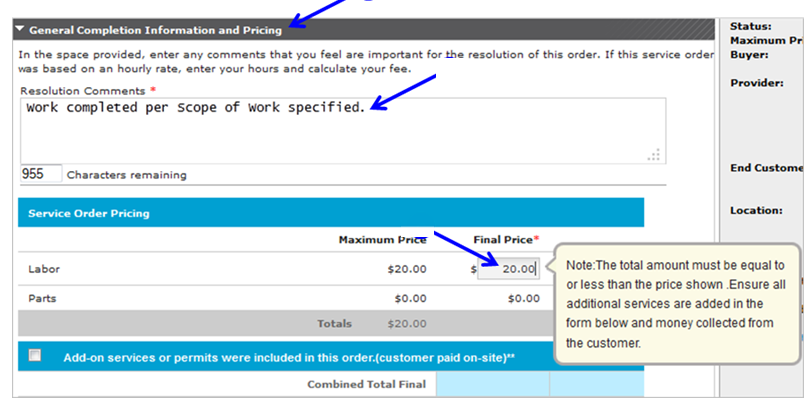
- General Completion Information section:
- Scroll down to General Completion Information section on Complete for Payment tab.
- Type appropriate Resolution Comments in box.
- Type appropriate Final Price for Labor, which may not exceed maximum price listed.
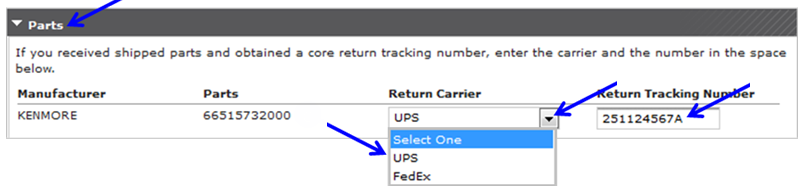
- Parts section:
- Scroll down to Parts section on Complete for Payment tab.
- If Part(s) require return, click on drop down arrow and list of Return Carriers will display.
Note: If Part(s) do not require return, skip to Step 7e. - Click on appropriate Carrier choice.
- Type appropriate Return Tracking Number.
Note: Each Buyer has different Parts requirements so this screen may vary.
- Another Parts screen that might display is no parts exist as shown below.

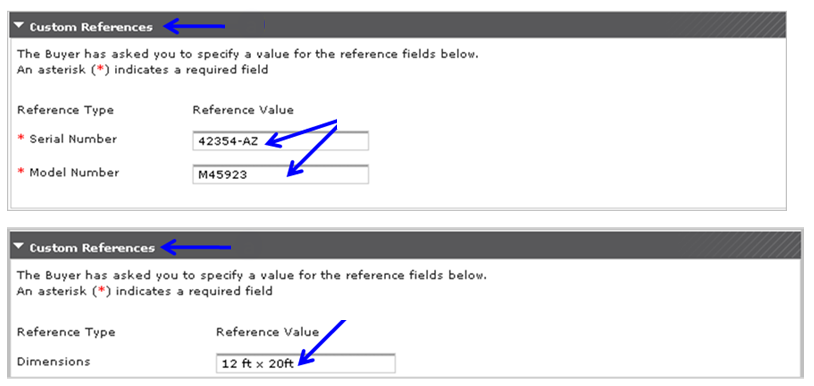
- Custom References:
- Scroll down to Custom References section on Complete for Payment tab.
- Type appropriate information as required.
Note: Each Buyer has ability to create Custom References so this screen may vary. See two examples below.
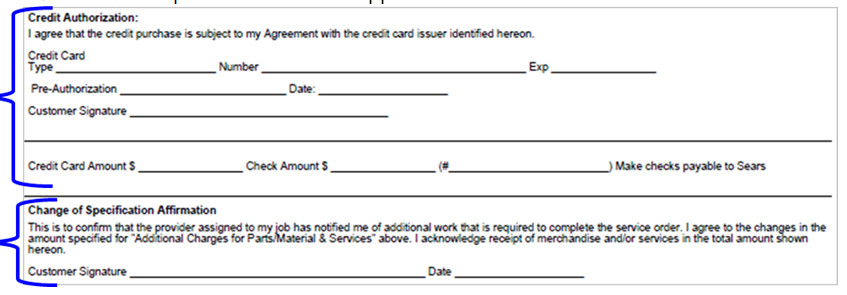
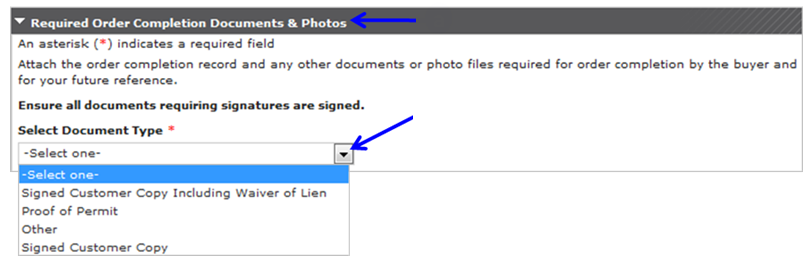
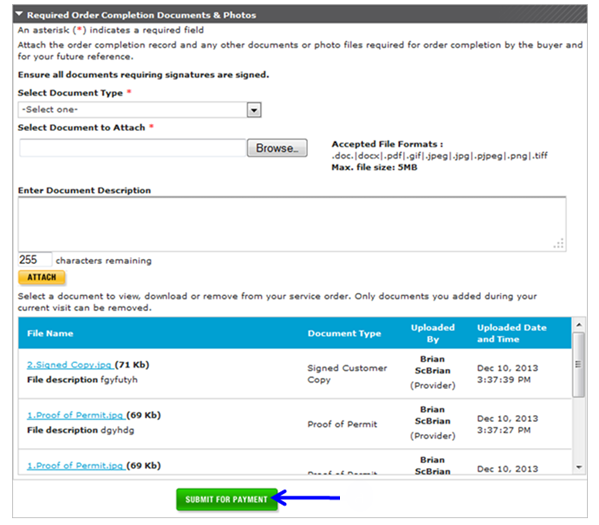
- Required Order Completion Documents & Photos section – Attach Documents & Photos:
- Scroll down to Documents & Photos section on Complete for Payment tab.
- Click on drop down arrow under “Select Document Type” and select appropriate choice OR skip to step 9c if this option is not available.
Important: Each Buyer has different Documents and Photo requirements so this process may vary.
- Click on
 button.
 - Acceptable file types to attach will display on the screen.
Note: The system does not allow attaching multiple documents with the same file name and you must clearly name documents as shown in examples below, so Buyer can easily identify each document/photo.- Before Mens Locker Rm
- After Mens Locker Rm
- Signed Completion
- Proof of Permit
- Change Order
- Locate document on your computer, click to select appropriate document, and click on
 button.
Note: Steps to scan and save documents on your computer to attach documents are available in Scan & Save Documents lesson in Registration course. - Enter brief document description.
- Click on
 button to attach document.
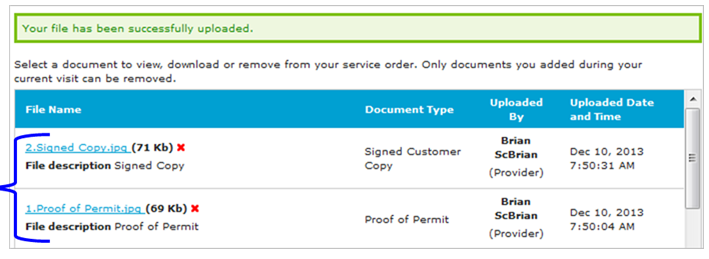
- Attached document will display.
Note: Only documents you add during your current visit can be deleted. Once you leave the screen you cannot delete documents uploaded. See step 11 to Remove documents. - Repeat Step 9b – Step 9g for each document you need to attach.
- Required Order Completion Documents & Photos section – View attached Documents & Photos:
- Click on appropriate blue title link to view document.

- Click on radio button labeled “Open with”.
- Click on
 button.

- A Windows Picture and Fax Viewer will open and you can review document.
- Click on
 button in top right corner to close Viewer.

Note: If you are using Mozilla Firefox browser, after you log out of ServiceLive you will also see a Download pop up box, click on button in top right corner to close pop up box.

- Click on appropriate blue title link to view document.
- Required Order Completion Documents & Photos section – Remove/Delete Documents & Photos:
IMPORTANT: Only documents you added during your current visit (session) can be removed (deleted).- Click on
 for document you desire to remove.

- Click on button to confirm deletion.
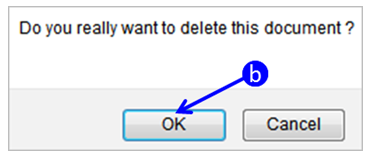
- Click on
- Required Order Completion Documents & Photos section – Print Documents & Photos:
- Click on appropriate blue title link to view document.
- Click on radio button labeled “Open with”.
- Click on button.
- To Print document, click on appropriate Menu item(s) on toolbar of software when file opens.
- Click on appropriate blue title link to view document.
- Submit for Payment:
IMPORTANT: Make sure you have attached the correct documents because once you Submit for Payment, you can no longer change any documents.- Click on
 button.
- A message will display “Successfully completed the Service Order for payment”.
- Once Provider completes work, Service Order status changes to Complete and automatically be moved to
 link. Buyer will review required documents, confirm pricing, Close and Pay, and Rate Provider.
- Click on
- Complete Order – Service was not Completed or Canceled:
Note: This is only applicable to Sears RI.- Select radio button labeled “No, service was completed”.
- Type Resolution Comments in provided text box.
Note: Be as specific as possible. - Type Final Price.
Note: Type appropriate amount that is equal to or less than price shown. To register a canceled Service Order, type $0.00. When a Service Order is canceled in this manner, it is automatically removed from your ServiceLive database. - Click on button.