This lesson explains how to search your ServiceLive Wallet transaction history. Search within a set period, or within a range of dates that you choose. You can export transactions and reports to Microsoft Office Excel file format.
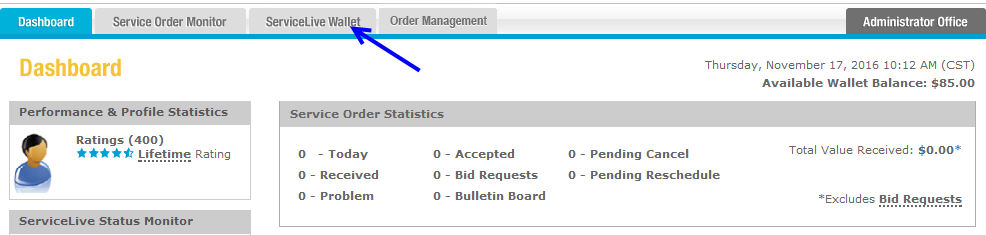
- Navigate to
 tab:
tab:
- Click on
 tab.
tab.
- Click on tab.

- Click on
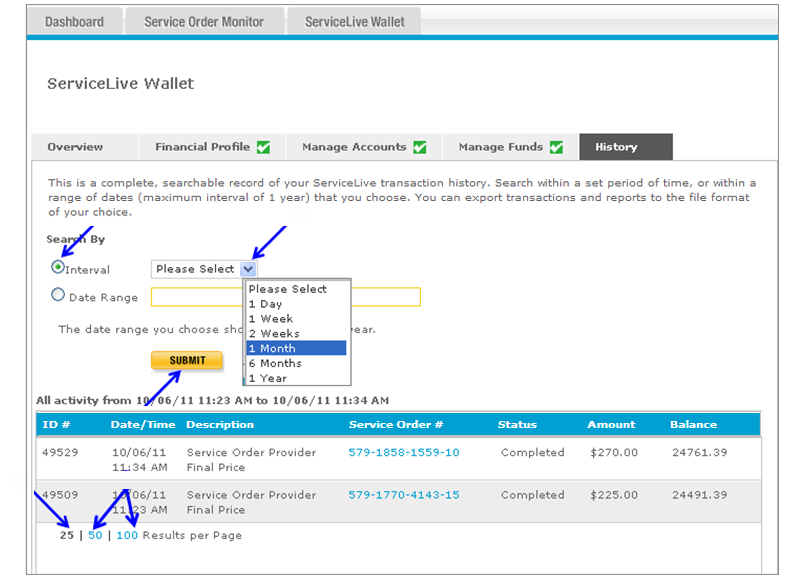
- To search within a set period:
Note: The list of transactions defaults to the last seven days transactions.- Click on radio button in front of “Interval”.
- Click on drop down arrow labeled “Please Select”.
- Click on
 button.
 - The transactions in set period selected will display.
- The list will display 25 transactions per page by default.
- To change list to display 50 or 100 per page, click on preferred number.
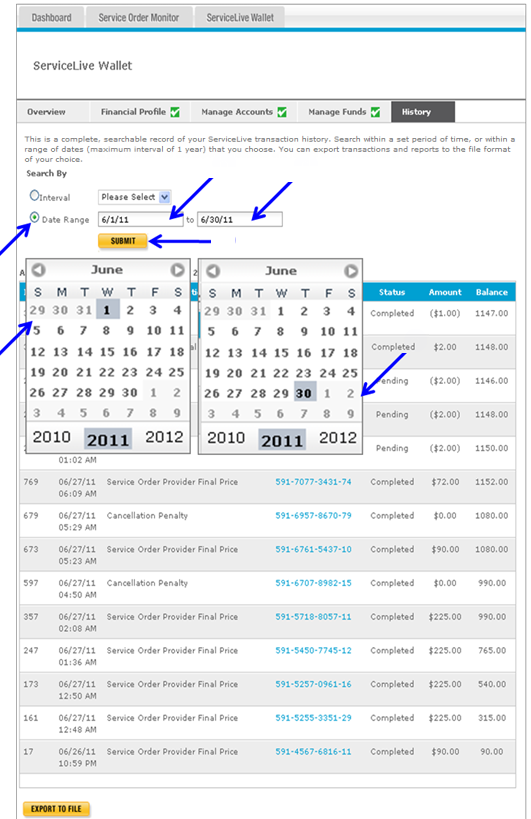
- To search within a date range:
- Click on radio button in front of “Date Range”.
- Click in first box and calendar will display.
- Select Month, Date, Year from calendar.
- Click in second box and calendar will display.
- Select Month, Date, Year from calendar.
- Click on button.
- The transactions in date range you selected will display.
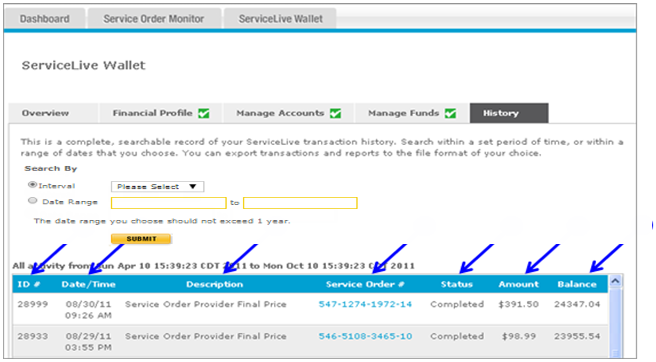
- Information that displays on tab:
Note: Documents display from most current transaction to oldest.- ID # = Transaction ID.
- Date, Time = Date and time transaction occurred.
- Description = Description of transaction (i.e. withdrawal, Service Order completion, etc.).
- Service Order # = Number associated with the specific Service Order (Service Order defines scope of work as requested by Buyer).
- Status = Status of transaction (i.e. Pending or Completed).
- Amount = Dollar amount of transaction.
- Balance = Dollar amount left in ServiceLive Wallet.
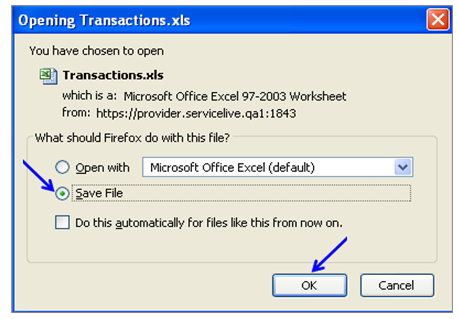
- Once you have selected and submitted search by set period or date range, you can Export to File.
- Scroll down to bottom of transactions, click on
 button.
 - Popup screen displays, click on radio button in front of “Save File”.
Note: Defaults to saving file as Microsoft Office Excel file. - Click
 button.
 - You will then need to select where to save file to on your computer.
Note: Write down where you save file to so you can locate the file when needed.
- Scroll down to bottom of transactions, click on