This lesson explains how to complete a service order in the ServiceLive Pro Mobile App.
This lesson also includes parts, which are necessary when completing Sears In-Home Repair Orders. Orders for other buyers may not require parts.
Note: Service Orders MUST be synced with the Mobile App in order to submit Service Order for payment.
1. Locate appropriate Service Order and open Service Order Details.
2. Tap Completion button.
Note: You must complete all the sections to submit & checkout.
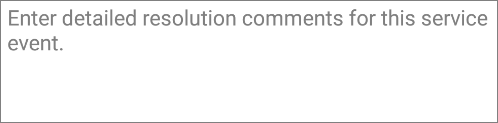
Resolution Comments:
Note: Orange Icons indicate that that section that is mandatory. Green icons indicate that the section is completed.
1. Tap Resolution Comments.
2. Enter Resolution Comments and tap ![]() .
.
Permits:
1. Tap Permits.
2. If there are NO permits, tap ![]() .
.
3. If there are Pre-Paid permits, tap to edit permit details.
Note: Enter actual price of the permit here (may be less than, equal to, or more than what customer paid)
4. To Add a Pre- Paid Permit, tap ![]() .
.
5. Tap Type of Permit (Plumbing, Electrical or Building).

6. Enter Customer Charge Amount.

7. Tap ADD PHOTO ![]() or Upload Later
or Upload Later ![]() (greyed out) to upload proof of permit.
(greyed out) to upload proof of permit.
IMPORTANT: If you don’t have the actual permit, make sure you attach it prior to final submission for payment. To get through the screen, you must attach a valid image.
8. Tap ![]() to save upload.
to save upload.
9. Permits uploaded display. If there is a customer refund, the same will be processed by Sears.
![]()
Additional Services:
Additional Services is an optional section.
1. Tap Additional Services button.
2. Tap ![]() if there are no Additional Services.
if there are no Additional Services.
3. OR tap ![]() button on appropriate Additional Services to add a service to Service Order.
button on appropriate Additional Services to add a service to Service Order.
4. Quantity of Additional Services may be adjusted by clicking ![]() the
the ![]() and buttons.
and buttons.
5. Tap ![]() once all Additional Services have been added.
once all Additional Services have been added.
6. If there is a Change of Spec, you must enter the Customer Charge and may edit the description.
Buyer Reference:
1. Tap References.
2. Enter Brand and Model (Model is optional).
3. Tap ![]() button.
button.
Upload Photos or Documents:
1. Tap Photos.
2. Select the type of Picture (Photo or Document).

3. Tap ![]() button.
button.
4. Tap cloud to attach photo. A green mark will appear to indicate that the photo(s) has been attached to the Order.
![]()
Parts:
1. Tap Parts Tracking.
2. Tap ![]() .
.
3. Select Model # or Part # to search by.
4. Enter Model # or Part #.
You may use * for partial Model Number Search. You must enter full Part Number.
5. Tap ![]() .
.

If Part Image is available you can pinch and zoom the image.
6. Select Part by tapping.
7. Tap Plus or Minus to increase or decrease quantity.
![]()
Parts – Check Availability:
1. Tap Check Availability.
2. Select Part.
3. Tap ![]() .
.
4. Once you find the part, tap Order Parts.
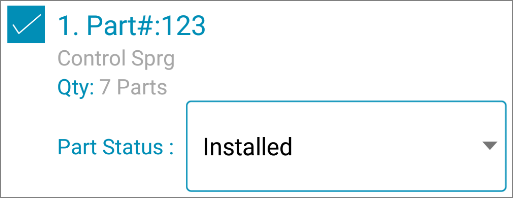
Parts – Update Status:
1. Tap Update Status.
2. Select Part to Update.
3. Tap ![]() .
.
4. Change Part Status by clicking drop down arrow.
NOTE: Once a part has been added, it must show “Installed” status before you can complete Service Order and Submit for Payment.
Parts – Add Invoice:
1. Tap Add Invoice icon.
2. Select Part to add invoice to.
3. Tap ![]() .
.
4. Select Source, enter Invoice Number and Part Cost and Quantity.
5. Tap Upload Invoice to search for invoice.

Payment – Check or Credit Card:
1. Tap Payment button.
NOTE: You must follow the existing business process to get customer payments, and use the App to gather the details.
2. Tap ![]() or
or ![]() to receive payment from customer for Additional Services.
to receive payment from customer for Additional Services.
3. For CHECK, you will take customer check, you will mail it to address displayed. Enter check number.
![]()
4. Tap ![]() .
.
5. For CREDIT CARD, enter credit card number, type, expiration date, and code.

6. Tap ![]() .
.
Signatures:
1. Tap Signature.
2. Tap Service Provider Signature.
3. Tap ![]() .
.
4. Using finger in field to enter signature.
5. Tap ![]() button.
button.
6. Confirm signature and tap ![]() button.
button.
7. Repeat for Customer Signature.
Submit & Check Out:
1. Tap Check Out.
2. Tap ![]() to complete Service Order.
to complete Service Order.
3. If you do not have pricing permissions for your Firm, you will receive a Congratulations message.
4. If you do have pricing permissions for your Firm (Dispatcher), tap Submit for Payment.
Provider Pricing:
You must be an Administrator for Firm or be a Firm Dispatcher for this step.
1. If Pricing is correct, tap ![]() button.
button.
2. If Pricing is not correct, tap within field with incorrect pricing to edit.
3. Tap ![]() button.
button.
4. Tap ![]() to confirm that you want to Submit for Payment.
to confirm that you want to Submit for Payment.