This lesson explains how to create a Select Provider Network (SPN). SPN allows Buyers to designate specific requirements and only dispatch Service Orders to those Provider Firms who meet the specific criteria. It also enables a convenient communication channel directly to the Provider Firms for urgent updates concerning services. Buyers have the ability to create multiple SPNs based on specific service offerings. Each SPN will provide the Buyer with a more controlled solution and create a better customer experience. When working with the SPN Monitor, you must create your SPN Network and Campaign in the following order: 1. Create Network, 2. Create Campaign, 3. Routing Priorities (if applicable), 4. Campaign Monitor, 5. Member Manager, 6. SPN Monitor.
- When you login to ServiceLive, the Dashboard will open.
- Navigate to Create Network Tab:
- Click on
 tab on right of screen.
 - Click on
 link.
link.
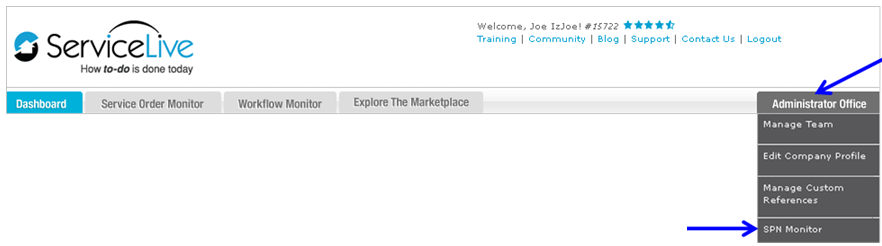
- Click on
- SPN Monitor Dashboard will open.
- Click on
 tab.
tab.

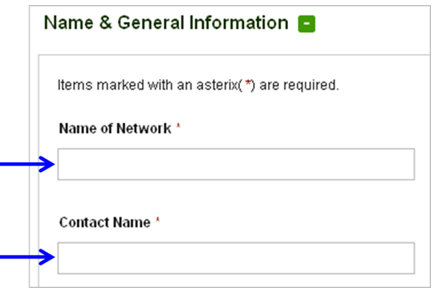
- Create Network:
Note: Items marked with a red asterisk (*) are required.- Enter Name of SPN in field provided.
Note: For reporting purposes, it is important to use the following naming convention for your Network (must use spaces):- BuyerCompanyName – NetworkName – Select Provider Network
- Ex: AT&T – Heating & Cooling – Select Provider Network
- Ex: Sears Retail Installation – General Plumbing Gas – Select Provider Network
- Enter SPN Contact Name in field provided.
Note: SPN Contact acts as SPN Manager Point of Contact for Buyer. Provider Firms who are interested and/or have inquiries regarding the SPN will use this contact information. Depending on the size of the SPN, this might potentially result in high email and call volume.
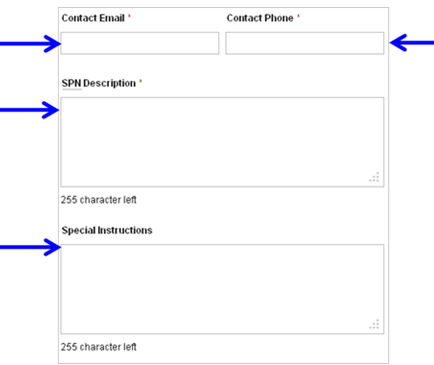
- Enter Contact Email address.
- Enter Contact Phone number.
- Enter SPN Description.
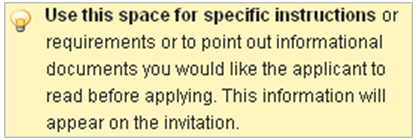
- IMPORTANT: This description will be included as part of the SPN invitation content and will be visible to all invited Provider Firms. The more attractive the message, the more likely a Provider Firm will be to join your SPN, although, this is not a guarantee. See information box below that appears when you click inside of SPN Description field.
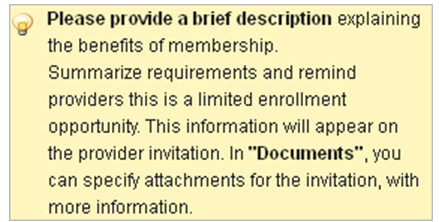
- IMPORTANT: This description will be included as part of the SPN invitation content and will be visible to all invited Provider Firms. The more attractive the message, the more likely a Provider Firm will be to join your SPN, although, this is not a guarantee. See information box below that appears when you click inside of SPN Description field.
- Enter SPN Special Instructions. Example: “Please complete and submit all required documents with you SPN application.”
- IMPORTANT: This description will be included as part of the SPN invitation content and will be visible to all invited Provider Firms. See information box below that appears when you click inside of Special Instructions field.
- IMPORTANT: This description will be included as part of the SPN invitation content and will be visible to all invited Provider Firms. See information box below that appears when you click inside of Special Instructions field.
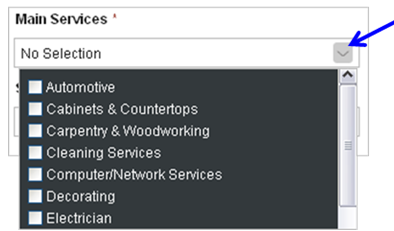
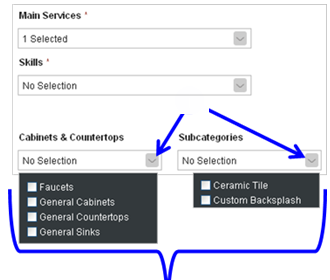
- Click on drop down arrow labeled “Main Services”. Click on appropriate Main Service(s) required for SPN, then click outside of Main Services list to apply choices.
- Assess ahead of time exactly what SPN/Campaign requires. Be specific as needed, yet general enough so not to limit SPN Provider pool.
- When selecting services, we recommend NOT to mix industries. Mixing industries will narrow Firms and Providers that qualify to serve in SPN.
- If there are questions as you set up you SPN Network, please contact your designated ServiceLive contact.
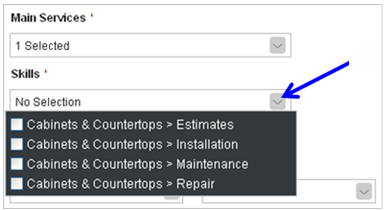
- Click on drop down arrow labeled “Skills”. Click on appropriate Skill(s) within Main Service(s) required for SPN, then click outside of Skills list to apply choices.
Note: Nothing will appear in this drop down list unless you select at least one Main Service.
- Fields below will populate according to Services and/or Skills selected in previous steps.
- Click on drop down arrow for each additional field and select additional choices. Click on appropriate choice(s) from list, and then click outside of list to apply choices.
Note: Nothing will appear in this drop down list unless at least one Main Service and one Skill are selected. Select subcategories carefully as Service Pros will be required to meet every single Skill required by SPN. The more Skills selected, the more complicated it becomes to reach Member Approved Status. This step is not required for SPN creation.
- Enter Name of SPN in field provided.
- Approval Criteria/Credentials:
Note: This section is not required.- Click on
 option.
 - Click on drop down arrow labeled “Minimum Rating”.
- Scroll down and select appropriate desired minimum rating for Service Pro.
Note: You do not have to select a desired minimum rating. If you select a minimum rating, we recommend that you select 3-5 stars to not limit SPN Provider pool. - AND/OR click on the checkbox labeled “Include non-rated providers”.
Note: It can take time for Service Pros to accumulate ratings. Therefore, it might be advantageous to accept Service Pros that have not yet been rated. - Click on drop down arrow to display Language Click on appropriate language(s), and then click outside of language list to apply choices.
- Enter minimum number of Service Orders for Firm to have previously completed for SPN membership.
Note: This feature is rarely used.

- Click on
- Provider Profile Status:
- ServiceLive Status = Approved (Market Ready)
- Select Checkbox labeled Background Check 2 year Re-certification Required to enable.

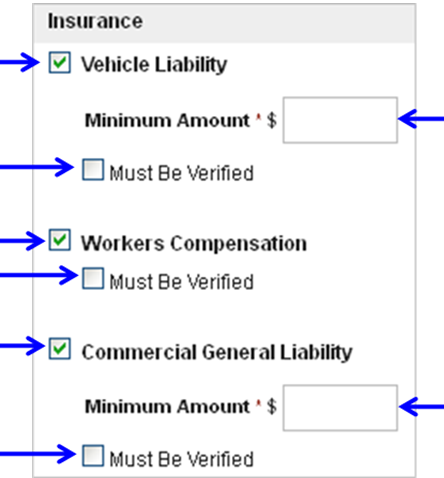
- Insurance:
- Click on option.
- Click on checkbox labeled “Vehicle Liability” if you desire SPN Firm members to carry Vehicle insurance.
- Enter appropriate minimum dollar amount of Vehicle Liability coverage you desire.
- Click on checkbox labeled “Must be Verified” if you desire Firm Vehicle insurance to be verified.
Note: Verification is done by ServiceLive Compliance team to ensure that insurance documents meet the Verified requirements established by ServiceLive. - Click on checkbox labeled “Workers Compensation” if you desire SPN Firm members to carry Workers Compensation coverage according to their state requirements.
- Click on checkbox labeled “Must be Verified” if you desire Workers Compensation coverage to be verified.
Note: Verification is done by ServiceLive Compliance team to ensure that insurance documents meet the Verified requirements established by ServiceLive. - Click on checkbox labeled “Commercial General Liability” if you desire SPN Firm members to carry Commercial General Liability coverage.
- Enter appropriate minimum dollar amount of Commercial General Liability coverage you desire.
- Click on checkbox labeled “Must be Verified” if you desire Firm coverage to be verified.
Note: Verification is done by ServiceLive Compliance team to ensure that insurance documents meet the Verified requirements established by ServiceLive.
- Click on
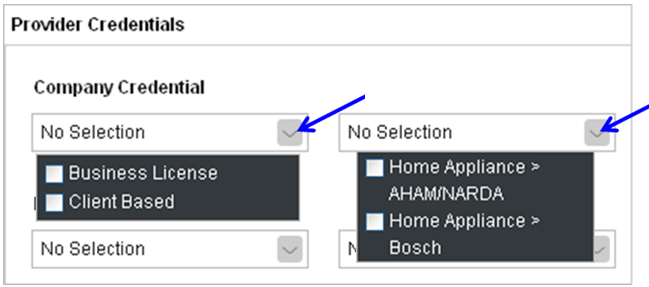
- Provider Credentials:
This section is required when creating a SPN if the Buyer requires SPN Firm Members to carry a specific license or credential. This section also allows Buyer to establish a license and/or credential requirement at the Service Pro level.
Note: We do NOT recommend that the SPN require a license/credential at the Firm AND Service Pro level, as such requirements may be extremely difficult to meet.- Click on the first drop down arrow under “Company Credential” to select required Credentials. Click on appropriate Company Credential(s), then click outside of Company Credential list to apply choices.
- Company Credential means that desired license is required at the Firm level.
- Click on the second drop down arrow under “Company Credential” to select more specific required Credentials. Click on appropriate Company Credential(s), then click outside of Company Credential list to apply choices.
Note: Nothing will appear in this drop down list unless you select at least one item from first list.
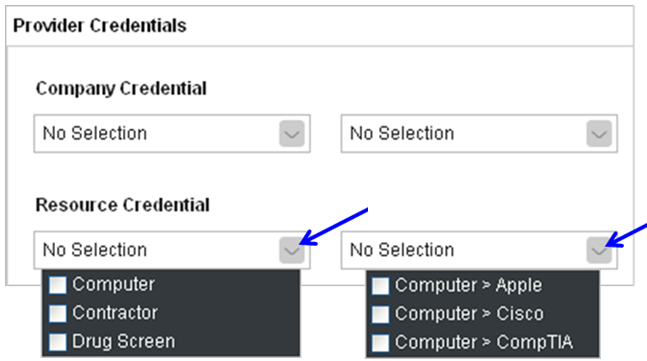
- Click on the first drop down arrow under “Resource Credential” to select required Credentials. Click on appropriate Resource Credential(s), then click outside of Resource Credential list to apply choices.
- Resource Credential means that desired license is required at the Service Pro level.
- Click on the second drop down arrow under “Resource Credential” to select more specific required Credentials. Click on appropriate Resource Credential(s), then click outside of Resource Credential list to apply choices.
Note: Nothing will appear in this drop down list unless you select at least one item from first list.
- Select the checkbox labeled “A meeting with the Provider Firm is required for approval” if you would like to require a phone interview meeting with Provider Firm before they are approved to the SPN.
Note: We recommend a Meet & Greet to ensure that only qualified Firms are approved to join SPN.

- Click on the first drop down arrow under “Company Credential” to select required Credentials. Click on appropriate Company Credential(s), then click outside of Company Credential list to apply choices.
- Documents:
Documents are important because they outline the SPN expectations for each member, for example, the Select Provider Agreement. The documents can also be information and serve as guides to assist members with completing a specific Service Order task.- Click on
 option.
 - Click on
 option to select documents from your computer to upload to SPN.

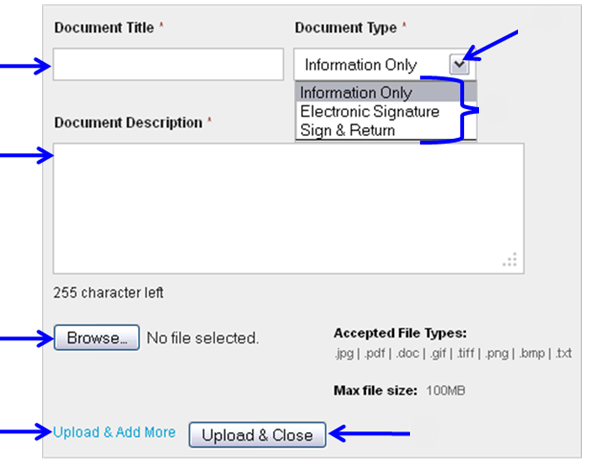
- Click on drop down arrow labeled “Document Type”.
Note: Select Document Type first then enter Document Title. - Scroll down and select appropriate document type.
- Informational Only = Documents containing SPN information.
- Electronic Signature = Document that requires an electronic acknowledgement that it has been read.
- Sign/Return = Legal document where the Provider will have to electronically sign and return. This is an agreement/contract.
- Enter Document Title.
Note: Use spaces NOT underscores ( _ ) in document title due to compatibility issues. - Enter Document Description.
- Click
 button and search/select document to upload from your computer.
Note: Do not select documents with underscores ( _ ) in name due to compatibility issues.
Accepted File Types = .jpg | .pdf | .doc | .gif | .tiff | .png | .bmp | .txt - Click on
 link if you would like to continue adding documents.
 - To add additional documents repeat steps c-g.
- OR click on
 button if you are finished uploading documents.
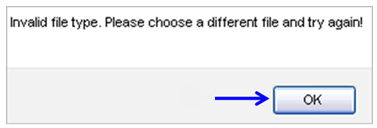
- If uploaded document is an invalid file type, warning message will appear. Click on button and try to upload different file type.
- OR if you would like to add previously uploaded documents to SPN, click on drop down arrow under “Choose from existing document(s),” scroll and select appropriate choice.
- Click on
 button.
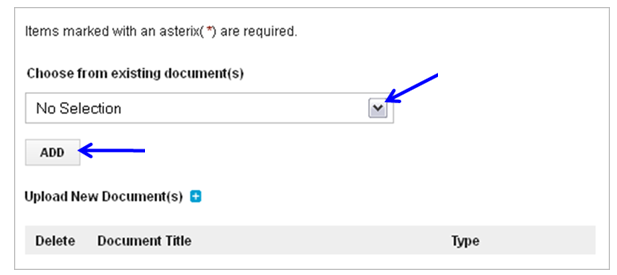
- Added documents display.
- Click on
 button next to selected document to delete document from SPN.
 - Click on
 button at bottom of screen.

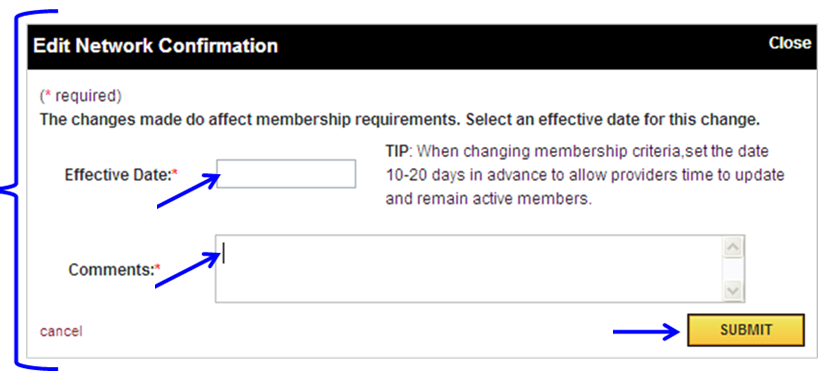
- IMPORTANT: If editing SPN after Network creation, adding Sign and Return or Electronic Signature documents will affect SPN membership. If this is the case, Edit Network Confirmation will appear.
Note: Background Recertification for Service Pro must have a status of In Process prior to the expiration date to avoid becoming Out of Compliance for the SPN. - Click in field labeled “Effective Date” and select appropriate date from calendar.
Note: Set the date 10-20 in advance to allow Provider Firms time to update and remain active members. - Enter Comments in field.
- Click on
 button.
Note: Provider Firms will receive an email stating that the SPN requirements have changed and they need to long into their account to view the changes.
- Red warning message will appear listing any missing information, go back through SPN form and complete missing items.

- SPN will display on SPN Monitor tab of ServiceLive dashboard.

- Refer to SPN Monitor tab lesson in Administrator Office Extended – SPN Monitor (Requires Password) course.
- Click on
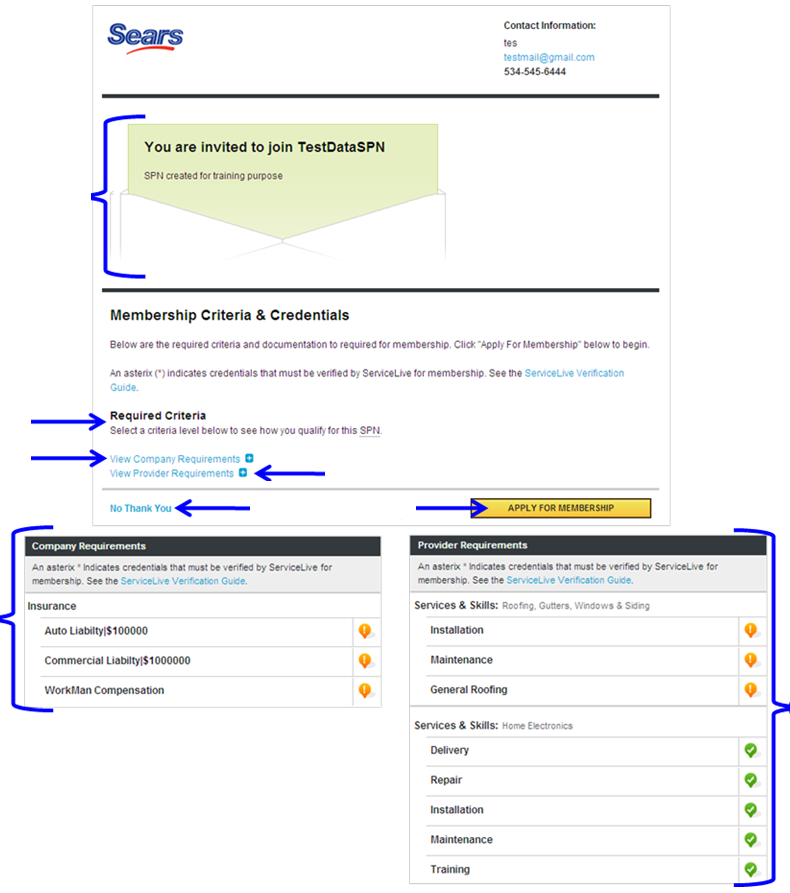
- SPN Invitation Example:
An email will be sent to Provider Firms when they are invited to your SPN, the invitation link will appear in their “Communications Monitor” section within the Provider Firms Admin dashboard. The following is the initial message Provider Firms receive from Communication Monitor and steps they follow to take action on invitation.- Initial Invitation Message
- SPN Required Criteria
- Click on
 link.
link. - Company Requirements display (see second picture displayed).
- Click on
 link.
link. - Provider Requirements display (see second picture displayed).
- Click on
 button accept SPN invitation and move forward in the application process.
 - OR click on
 link to decline SPN Invitation.