This lesson provides a high-level explanation of the Campaign Monitor Tab. All campaigns (pending, active and inactive) can be managed, edited and monitored from this tab. When working with the SPN Monitor, you must create your SPN Network and Campaign in the following order: 1. Create Network, 2. Create Campaign, 3. Routing Priorities (if applicable), 4. Campaign Monitor, 5. Member Manager, 6. SPN Monitor.
- When you login to ServiceLive, the Dashboard will open.
- Navigate to Campaign Monitor Tab:
- Click on
 tab on right of screen.
 - Click on
 link.
link.
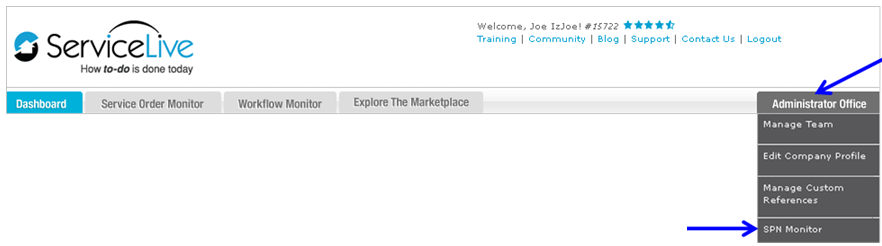
- Click on
- SPN Monitor Dashboard will open.
- Click on
 tab.
tab.

- Campaign Monitor dashboard displays.
- Campaign information will categorically display:
- Status = Campaign Status
 = Campaign Pending
 = Campaign Active
 = Campaign Inactive
- Campaign = Campaign Title and Active Dates
- SPN = Name of Select Provider Network will display.
- View All = Click this link to view all campaigns (Pending, Active and Inactive).
- Invited Firms | Providers = Number of Firms (and corresponding number of Service Pros) invited via specific campaign.
- Status = Campaign Status
- Click on
 button to view campaign details.

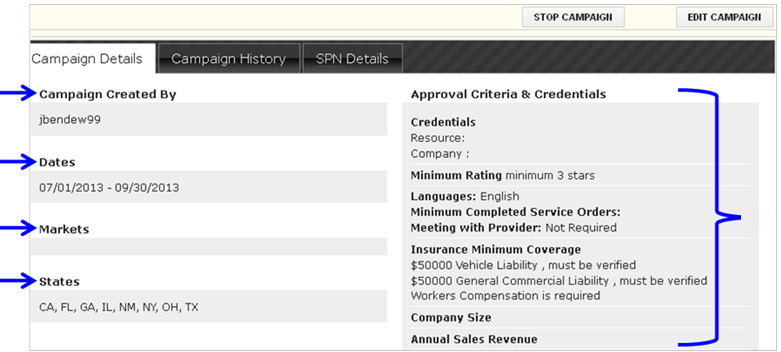
- Campaign Details:
Note: For additional information about these categories, refer to Create Campaign Tab lesson in Admin Office Extended – SPN Monitor course.- Campaign Author
- Campaign Active Dates
- Markets
- States
- Approval Criteria and Credentials
- Campaign History:
ServiceLive Compliance will be notified once a campaign is created, they will review it, and approve it.
Note: If unauthorized or inappropriate content is found, ServiceLive Compliance will contact SPN Manager to explain required changes that need to be made before approval.- Click on
 link.
link. - Name = Person who executed action.
- Action = Type of action that occurred.
- Date = Date action occurred.

- Click on
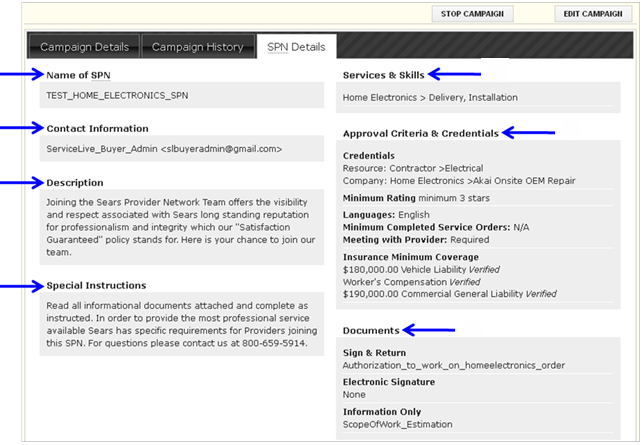
- SPN Details:
Note: For additional information about these categories, refer to Create Network Tab lesson in Admin Office Extended – SPN Monitor (Requires Password) course.- Name of SPN
- Contact Information
- Description
- Special Instructions
- Skills and Services
- Approval Criteria and Credentials
- Documents
- Edit Campaign:
- Click on button to view campaign details.

- Click on
 button.

- Refer to Create Campaign Tab lesson in Admin Office Extended – SPN Monitor course for details.
- Click on
- Stop Campaign:
Note: This action is only available for Active Campaigns.- Click on button to view campaign details.
- Click on
 button.

- Campaign is automatically marked as Inactive.
- Click on