This lesson explains how to locate and manage Service Orders that are in Problem status including how to resolve issue (problem) using Issue Resolution tab and Cancel a Problem Service Order. A Service Order is in Problem status when there is an issue or error submitted by either Buyer or Provider in regards to completion of Service Order.
- Lifecycle/Status of a Service Order:
- Draft – After Buyer creates a new Service Order OR edits a Draft Service Order AND saves as Draft, Service Order will be located on Draft tab until Buyer Posts or Deletes Service Order. Provider will not be able to view until Buyer posts Service Order.
- Posted
- Buyer Posts a Name Your Price Service Order, which they identify price. Buyer can view from Posted Provider can view/take action from Received tab.
- Buyer Posts a Bid Request Service Order, which they ask for bids.
- Bid Requests functionality can be enabled in ServiceLive at Buyers request.
- If not enabled, Buyer will not see this tab.
- Buyer will be able to view Bid Request Service Orders from Posted Provider can view/take action from Bid Requests tab.
- Accepted – On Name Your Price, once Provider Accepts or Buyer Accepts Provider’s Counter Offer, Service Order will change to Accepted status and will be located on Accepted tab until Service Date/Time. On Bid Requests, once Buyer Accepts Bid, Service Order will change to Accepted status and will be located on Accepted tab until Service Date/Time.
- Active – Once the Service Date/Time occurs, Service Order will change to Active status and will be located on Today tab.
- Completed – Once Provider submits Service Order for payment, Service Order will change to Completed status and will be located on Today tab.
- Closed – Once Buyer Closes and Pays, Service Order will change to Closed status and will be located on Inactive tab.
- Service Orders can be in six other statuses: Cancelled, Voided and Deleted status located on Inactive tab, Pending Cancel and Expired status located on Today tab, and Problem status located on Problem tab.
Note: There are multiple ways to navigate to Problem tab information.
- When you login to ServiceLive, Dashboard tab will open.
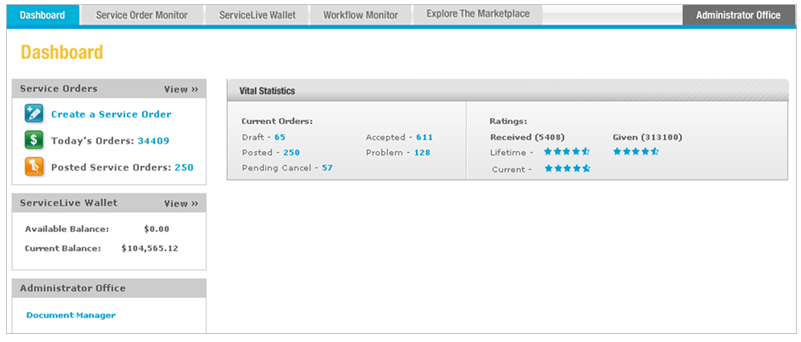
- Navigate to Problem tab:
Note: Dashboard will show number of orders currently on Problem tab.- Click on Problem link on dashboard.
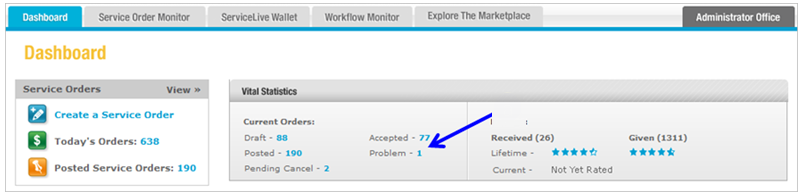
- OR click on Service Order Monitor tab.
- Click on Problem tab.

- Click on Problem link on dashboard.
- Search Filters available on Problem tab:
Note: This section explains how you can search and locate information on Problem tab. You may select any one filter or add Sub-status filter to narrow your search even more.- Status Filter = Defaults to display all Problem Service Orders.
- Sub-status Filter = Click on drop down arrow and list of Reason Codes will display. Click on appropriate choice and Service Orders you selected will display.
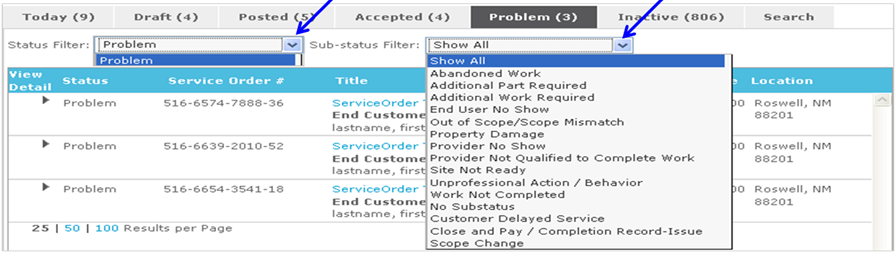
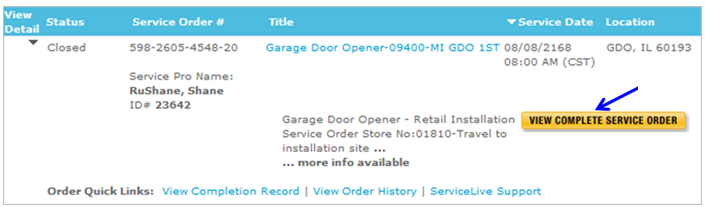
- Information that displays on Problem tab:
Note: Service Orders display most current to oldest. When you see in front of text (Service Date) in Title Bar, you can click on text to change Service Orders to display oldest to most current and click again and display will return to original order.- View Detail, click on button in this column to display Service Order details and click on button to collapse to original view. You can also click on text in columns to expand/collapse Service Order details.
- Status = Status of Service Order (i.e. Problem).
- Service Order # = Number associated with specific Service Order (Service Order defines scope of work as requested by Buyer).
- Title = Name entered for Service Order, click on title link to display Service Order details.
- Service Date = Date and Time Service is scheduled.
- Click on text (Service Date) with in front to change sort order.
- Location = City, State, and Zip Code for Service visit.
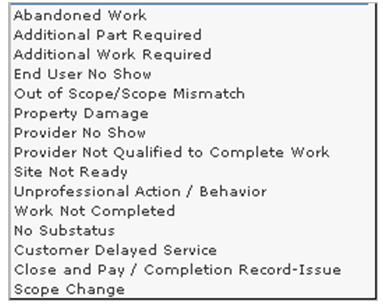
- Sub-status = Reason for problem that was entered by either Buyer or Provider.

- Examples of problem reason codes that will display in sub-status of Service Order.
- View Service Order Details:
- Click on
 button in View Detail column to display Service Order details.
 - OR click on Title link to display Service Order details.
- Click on
 button to open Service Order.
 - Note: Order Quick Links will take you to specific tab (i.e. Order History). The Quick Links will vary depending on status of Service Order.
- This will open Summary tab, which includes the tabs and sections displayed below. Details about Summary tab are available in Summary Tab lesson in Close and Pay a Service Order course.
Note: Click on or
or  buttons to expand or collapse sections.
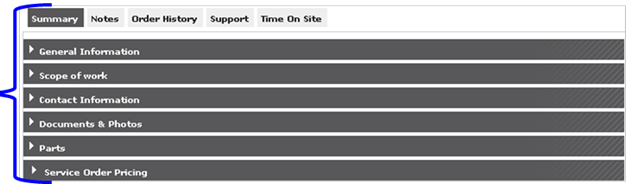
- Click on
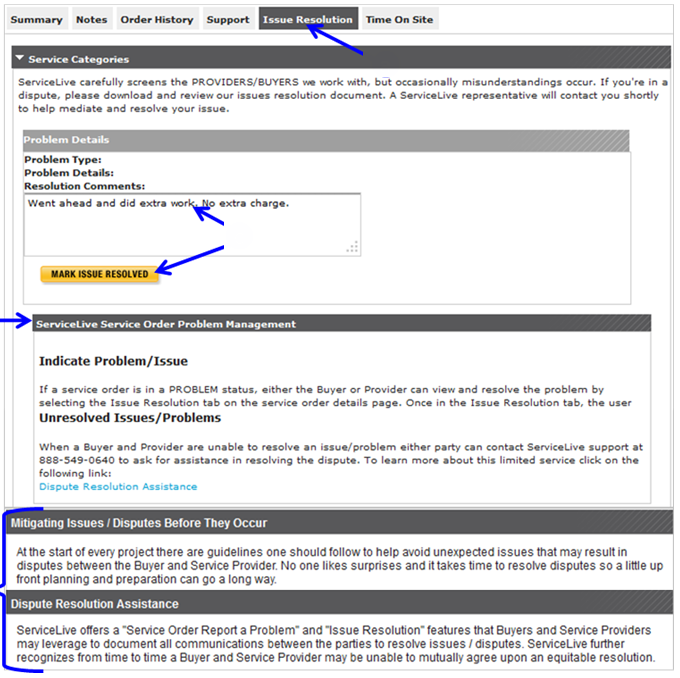
- Resolving an issue:
- Click on Issue Resolution tab.
- Read and follow instructions under ServiceLive Service Order Problem Management.
- Type in Resolution Comments, click on
 button.
Note: Depending on the Problem Type, you will provide different comments. - Please refer also to the Mitigating Issues/Disputes Before They Occur section and Dispute Resolution Assistance section on this tab for Problem Resolution information.
- Report a Problem:
- Steps to Report a Problem are available in Report a Problem Tab lesson in Close and Pay a Service Order course.
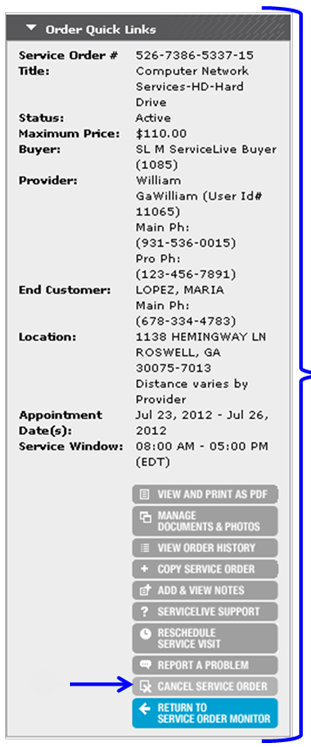
- Cancel a Service Order:
- Once you have clicked on button to open Service Order, widget will display on right side of screen.
- Click on
 button.
- For some Buyers, checkbox labeled “Check this box if the Provider needs to be paid an additional amount for this order” is grayed out or doesn’t show at all, as this is dependent upon Buyer processes and status of Service Order in relation to Appointment Date/Time. Skip to Step 9f.
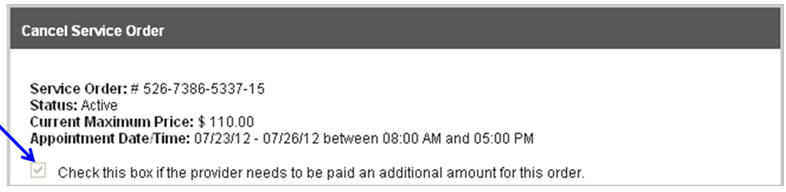
- For some Buyers, checkbox labeled “Check this box if the Provider needs to be paid an additional amount for this order” is available for Buyer agent to determine if Provider to be paid (as this is dependent upon Buyer processes and status of Service Order in relation to Appointment Date/Time.). Continue to Step 9e.

- Select or deselect checkbox (as appropriate) labeled “Check this box if the Provider needs to be paid an additional amount for this order”.
Note: Fields with * (red asterisk) must be completed. - Click on drop down arrow in Reason for Canceling to display choices.
- Scroll down and click on appropriate reason for canceling Service Order.
- Cancellation amount will be auto populated (can edit as appropriate).
- Type comments about why you are canceling Service Order.
- Click on

Note: For some Buyers (Sears RI) click the button to take you to Manage Scope Change screen. Specific instructions are available from your company.

- If “Check this box if the Provider needs to be paid an additional amount for this order” is NOT selected AND there are $0 Provider will be paid, Service Order will be Cancelled and be located on Inactive tab and you will receive message, “Service Order was successfully Cancelled”.
Note: If Buyer Cancels Service Order that money is still owed to Provider, the only way to pay Provider is to create a new Service Order. Consider checking the box and submitting $0 to be paid as shown in Step l (allowing the opportunity for Provider to request a different amount as applicable).

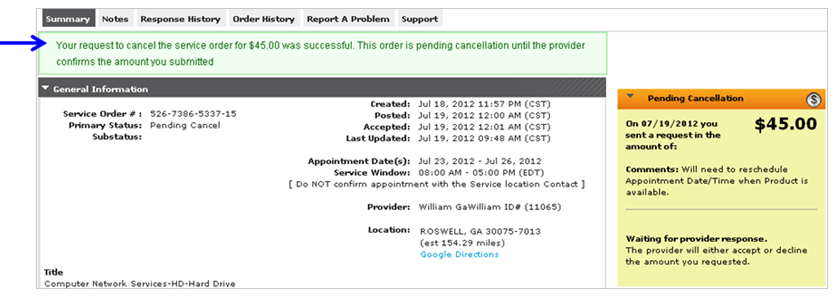
- If “Check this box if the Provider needs to be paid an additional amount for this order” is selected AND if there are $0 or greater Provider will be paid. Service Order will be in Pending Cancel status and you will receive message, “Your request to cancel Service Order for $xx.xx was successful” and you will have to wait until Provider responds. For details, refer to Pending Cancel lesson in Service Order Monitor course.
- Once you have clicked on