This lesson explains how to Create a Service Order by using SKUs. SKUs will be created prior to use by ServiceLive Admin. This lesson explains how to select SKUs and then how to enter each tab to add, edit or confirm information.
- Navigate to Original Service Order:
- Click on
 link from ServiceLive dashboard.
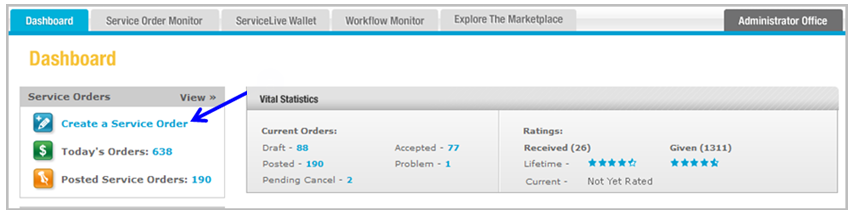
- Click on
- Add SKU:
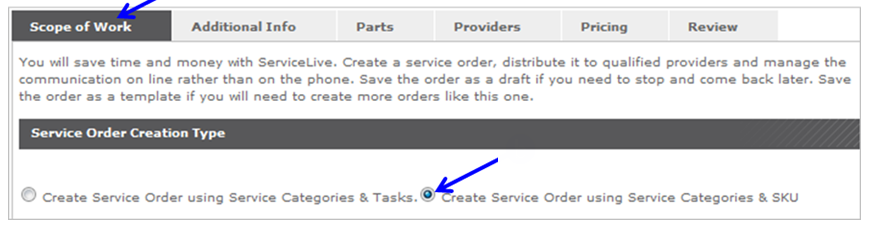
 tab will display.
- Select radio button labeled “Create Service Order using Service Categories & SKU”.
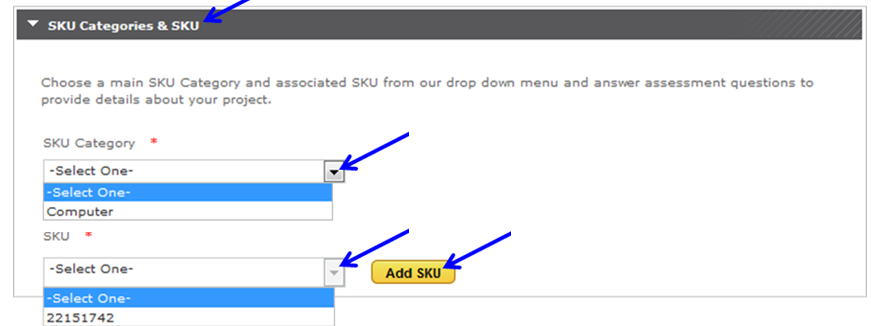
- SKU Categories & SKU section will display.
- Click on drop down arrow labeled “SKU Category” and select appropriate choice.
- Click on drop down arrow labeled “SKU” and select appropriate choice.
Note: Nothing will appear in this category unless you select a SKU Category first. - Click on
 button.
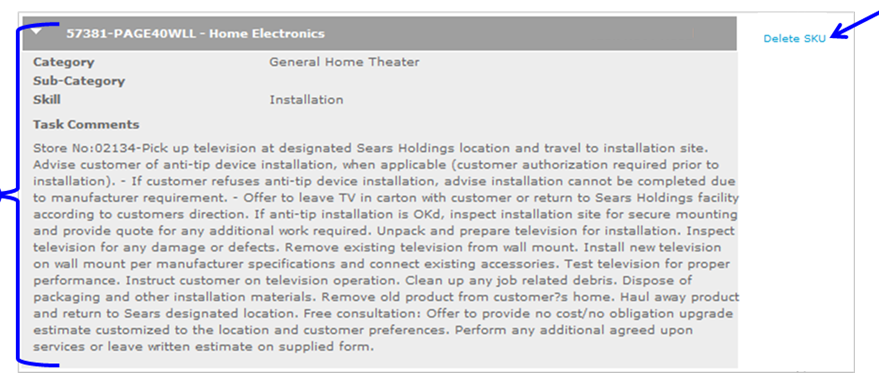
- SKU Task will display.
- Click on
 link to delete SKU Task.
- To add another SKU, repeat steps 2a – 2f.
Note: You can only add another SKU that has the same Main Service Category.
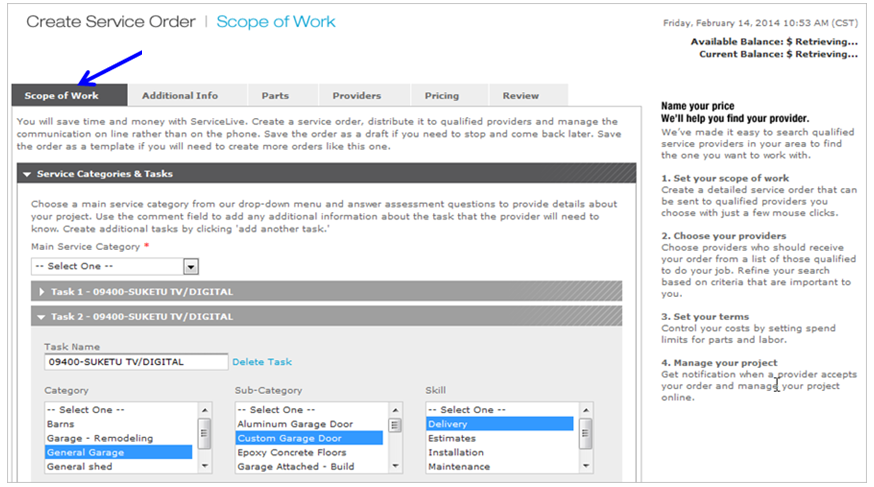
- Edit, Add or Confirm Information in Service Order:
- Information entered for SKU during SKU creation will automatically load in Service Order.
Note: You will need to edit or add different information depending on what information was entered in SKU Maintenance. Your company will have documents to help isolate what specific information needs to be edited, added, or confirmed. - Continue to scroll through tab and edit, add or confirm information contained on tab.
- Click
 button at bottom of page to continue creating Service Order.
Note: For additional details refer to Scope of Work Tab lesson in Create a Service Order course.
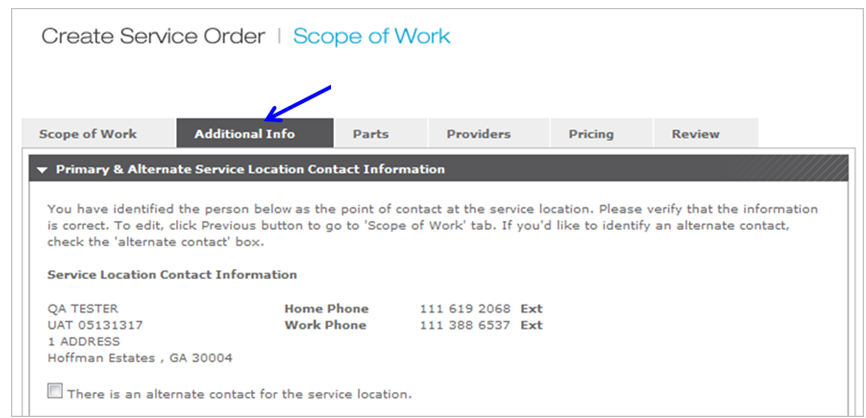
- Click on
 tab.
tab. - Scroll through and edit, add or confirm information contained on tab.
- Click button at bottom of page to continue creating Service Order.
Note: For additional details refer to Additional Info Tab lesson in Create a Service Order course.
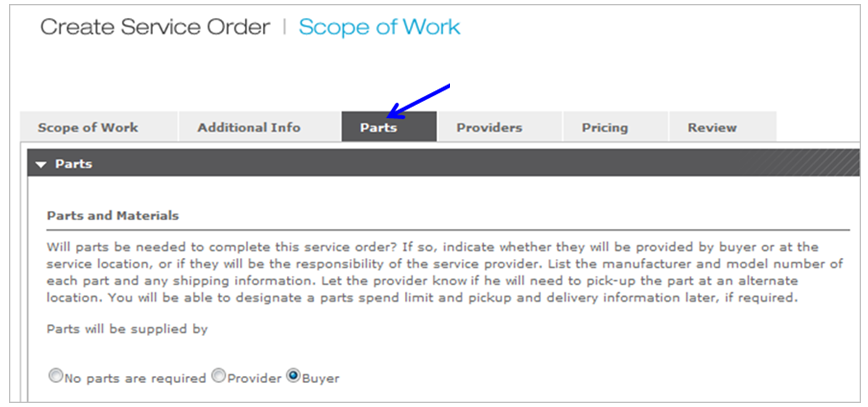
- Click on
 tab.
tab. - Scroll through and edit, add or confirm information contained on tab.
- Click button at bottom of page to continue creating Service Order.
Note: For additional details refer to Parts Tab lesson in Create a Service Order course.
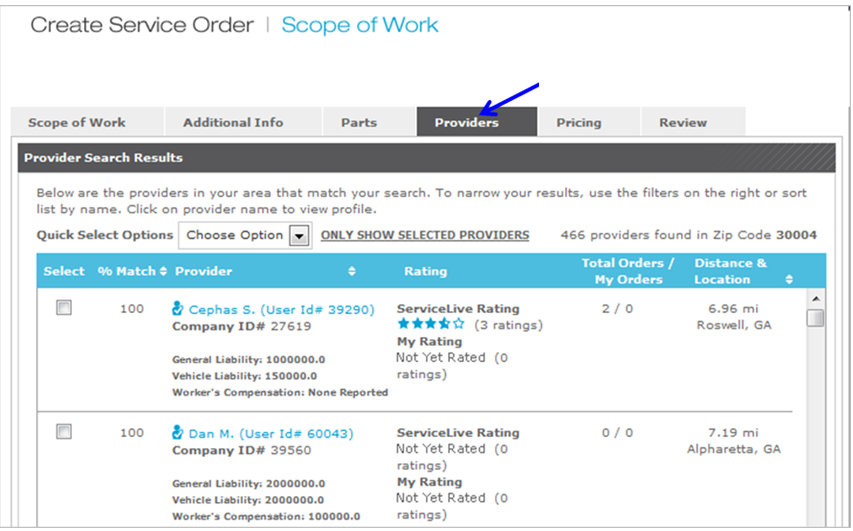
- Click on
 tab.
tab. - Scroll through and edit, add or confirm information contained on tab.
- Click button at bottom of page to continue creating Service Order.
Note: For additional details refer to Providers Tab lesson in Create a Service Order course.
- Click on
 tab.
tab. - Scroll through and edit, add or confirm information contained on tab.
- Click button at bottom of page to continue creating Service Order.
Note: For additional details refer to Pricing Tab lesson in Create a Service Order course.
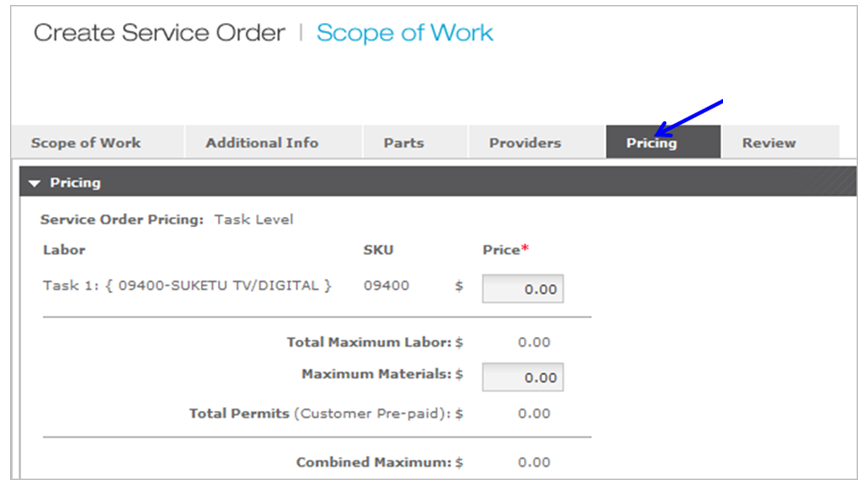
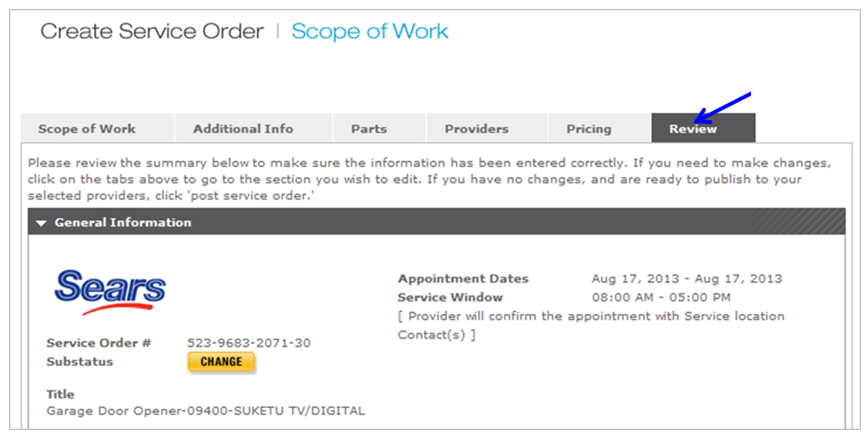
- Click on
 tab.
tab. - Scroll through and edit, add or confirm information contained on tab.
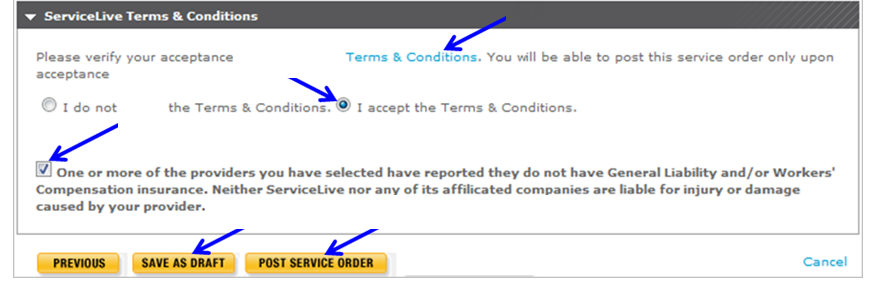
- Click on blue link
 to view Terms & Conditions.
 - Select radio button labeled “I accept the Terms & Conditions”.
- Select checkbox notification to acknowledge that you have selected Service Pros without insurance.
Note: This checkbox displays only if one or more Service Pro you selected has reported that they do not have General Liability and/or Workers’ Compensation. - Click
 button to save and exit Service Order.
 - Click
 button to Post Created Service Order.
Note: For additional details refer to Review Tab lesson in Create a Service Order course.
- Information entered for SKU during SKU creation will automatically load in Service Order.