This lesson explains how to review and post a Service Order. When Creating a Service Order you will be able to view all details of Service Order as the Provider Firm would see it, confirm that all details are correct and post Service Order from the Review tab. When Creating a Service Order by Copying and Editing or by SKU, sections on Review tab will auto-populate with information from saved template Service Order. Refer to Company documents for specific information that needs to be added, edited or confirmed on Review Tab.
- Navigate to Review Tab:
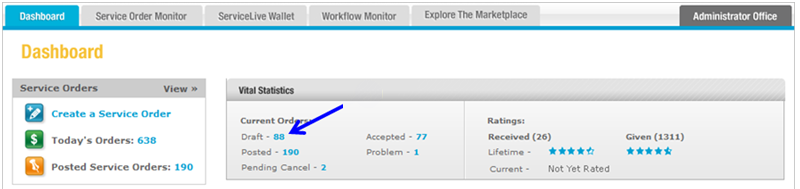
- Click on Draft link on dashboard.
- OR if you have already Created a Service Order and need to edit, click on
 tab.
tab. - Click on
 tab.
tab.

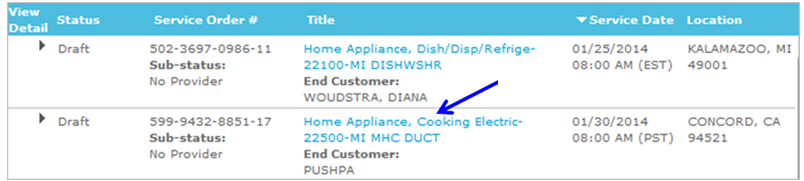
- Click on title link of appropriate Service Order.
- Click on
 button.

- Click on
 tab.
tab.
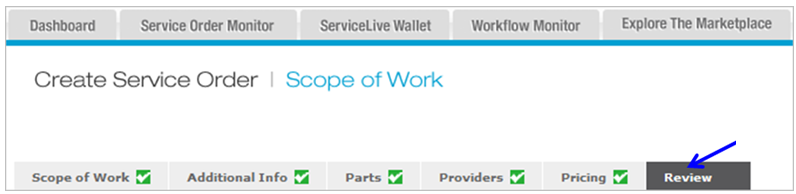
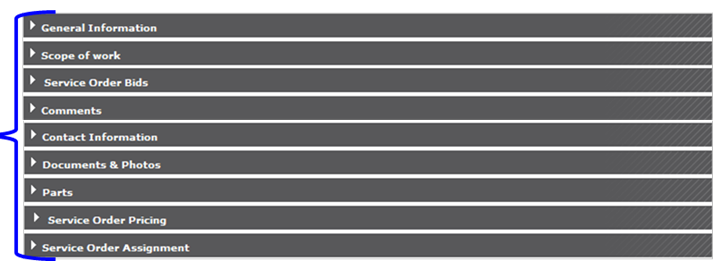
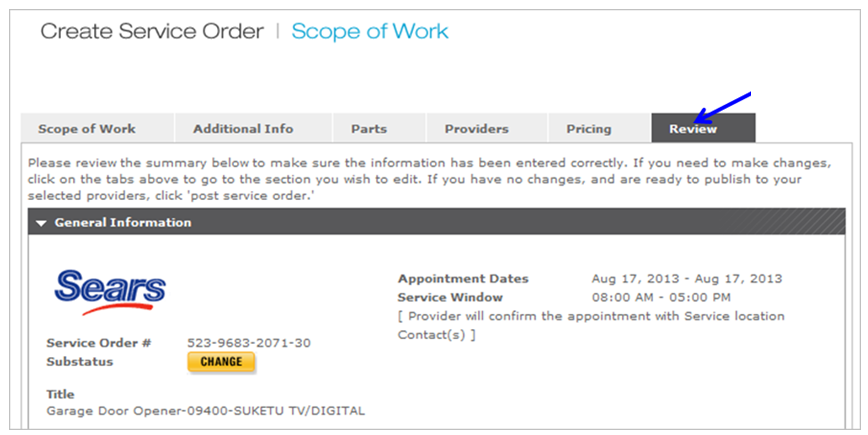
- Review tab will display the following Service Order details in the following sections.
Click on or
or  buttons to expand or collapse sections.
- The next several steps in this lesson identify sections/information regarding Service Order that is important to review.
- Click on Draft link on dashboard.
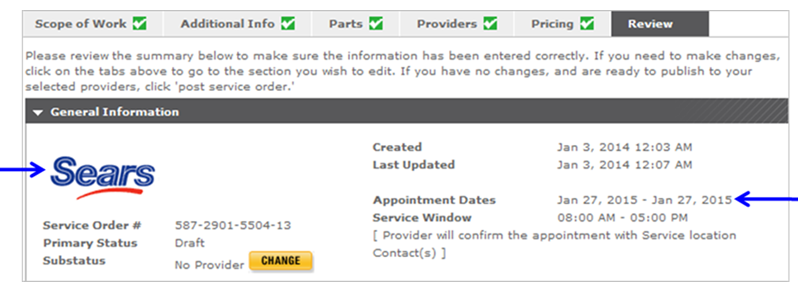
- General Information section:
- Service Order Logo
Note: Click on tab and refer to Additional Info Tab lesson in Create a Service Order course for details about adding or editing logo for Service Order.
 - Appointment Date = Date and Time set for Service Order to be completed.
- Overview = Details of what Buyer is requiring Provider to do if they Accept Service Order.
- Buyer Terms & Conditions = The Terms & Conditions Provider agrees to if they Accept Service Order.
- Special Instructions = Additional instructions about Service Order Buyer would like to communicate to Provider.
Note: Click on tab and refer to Scope of Work Tab lesson in Create a Service Order course for details about editing Overview, Buyer’s Terms & Conditions, and Special Instructions.
- Buyer References = Optional Custom Reference fields used to track specific information by Buyer.
Note: Click on tab and refer to Additional Info Tab lesson in Create a Service Order course for details about editing or adding Buyer References.
- Service Order Logo
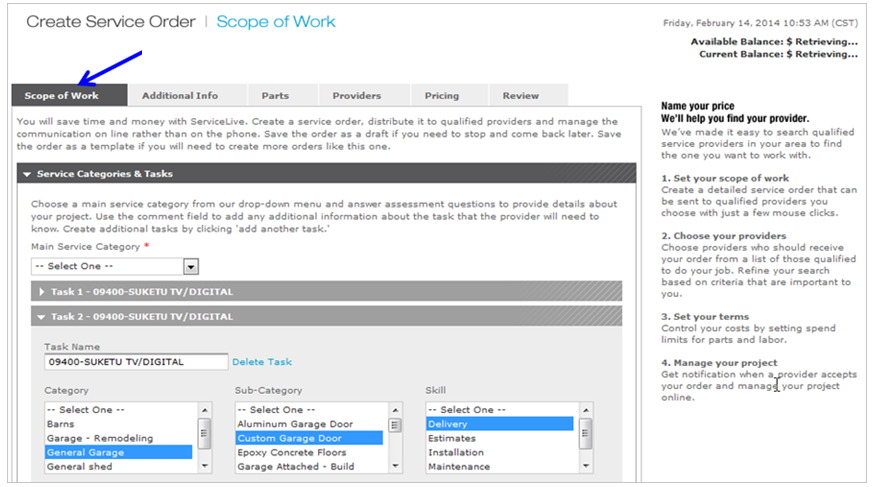
- Scope of Work section:
- Task Comments – Identifies details of required work to be completed.
Note: Click on tab and refer to Scope of Work Tab lesson in Create a Service Order course for details about edit Service Order Scope of Work.
- Task Comments – Identifies details of required work to be completed.
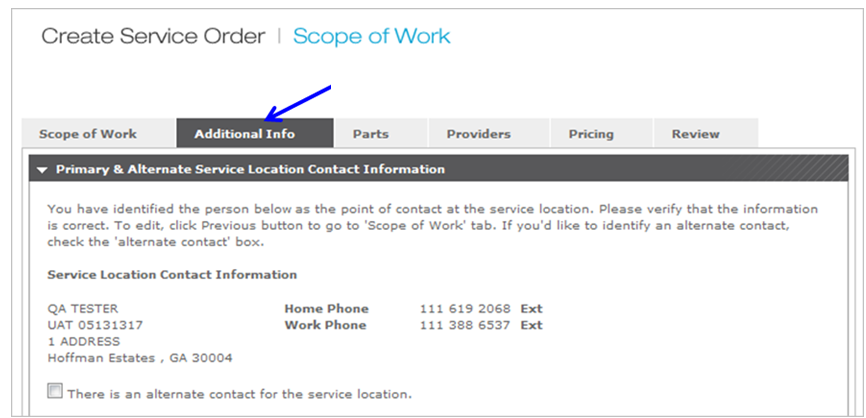
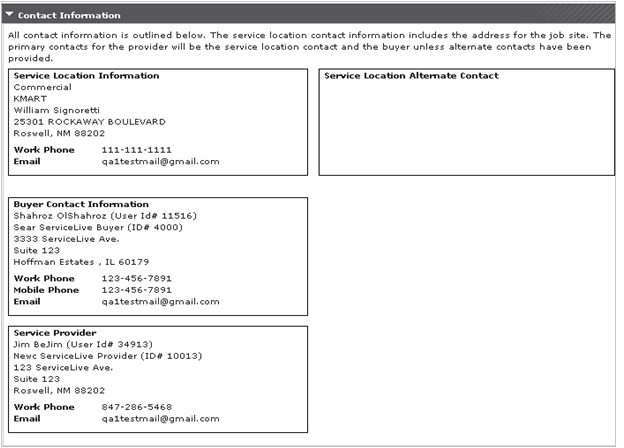
- Contact Information section:
- Identifies Service Location, Buyer Contact, and Service Provider Information for Service Order.
Note: Until Service Order is Accepted, Provider will only see Buyer ID and Company ID in this section. However, Providers will be able to identify who Buyer is by logo at top in General Information section.
Note: Click on tab and refer to Additional Info Tab lesson in Create a Service Order course for details about editing Contact Information on Service Order.
- Identifies Service Location, Buyer Contact, and Service Provider Information for Service Order.
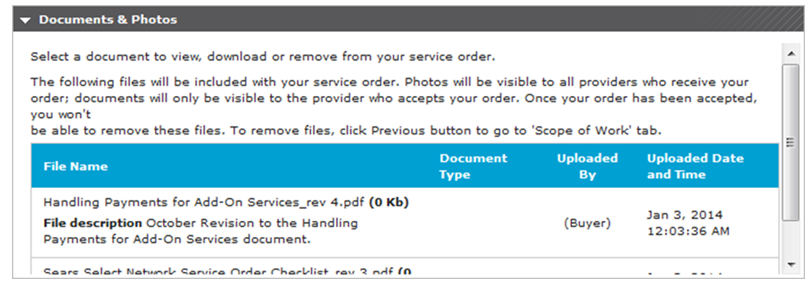
- Documents & Photos section:
- Review files that will be included with your Service Order.
- Photos will be visible to all Provider Firms who receive your Service Order; documents will only be visible to the Provider Firm who accepts your Service Order.
- Once your Service Order is accepted, you will not be able to remove files.
Note: Click on tab and refer to Additional Info Tab lesson in Create a Service Order course for details about editing and/or adding documents and photos to Service Order.
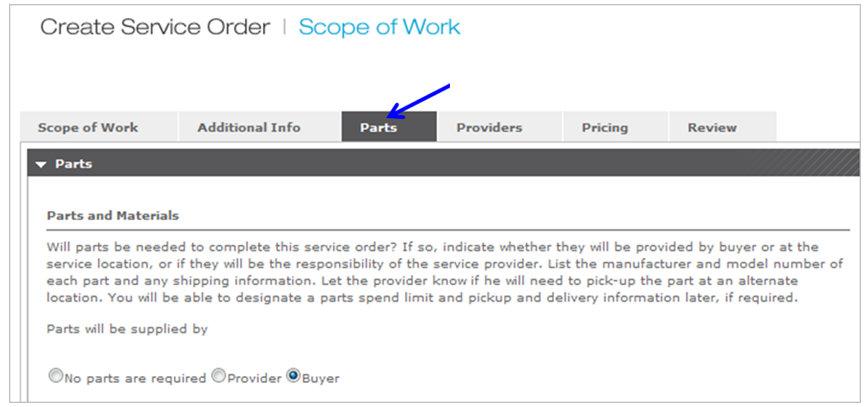
- Parts section:
- Identifies if there are Parts that require pick up and installation.
- Identifies Pick-up/Merchandise Location.
Note: Click on tab and refer to Parts Tab lesson in Create a Service Order course for further details about adding or editing Service Order parts.
- If no parts, Parts section will display with below information.
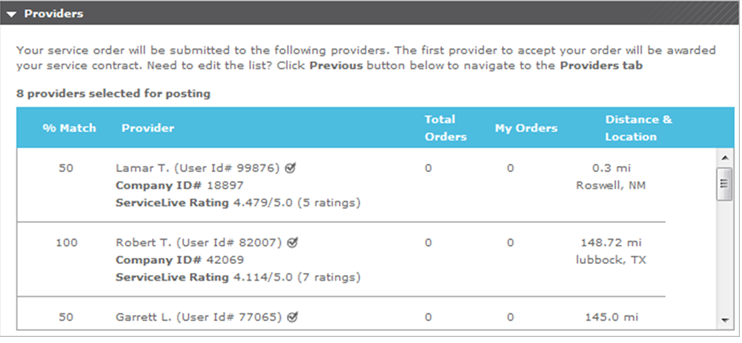
- Providers section:
- Displays Service Pros you will route the Service Order.
Note: Click on tab and refer to Providers Tab lesson in Create a Service Order course for further details about selecting Service Pros for Service Order.
- Displays Service Pros you will route the Service Order.
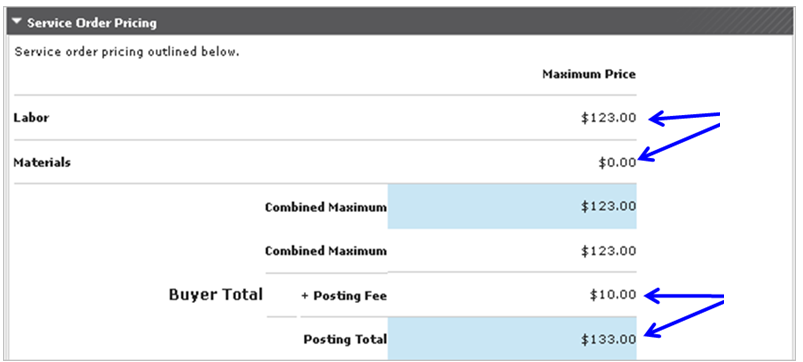
- Pricing section:
- Identifies the Labor, Material and if the Service Order requires a Permit (for some Sears RI Service Orders) this section will include the Permit Price.
- Once Service Order is in Posted status or later in lifecycle, Posting Fee and Posting Total will also display.
Note: Click on tab and refer to Pricing Tab lesson in Create a service Order course for further details about editing Service Order Price.
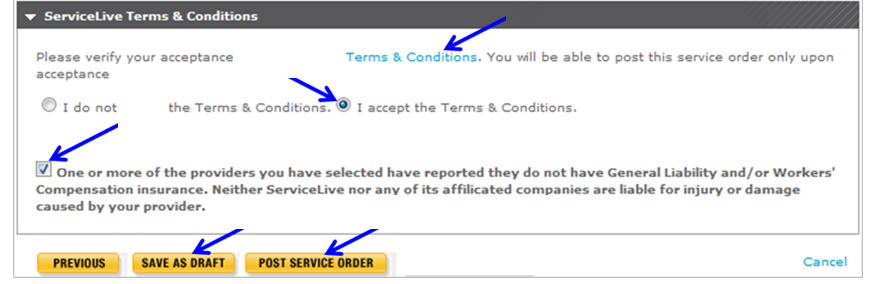
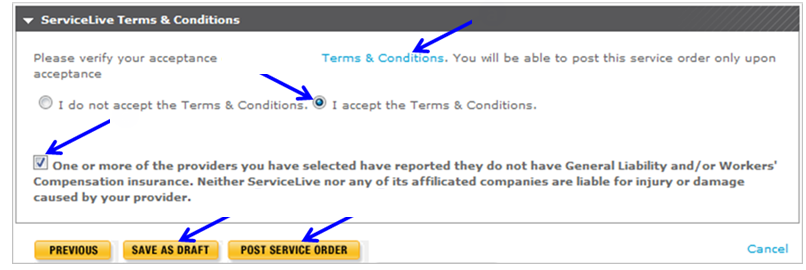
- ServiceLive Terms & Conditions section:
- Click on blue link
 to view Terms & Conditions.
 - Select radio button labeled “I accept the Terms & Conditions”.
- Select checkbox notification to acknowledge that you have selected Service Pros without insurance.
Note: This checkbox displays only if one or more Service Pro you selected has reported that they do not have General Liability and/or Workers’ Compensation OR if a Firm/Service Pro has “self-declared” that they do not need any insurance they still show in the route list but with this acknowledgement at the bottom. - Click
 button to save and exit Service Order.
 - OR click
 button to continue creating Service Order.
 - Once Service Order is posted it will be located on Posted tab. Refer to Posted Tab lesson in Service Order Monitor course for further details.
- Click on blue link