This lesson explains how to select Service Pros to route the Service Order. When Creating a Service Order all Service Pros in your area that match your search will display on Providers tab. You can filter Service Pros to find the best matches and select as many Service Pros as desired for routing. When Creating a Service Order by Copying and Editing may auto populate with selected Service Pros from template of Service Order. Refer to Company documents for specific information that needs to be added, edited or confirmed on Providers Tab.
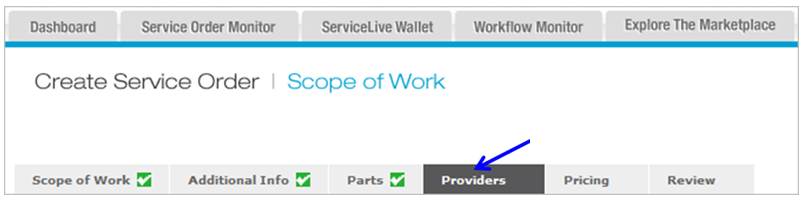
- Navigate to Providers Tab:
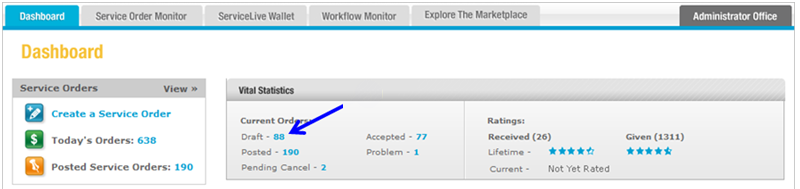
- Click on Draft link on dashboard.
- OR if you have already Created a Service Order and need to edit, click on
 tab.
tab. - Click on
 tab.
tab.

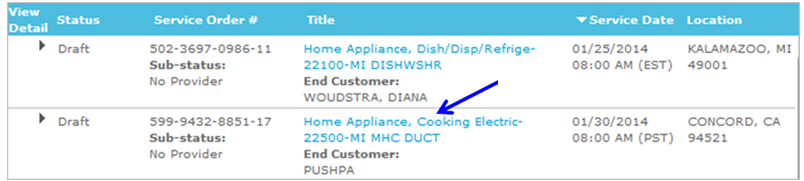
- Click on title link of appropriate Service Order.
- Click on
 button.

- Click on
 tab.
tab.
- Click on Draft link on dashboard.
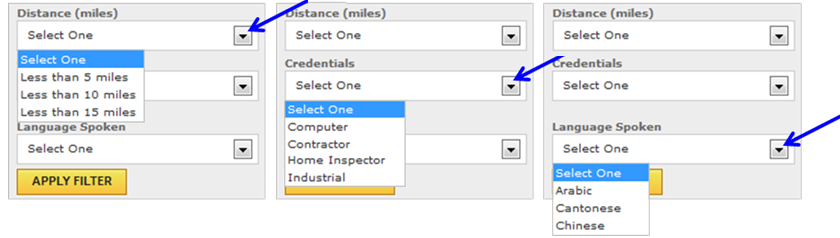
- Search Filters available on the Providers Tab:
Note: Filters will vary depending on SPN, listed below are all possible Filters that may appear when you are creating a Service Order. You may select one or multiple Filters. Once desired Filters are selected, click on button and Service Pros matching filter criteria will display.
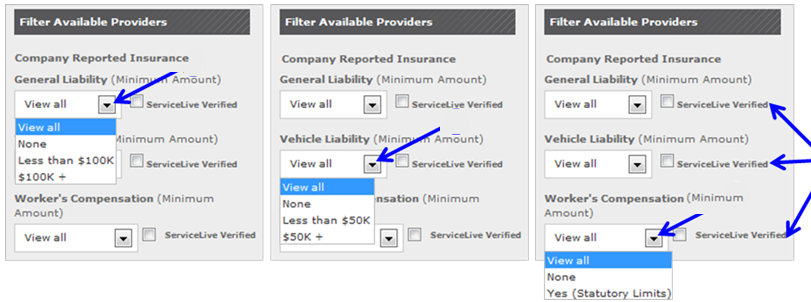
- General Liability = Click on drop down arrow to filter by General Liability amounts and select appropriate choice.
- Vehicle Liability = Click on drop down arrow to filter by Vehicle Liability amounts and select appropriate choice.
- Worker’s Compensation = Click on drop down arrow to filter by Worker’s Compensation status and select appropriate choice.
- ServiceLive Verified = Select appropriate checkbox labeled “ServiceLive Verified” to display Service Pros that have General Liability coverage, Firm Vehicle Insurance or Worker’s Compensation coverage verified.
Note: Verification is done by ServiceLive Compliance team to ensure that insurance documents meet the verified requirements established by ServiceLive.
- If a firm has “self-declared” that they do not need any insurance they still show in the route list but with this acknowledgement at the bottom of the Review Tab. See Review Tab lesson in Create Service Order course for more information.
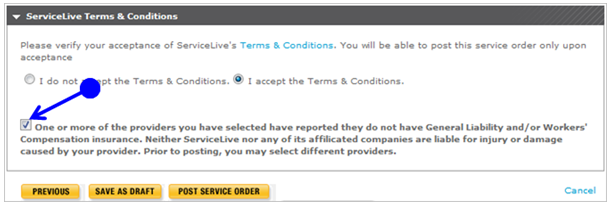
- If a firm has “self-declared” that they do not need any insurance they still show in the route list but with this acknowledgement at the bottom of the Review Tab. See Review Tab lesson in Create Service Order course for more information.
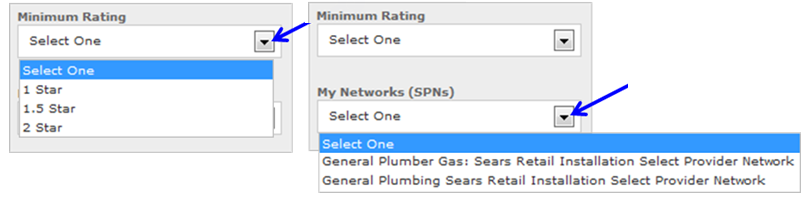
- Minimum Rating = Click on drop down arrow to filter by Service Pro minimum rating and select appropriate choice.
- My Networks (SPNs) = Automatically defaults to display Service Pros according to the SPN that you created Service Order for. To view Service Pros from other SPNs, click the drop down arrow and select appropriate choice.
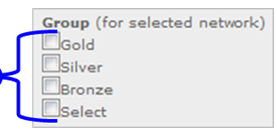
- Group = Select appropriate checkbox(es) to display Service Pros in different routing tiers.
Note: This section will only appear if an SPN is selected first.
- Distance (miles) = Click on drop down arrow to display distance choices and select appropriate choice.
- Credentials = Click on drop down arrow to display Credential choices and select appropriate choice.
- Language Spoken = Click on drop down arrow to display Language choices and select appropriate choice.
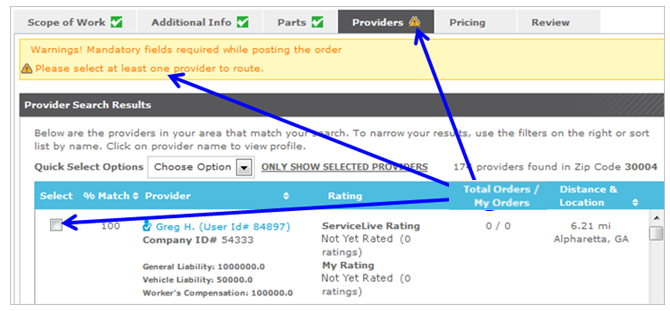
- Information categorically displayed on Providers tab:
Note: When you see button behind text in Title bar, you can click on text to change the displayed sort order of Service Orders. By default Service Pros are displayed according to % Match and then Distance. You can change which Service Providers are displayed by using filters and sorting categories to search.
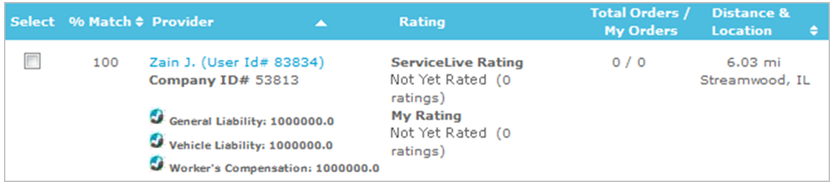
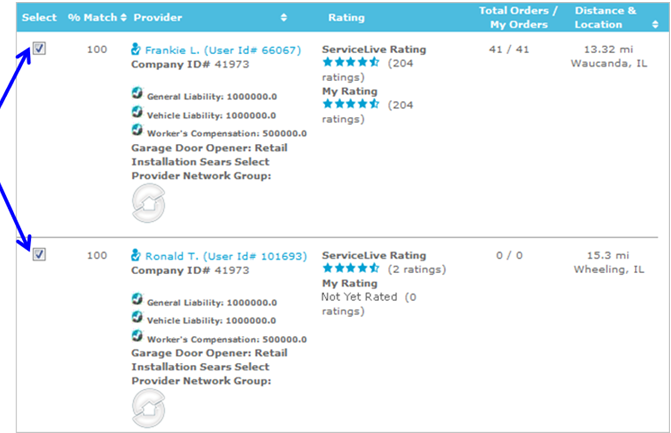
- Select = Click checkboxes to select Service Pro you would like to route Service Order.
- % Match = Percent that Service Pro meets criteria according to Category, Sub-Category and skill selected.
- Provider = Service Pro Name, Id, Company Id, Company Reported Insurance, SPN and Tiered Routing status.
- Rating = Buyer Ratings of Service Pro
- ServiceLive Rating = Service Pros overall ratings from all Buyers on ServicveLive.
- My Rating = Ratings that your Buyer Firm has given Service Pro.
- Total Orders/My Orders = Total number of Service Orders completed on ServiceLive verses the number of Service Orders completed for Buyer.
- Distance & Location = Distance, based on zip code, of address listed in Service Pro’s profile to City/State of Service Location.

- View Service Pro Information:
- Click on Service Pro name link to display Service Pro Profile.
- This will open a new browser window, which will display information about Service Pro.
Note: For accounts where SPN is enable, see Member Manager Tab lesson in Admin Office Extended – SPN Monitor course for further details on Member Manager.
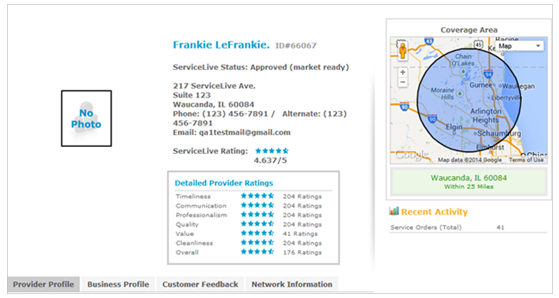
- Click on Service Pro name link to display Service Pro Profile.
- Select Service Pros for Service Order:
- Click on checkbox(es) of Service Pros you desire to route Service Order.
- Click
 button to save and exit Service Order.
 - OR click
 button to continue creating Service Order. Refer to Pricing lesson in Create a Service Order course for next steps.
- Click on checkbox(es) of Service Pros you desire to route Service Order.
- If you completed all required fields, a
 icon displays on Providers tab indicating successful tab completion.
 - If you have one or multiple data errors, a
 icon displays on Providers tab and errors display in red. You will need to go back and make the necessary changes and click on button or button.