This lesson explains how to add parts to your Service Order. When Creating a Service Order you will be able to indicate if Parts are required, and if so, whether they will be provided by Buyer, be at the service location or if they will be the responsibility of the Provider Firm from the Parts tab. You can enter manufacturer and model number for each part, any shipping information and/or you can let the Provider Firm know if he will need to pick-up the part. When Creating a Service Order by Copying and Editing or by SKU, sections on Parts Tab will auto-populate with information from saved Draft template Service Order. Refer to Company documents for specific information that needs to be added, edited or confirmed on Parts tab.
- Navigate to Parts Tab:
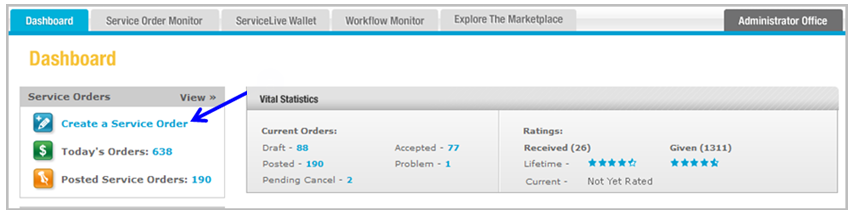
- Click on Draft link on dashboard.
- OR if you have already Created a Service Order and need to edit, click on
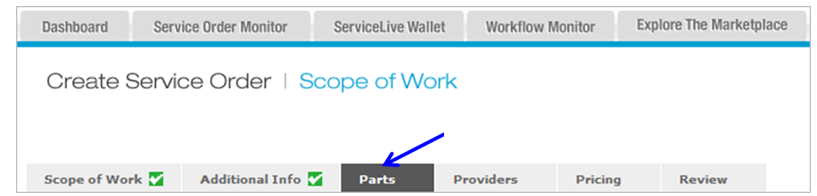
 tab.
tab. - Click on
 tab.
tab.

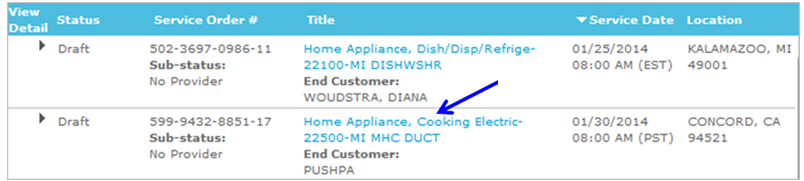
- Click on title link of appropriate Service Order.
- Click on
 button.

- Click on
 tab.
tab.
- Click on Draft link on dashboard.
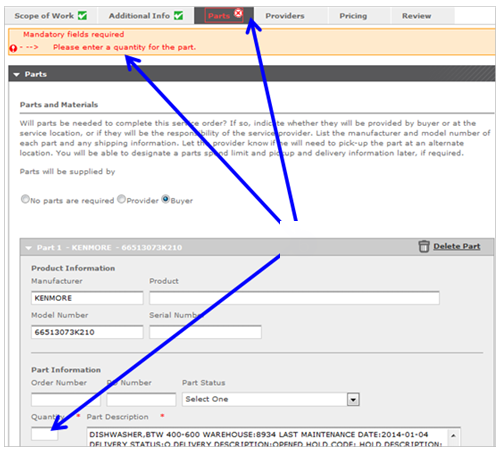
- Parts Section:
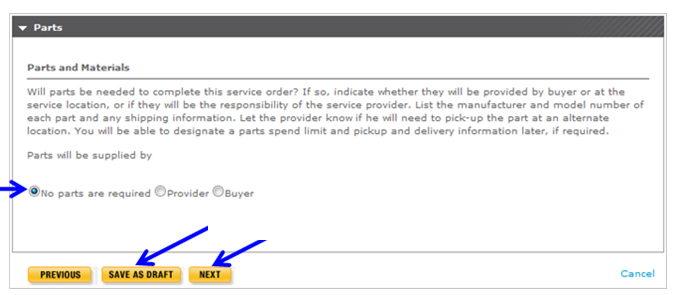
Note: This initial section may already be selected if you are creating a Service Order by copying or by SKU.- Click on appropriate radio button to indicate whether parts are needed for this Service Order.
- No Parts Required
- Provider = Indicates that the Provider Firm is responsible for part.
- Buyer = Indicated that Buyer (or the Service Location) is responsible for part.
- If you selected radio button labeled “No parts are required” or “Provider” click
 button to save and exit Service Order.
 - OR click
 button to continue creating Service Order. Refer to Providers Tab lesson in Create a Service Order course for next steps.
- If you selected radio button labeled “Buyer”, click in fields and enter/edit appropriate information for Product Information, Part Information and Part Pick Up Information sections.
Note: Red Asterisk (*) indicates required field. - Click on drop down arrows and select appropriate choices.
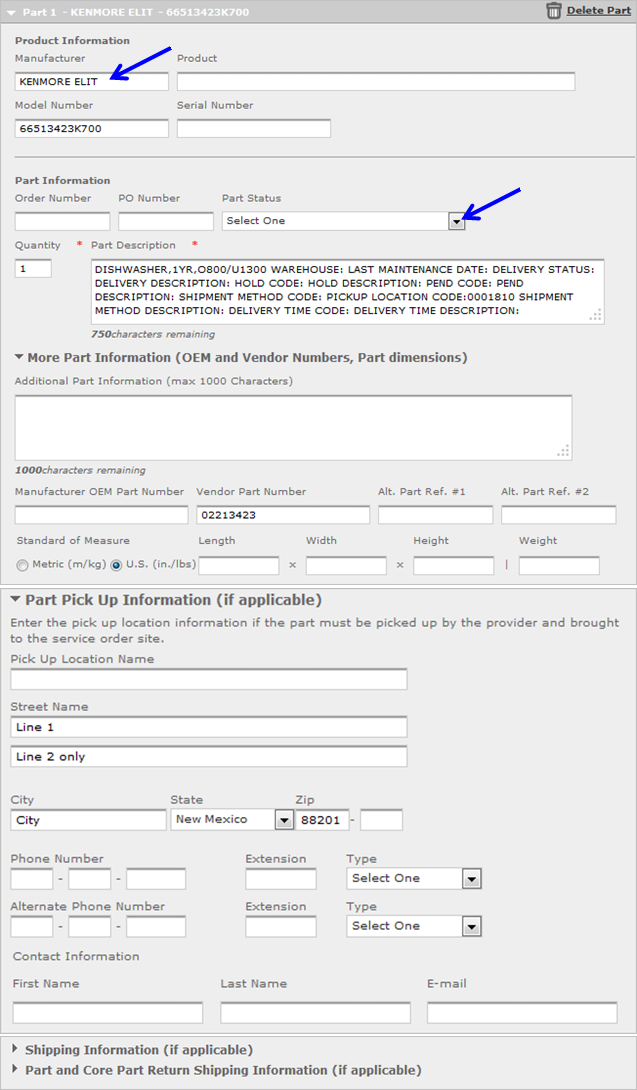
- Click on
 buttons to expand section (if applicable).

- Click on drop down arrows and select appropriate choices.
- Enter appropriate information in fields.
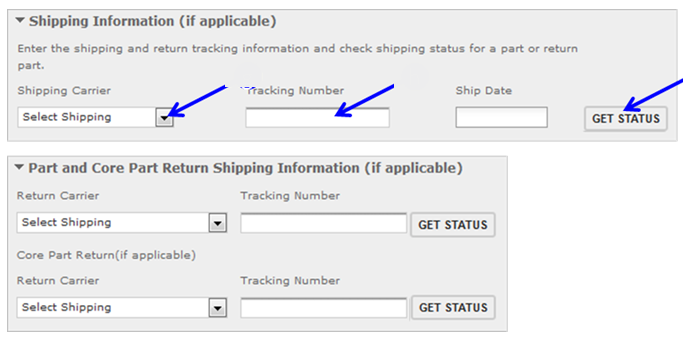
- Click on
 button to check shipping status for a part or return.
- Click on appropriate radio button to indicate whether parts are needed for this Service Order.
- To add another Part, click on
 button and repeat step 2.
 - Click button to save and exit Service Order.
- OR click button to continue creating Service Order. Refer to Providers lesson in Create a Service Order course for next steps.
- If you completed all required fields, a
 icon displays on Scope of Work tab indicating successful tab completion.
 - If you have one or multiple data errors, a
 icon displays on Scope of Work tab and errors display in red. You will need to go back and make the necessary changes and click on button OR button.