This lesson explains how to continue creation of a Service Order on the Additional Info Tab. When Creating a Service Order you will be able to able to add Primary and Alternate Service Location, Contact Information and Buyer Support Contact Information from the Additional Info tab. You can also choose a logo for the Service Order and add Custom References, which allow for easier searching. When Creating a Service Order by Copying and Editing or by SKU, sections on Additional Info Tab will auto-populate with information from saved Draft template or SKU. Refer to Company documents for specific information that needs to be added, edited or confirmed on Additional Info Tab.
- Navigate to Additional Info Tab:
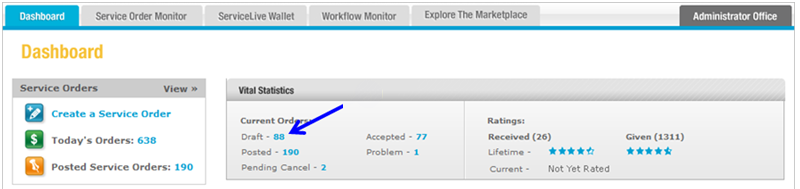
- Click on Draft link on dashboard.
- OR if you have already Created a Service Order and need to edit, click on
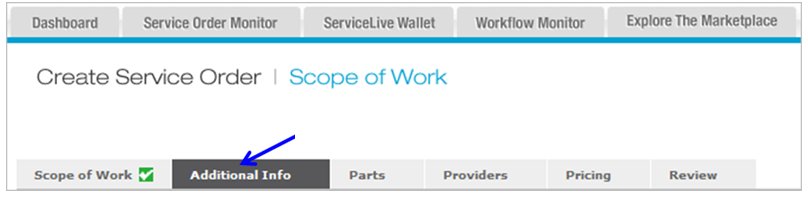
 tab.
tab. - Click on
 tab.
tab.

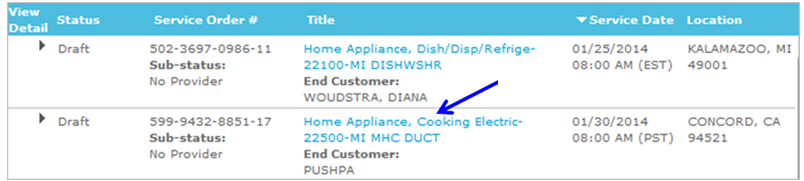
- Click on title link of appropriate Service Order.
- Click on
 button.

- Click on
 tab.
tab.
- Click on Draft link on dashboard.
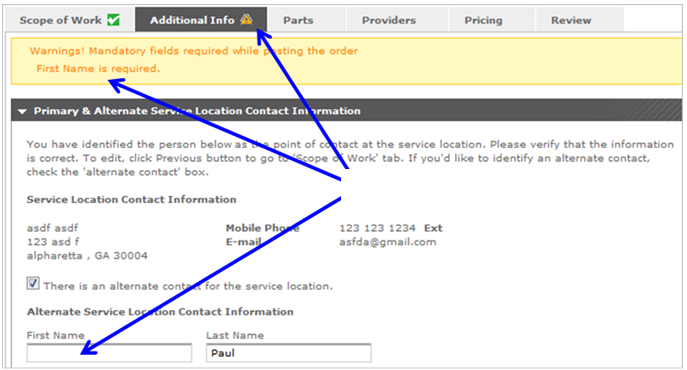
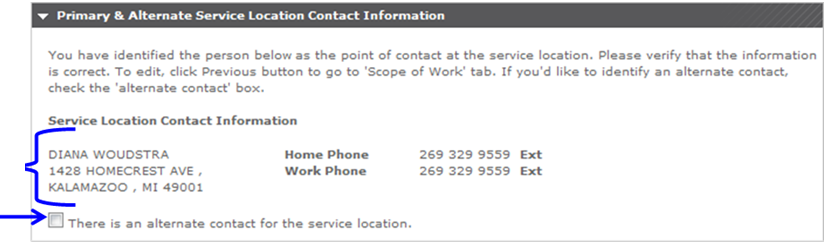
- Primary & Alternate Service Location Contact Information section:
- Confirm the Primary Service Location Contact Information.
Note: The primary point of contact was entered on the Scope of Work tab, to edit this information, refer to Scope of Work Tab lesson in Create a Service Order course. - Select checkbox if you would like to list an alternate contact for the service location, otherwise continue to step 3.
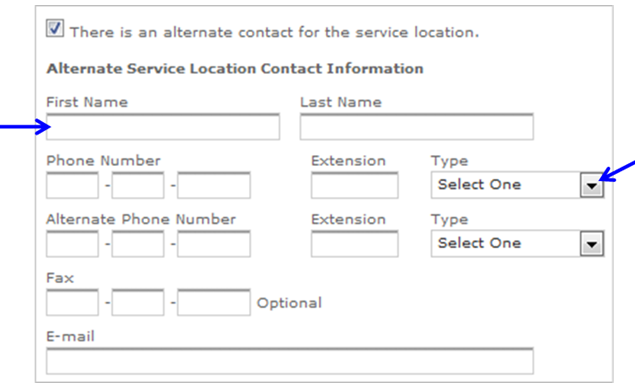
- Enter or edit appropriate information in fields.
- Click on drop down arrows and select appropriate choices.
- Confirm the Primary Service Location Contact Information.
- Buyer & Buyer Support Contact Information section:
- Confirm the Buyer Contact Information.
Note: To edit Buyer Contact Information, contact your Company’s Administrator. - Select checkbox if you would like to list an alternate Buyer contact.
- Click on drop down arrow and select appropriate choice.

- Confirm the Buyer Contact Information.
- Branding Information (Optional):
ServiceLive allows you to add your company Logo to your Service Order. Choose logo you would like to include from list or talk to your Company’s Administrator if you need to upload additional logos.- To view logo, select radio button of appropriate logo.
Note: If you are creating a Service Order by copying or by SKU’s previously selected logo will be indicated by radio button. - Click on
 button to see logo.
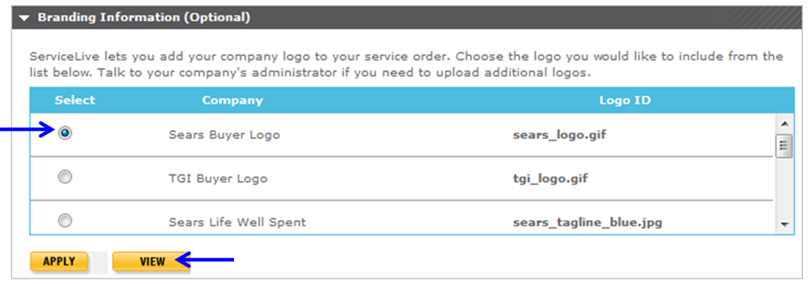
- OR to apply or edit logo to Service Order, select radio button of appropriate logo(s).
- Click on
 button.
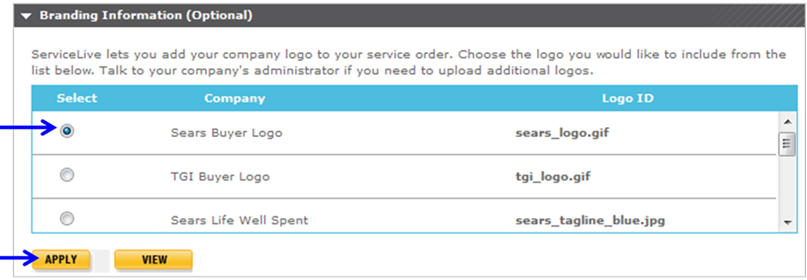
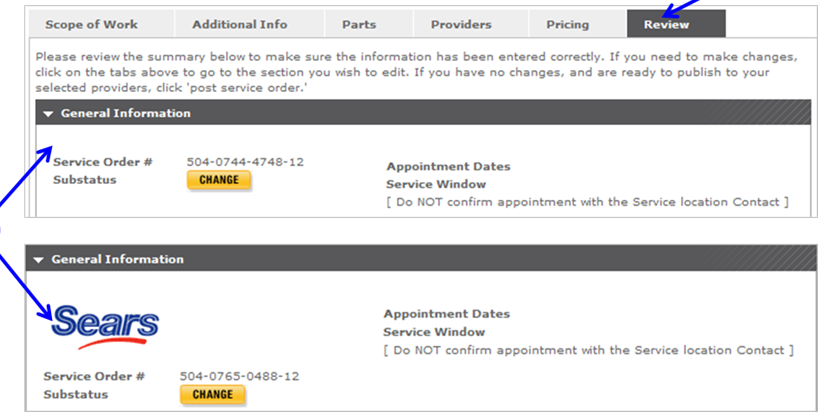
- To check that a logo has actually applied to Service Order, click on
 tab.
tab. - If the logo applied, it will display in the General Information section.
Note: Logo will also apply to top left of Service Orders on Customer and Provider copies.
- To view logo, select radio button of appropriate logo.
- Custom References (Optional) section:
Note: Custom References allow Buyer to be able to do customizable searches for Service Orders based on information specific to Buyer. Listed below are some common Reference Fields. Speak your Company Admin or your ServiceLive Liasion about adding or customizing these field to meet Company needs.- Enter or edit in appropriate information in fields.
Note: Red asterisk (*) indicates required fields. - Click
 button to save and exit Service Order.
 - OR click
 button to continue creating Service Order. Refer to Parts Tab lesson in Create a Service Order course for next steps.
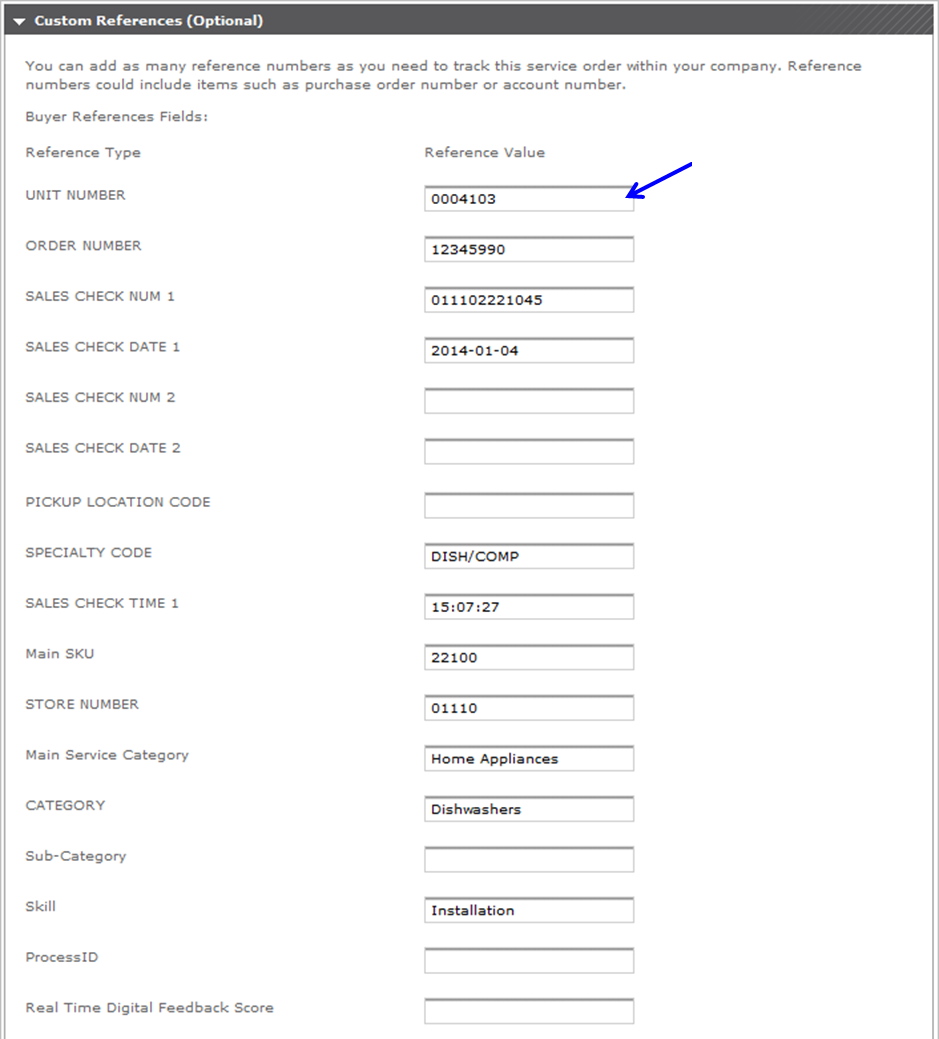
- Enter or edit in appropriate information in fields.
- If you completed all required fields, a
 icon displays on Additional Info tab indicating successful tab completion.
 - If you have one or multiple data errors, a
 icon displays on Additional Info tab and errors display in red. You will need to go back and make the necessary changes and click on button or button.