This lesson explains how to work with Leads you have already received and scheduled. From the Scheduled tab, you will be able to view Customer information, location and manage follow up of Leads you receive including Assign/Reassign Providers, Reschedule Service Dates, Complete Lead, view Lead History, add Notes and Attachments. It is important that you Assign Providers and follow through on Scheduled Appointments.
Note: Leads are not Service Orders. They are opportunities for you to work directly with the customer to arrange appointments, scope/quote potential opportunity, and earn their business.
- ServiceLive Dashboard – Lead Order Statistics:
- Active Leads = Leads that are in New, Working or Scheduled statuses.
- New = Leads that have just been received and require action. It is important to contact Customer as soon as possible. Doing so within 5 minutes of receiving Lead will give Provider Firm a better chance of earning their business.
- Working = Leads where an attempt to contact the customer has occurred but Provider Firm still needs to contact Customer to schedule appointment.
- Scheduled = Leads that have an appointment with Customer scheduled.
- Inactive Leads = Leads that are in Completed, Canceled, and Stale.
- Completed = Leads that have been completed.
- Canceled = Leads that have been canceled by Provider or Customer.
- Stale = Leads on which action has not been taken for 22 days or more.
Note: Number indicates the number of Leads in each status. To access Leads, click on number next to that status OR from click on Leads Management Tab.
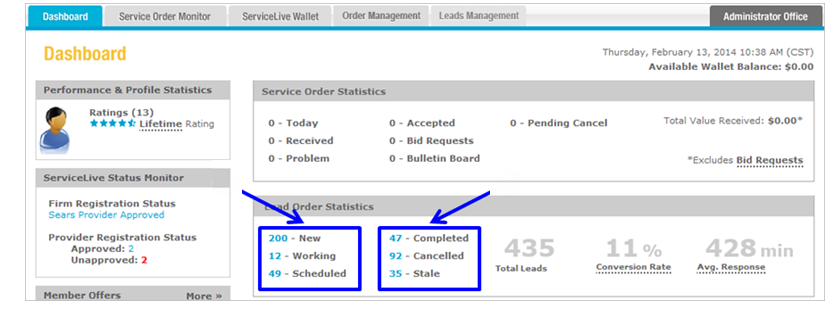
- Total Leads = Total number of Leads opportunities Provider Firm received.
- Conversion Rate = Number of Leads completed out of number of Leads received.
- Response = Time elapsed from receiving Lead to responding.

- Active Leads = Leads that are in New, Working or Scheduled statuses.
- Navigate to Scheduled tab:
- Click on Scheduled link from ServiceLive dashboard.

- OR click on
 tab.
tab.

- Click on
 tab.
tab.

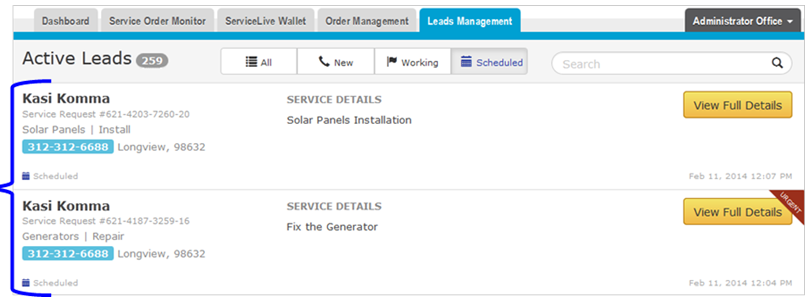
- All Leads that have Scheduled Service Appointments will display.
- Click on Scheduled link from ServiceLive dashboard.
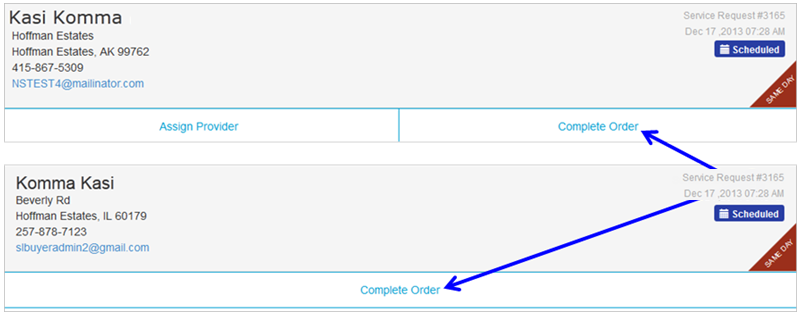
- Information displayed on Scheduled Tab:
- Lead Contact Name
- Lead Contact Phone Number
- Service Details
- Flag (Same Day, Urgent, No Flag)
- Date and Time Lead Service Request Posted
- Click on
 button to view more details.

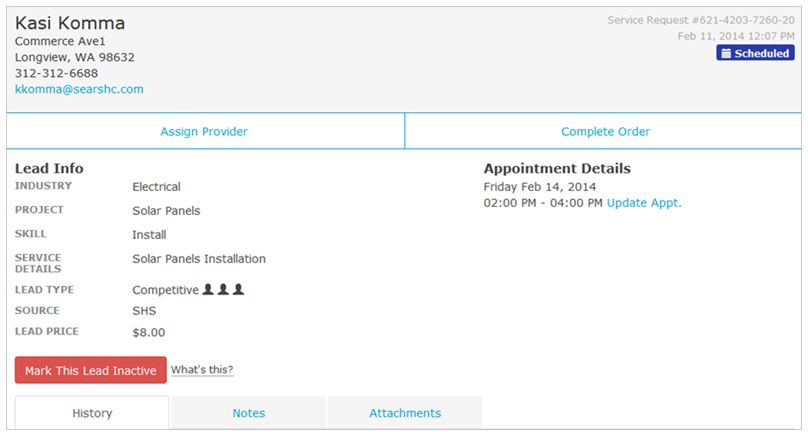
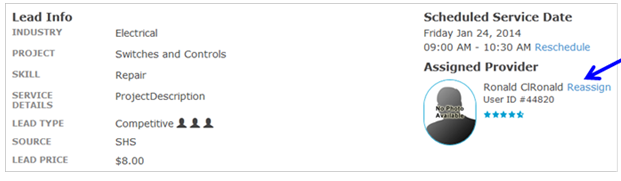
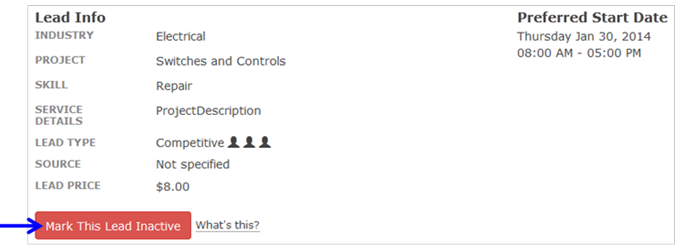
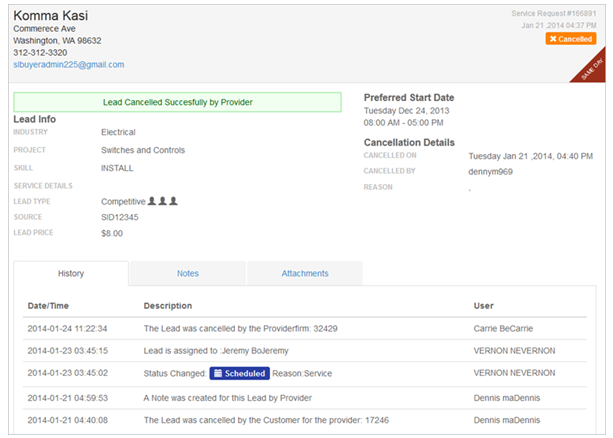
- Once you open the Lead, detailed information that about Lead will display.
- Lead Name and Contact Information
- Lead Service Request Id #
- Date and Time Lead Service Request Posted
- Lead Info
- Scheduled Service Appointment
- History
- Notes
- Attachments

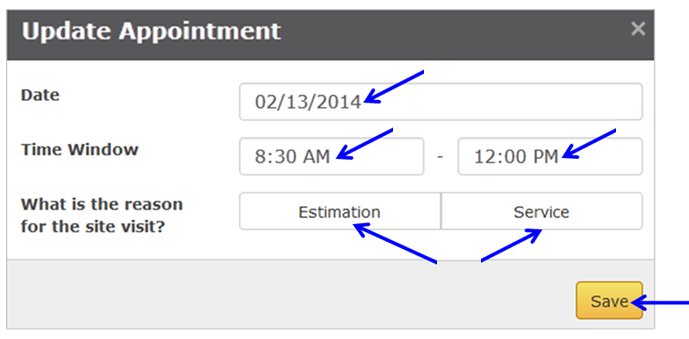
- Reschedule a Service Order:
- Click on
 link.
link.
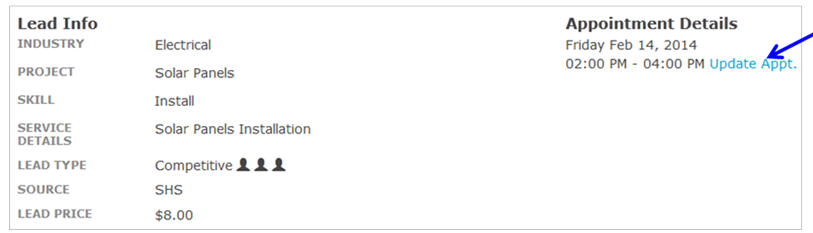
- Click in field labeled “Date” and select appropriate Service Appointment date.
- Click on first drop down arrow labeled “Time Window” and select appropriate beginning time for Service Appointment.
- Click on second drop down arrow labeled “Time Window” and select appropriate ending time for Service Appointment.
- Click appropriate button to select reason for Service visit.
Note: Service Reason is indicated when button is greyed. - Click on
 button.
- Lead opportunity will still be marked as Scheduled and can be found in the Scheduled Tab.
- Click on
- Assign Provider:
- Click on
 button.
Note: If you already assigned a Service Pro, this button will not display. Skip to step 7.

- Service Appointment Time and Location.
- Click on drop down arrow labeled “Assign this job to” and select appropriate Service Pro.
- Click on button.
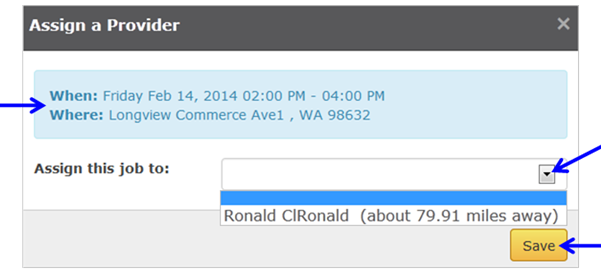
- Assign Provider Confirmation will display.

- Click on
- Reassign Provider:
- To Reassign Provider click on
 link.
link.
- Click on drop down arrow labeled “Assign this job to” and select appropriate choice.
- Click on button.
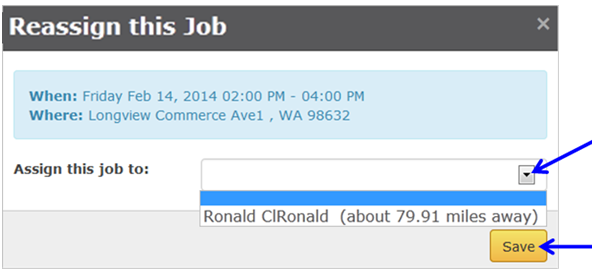
- To Reassign Provider click on
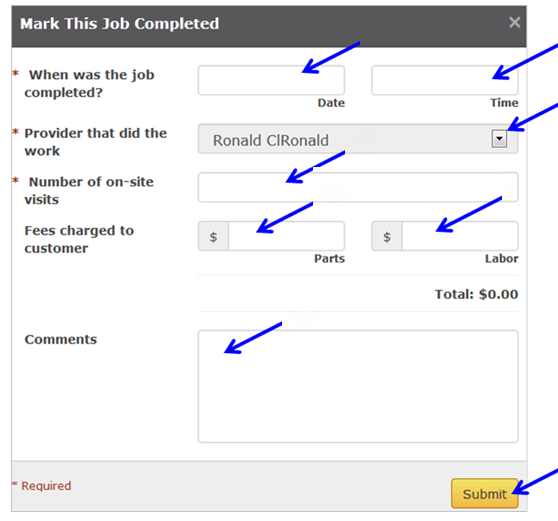
- Complete Order:
- Click on
 button.
Note: This screen may look different depending on if you have or have not assigned a Service Pro.
- Click on field labeled “Date” and select appropriate date.
- Click on field labeled “Time” and select appropriate date.
- Click on drop down arrow labeled “Provider that did the work” and select appropriate choice.
- Click on field labeled “Parts” and enter appropriate fee.
- Click on field labeled “Labor” and enter appropriate fee.
Note: Parts and Labor are NOT required fields. - Click in Comments field and enter any appropriate comments.
- Click on
 button.
- Completion details display and can be found in the Completed Tab via Dashboard or Leads Management Tab.

- Click on
- Mark Lead as Inactive (Cancel):
- Click on
 button.
- Click on drop down arrow labeled “Select a Reason” and select appropriate choice.
- Click on button.
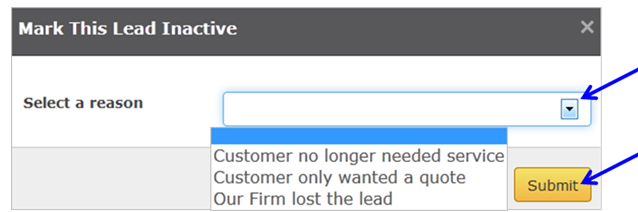
- Canceled details display and can be found in the Canceled Tab via Dashboard or Leads Management Tab.
- Click on
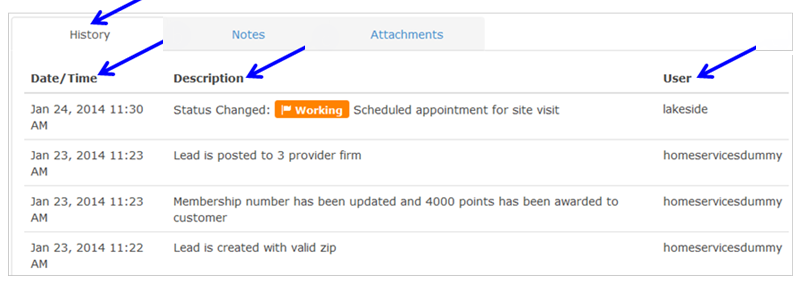
- History Tab:
Note: History Tab is available in Scheduled, Working, Completed, Canceled and Stale tabs.- Click on
 tab if not already displayed.
 - Date/Time of action on Lead was taken.
- Description of action taken.
- User who initiated action.
- Click on
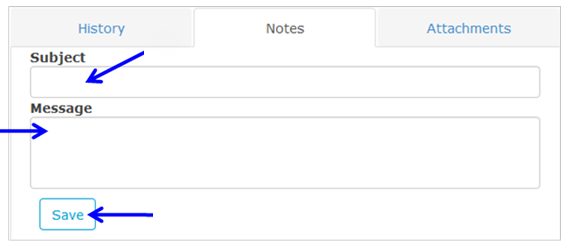
- Notes Tab:
Note: Notes Tab is available in Scheduled, Working, Completed, Canceled and Stale tabs.- Click on
 tab.
tab. - To add a note, click on
 button.

- Enter Note Subject.
- Enter Note Message.
- Click on
 button.
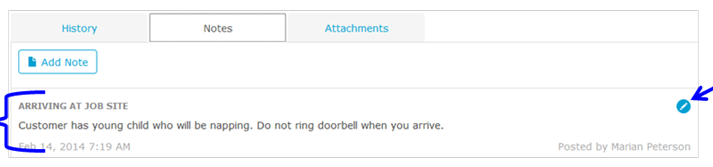
- Notes display on tab.
- To edit Note, click on
 button and repeat steps 10c – 10e.
- Click on
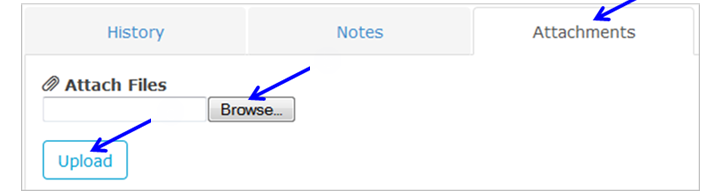
- Attachments Tab:
Note: Attachment Tab is available in Scheduled, Working, Completed, Canceled and Stale tabs.- Click on
 tab.
tab. - Click on
 button to locate file from your computer.
 - Click on
 button.
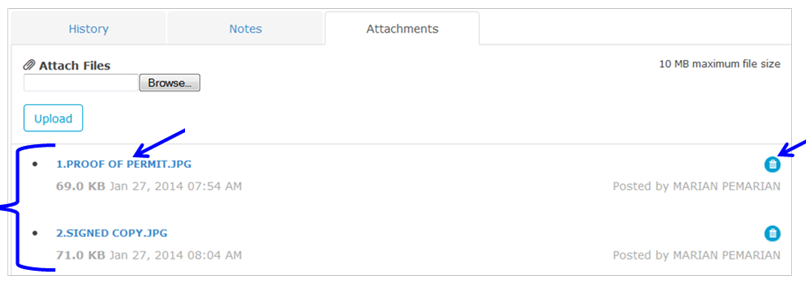
- Attachments display on tab.
- Click on file title link to view file.
- Click on
 button to delete file.
- Click on