This lesson explains how to manage parts.
- Navigate to Summary tab:
- Click on Order Management tab.

- Click on blue Service Order ID.

- Click on Order Management tab.
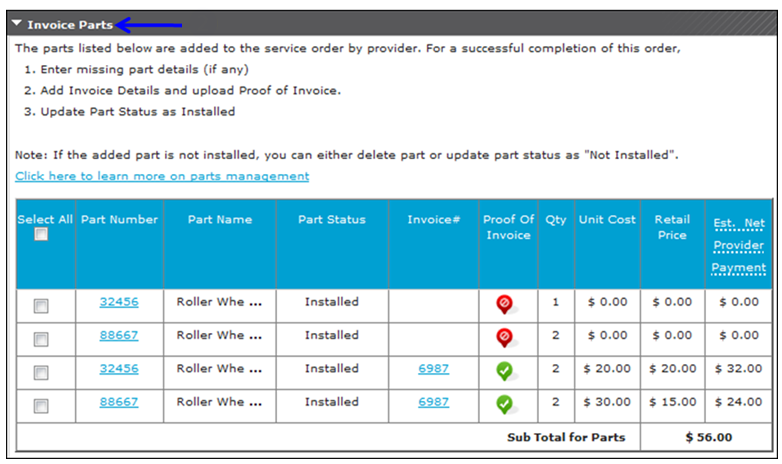
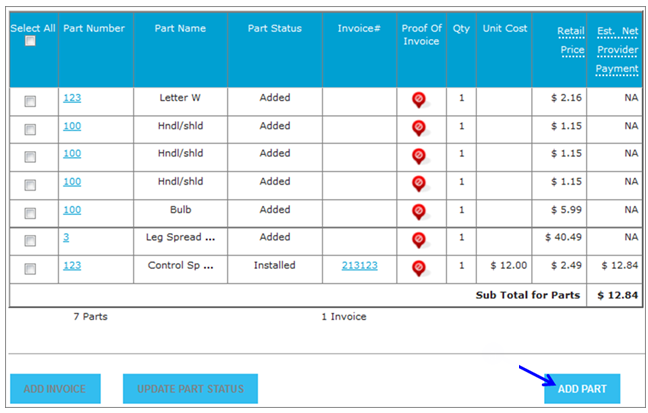
- Scroll down to Parts section to display Parts information.
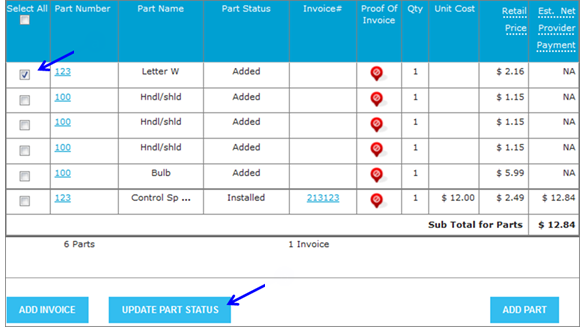
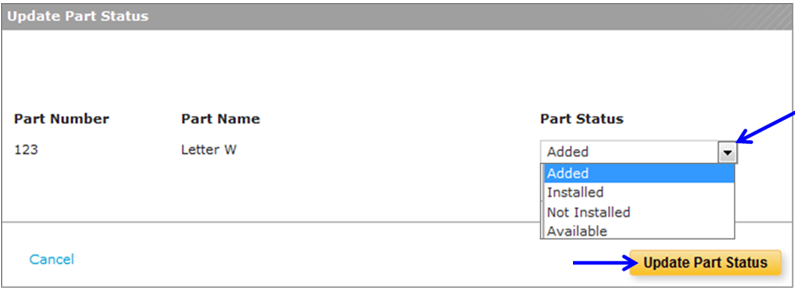
- Update Parts status:
- Select Check box of part.
- Click
 button.
- Click drop down arrow and select appropriate choice.
- Click
 button.
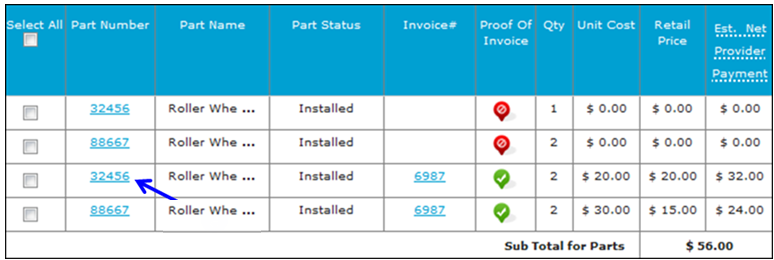
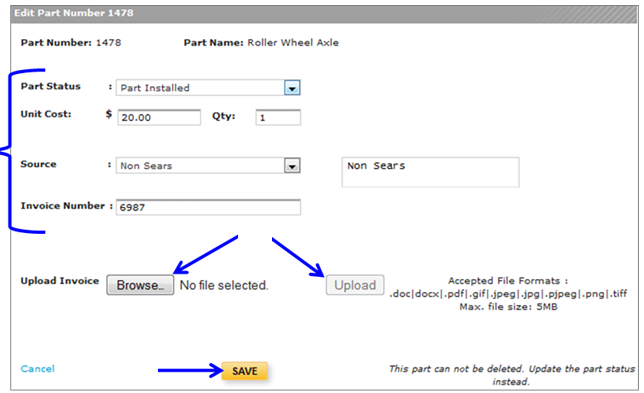
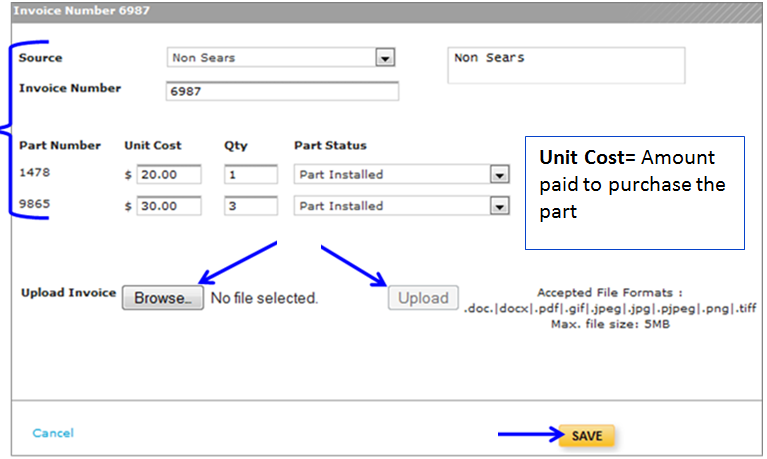
- Edit Part Info:
- Click Part Number.
- Edit appropriate information.
- Unit Cost= Actual cost to purchase the part
- If available, click
 button and search for Invoice you would like to Upload and click
  button.
 - Click
 button.
- Click Part Number.
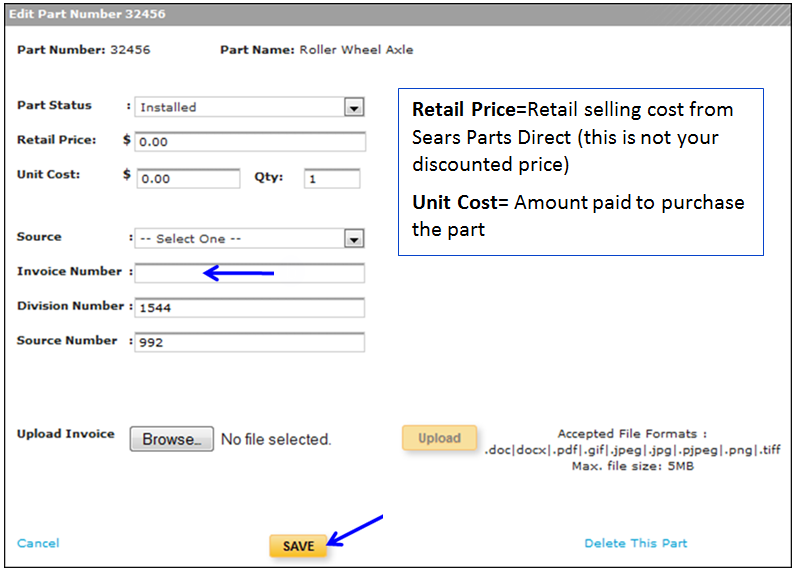
- Add an Invoice Number:
- Click on Part Number where Proof of Invoice is needed.
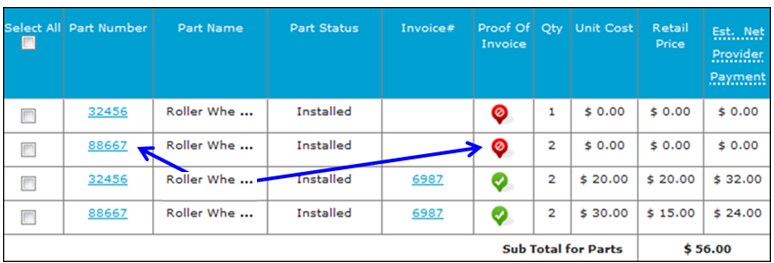
- Enter in Invoice Number.
- Click on Save button.
- Click on Part Number where Proof of Invoice is needed.
- Update Invoice:
- Click on Invoice Number.
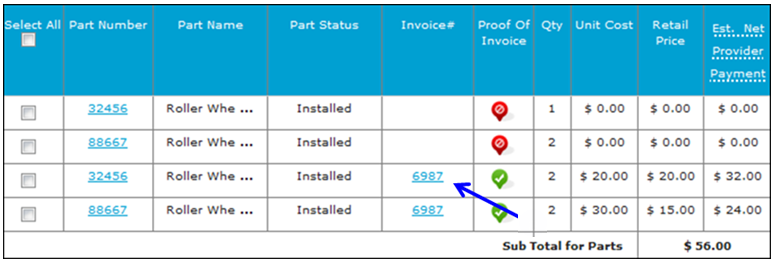
- Edit appropriate Part information if needed.
- If available, click button and search for Invoice you would like to Upload and click button.
- Click button.
- Click on Invoice Number.
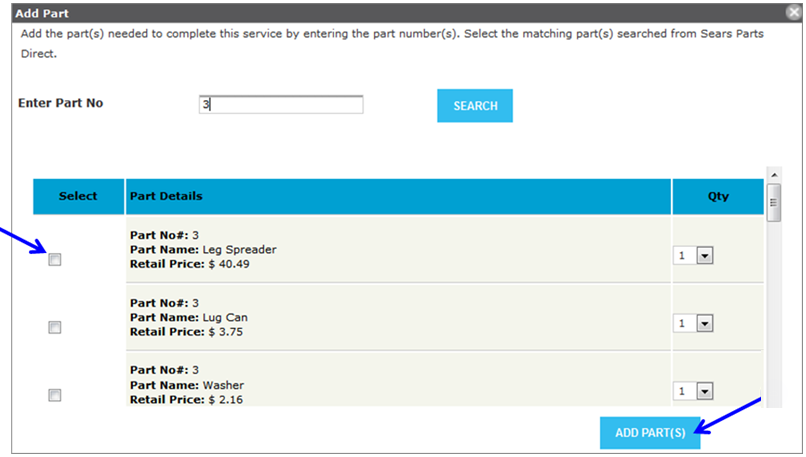
- Add Part:
- Click
 button.
- Enter Part number.
- Click on Search button.

- Select checkbox of appropriate part(s) to add.
- Click button.
- Click
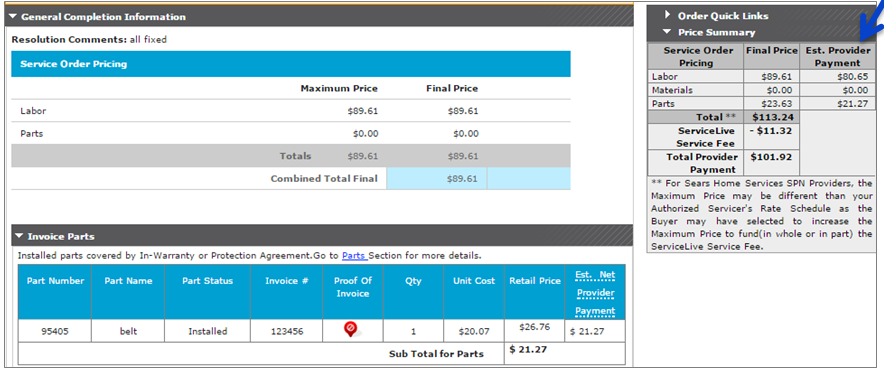
- Viewing Completion Summary (with parts)
- After claim submission for payment, the Completion Record will display the Provider Payment. This is the amount the Firm will be paid for the corresponding service order.
- After claim submission for payment, the Completion Record will display the Provider Payment. This is the amount the Firm will be paid for the corresponding service order.